Connect the Miro Web SDK to a backend (Firebase)
Create a Node.js application that leverages the Miro Web SDK to send and retrieve data from a backend and populate a Miro board.
The app saves items on your board as templates in a Firebase database, enabling users to reuse them by selecting them from the app panel. The complete project code is available on GitHub.
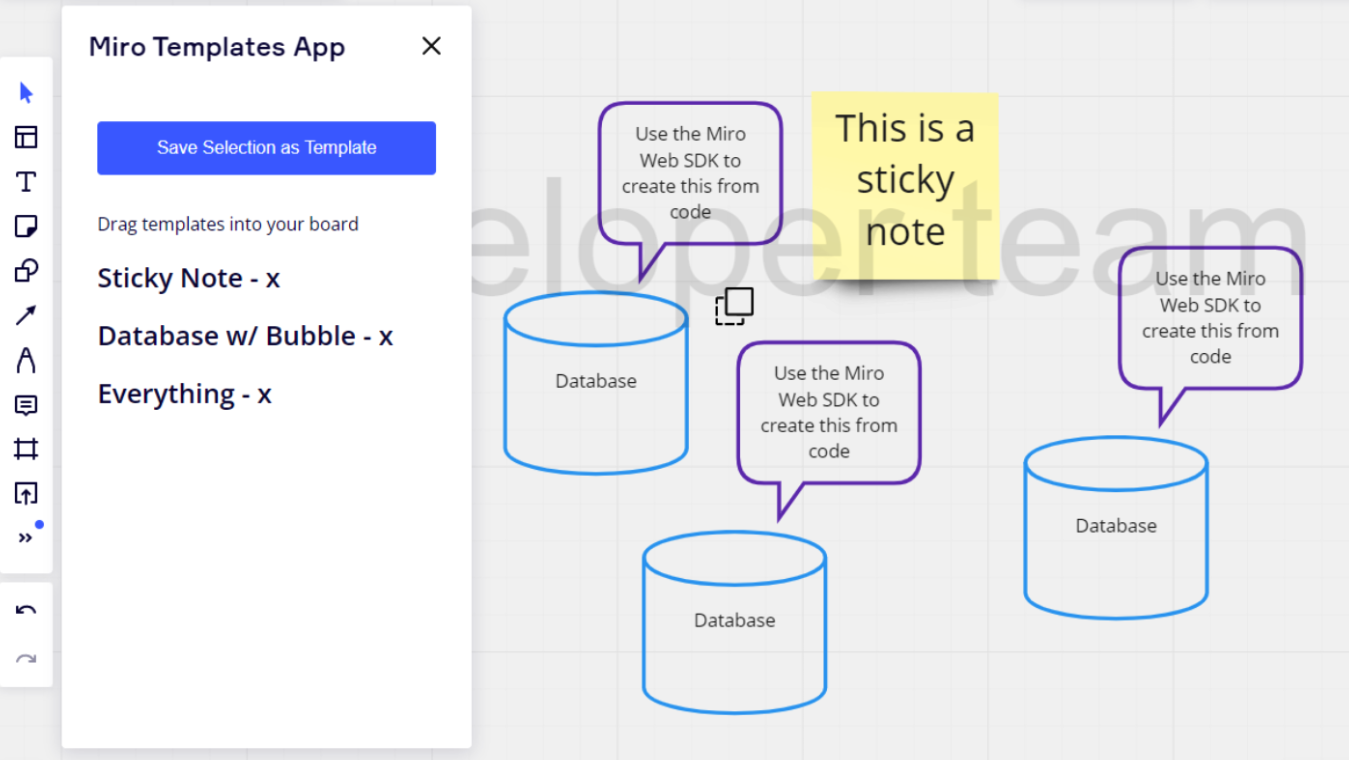
Figure 1. Miro board showing shapes and a sticky note.
Prerequisites
Before you start, you need the following:
- A Miro account to create a Miro app.
- A recent version of Node.js installed on your computer. The latest LTS version is recommended.
- A Firebase account to use a real-time database.
Set up the Miro Node.js app
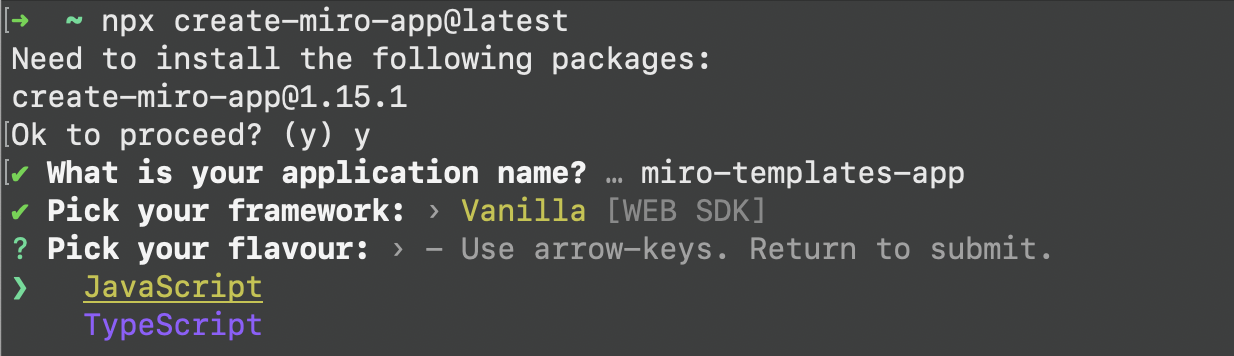
The easiest way to start using the Miro Web SDK is from the Hello, World! app. To begin creating this app:
- Open a terminal window and go to the directory where you want to make your app.
- Run
npx create-miro-app@latest. - Select Vanilla as a framework.
- Select JavaScript as a flavor.
- Press Enter ↩.
These steps create a directory for your project and install all dependencies.
- Open the project root directory inside your integrated development environment (IDE). The app code includes four particularly relevant files:
index.htmlis the landing page that users see upon installing your app.index.jscontains the code that runs when users click the app icon on the app toolbar after the app authorization.app.htmlcontains the app UI and loads the app.js JavaScript code.app.jsincludes the script for the panel and contains most of the code for this project.
In the Hello, World example, index.js pulls the app.html file. The app.html file is the user interface to the app when the app is running on the board. This is where you can include more UI controls and scripts to enable users to perform further actions within the app, such as creating board items or dragging and dropping items on the board.
The file flow in this example is as follows:
- Start server to run the app on localhost →
- displays
index.html→ - loads
index.js→ - fetches
app.html→ - loads
app.js.
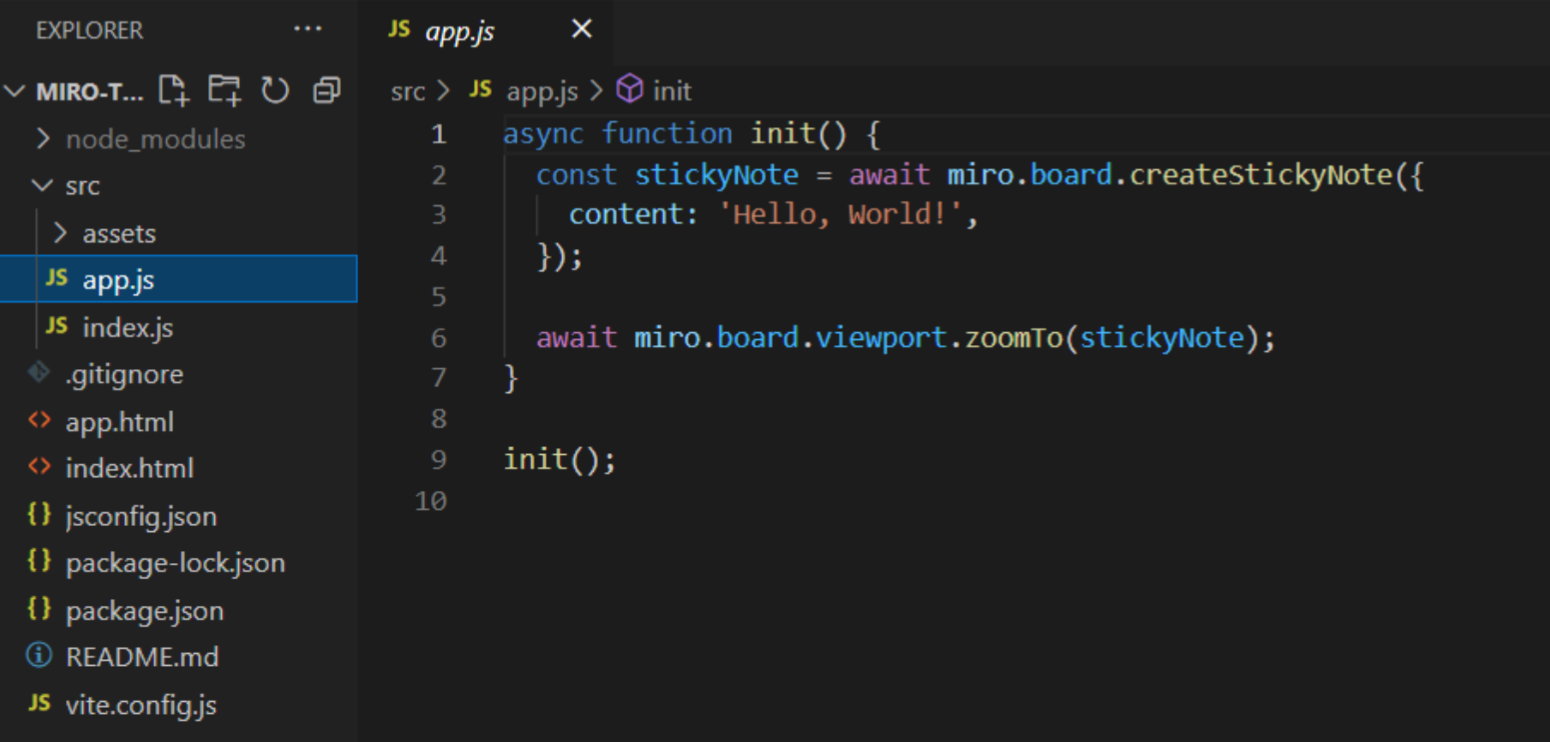
Figure 3. IDE showing the code with the app logic.
- To boot up the project to a server running at
http\://localhost:3000/, go to the project directory, and then run:npm run start - In your web browser, go to
http\://localhost:3000/to see a page like this:

Figure 4. Confirmation that the app is running.
- Select Create a Developer team, then proceed to create or select a Developer team.
- In Your apps, select the checkbox to accept Miro's terms of service and create a new app for this project.

Figure 5. Your apps are a with a checkbox for accepting terms and the + Create new app button.
- In the + Create new app modal, enter an App Name, such as “Miro Templates App”, select the team, leave the Expire user authorization token option deselected, and click Create app.
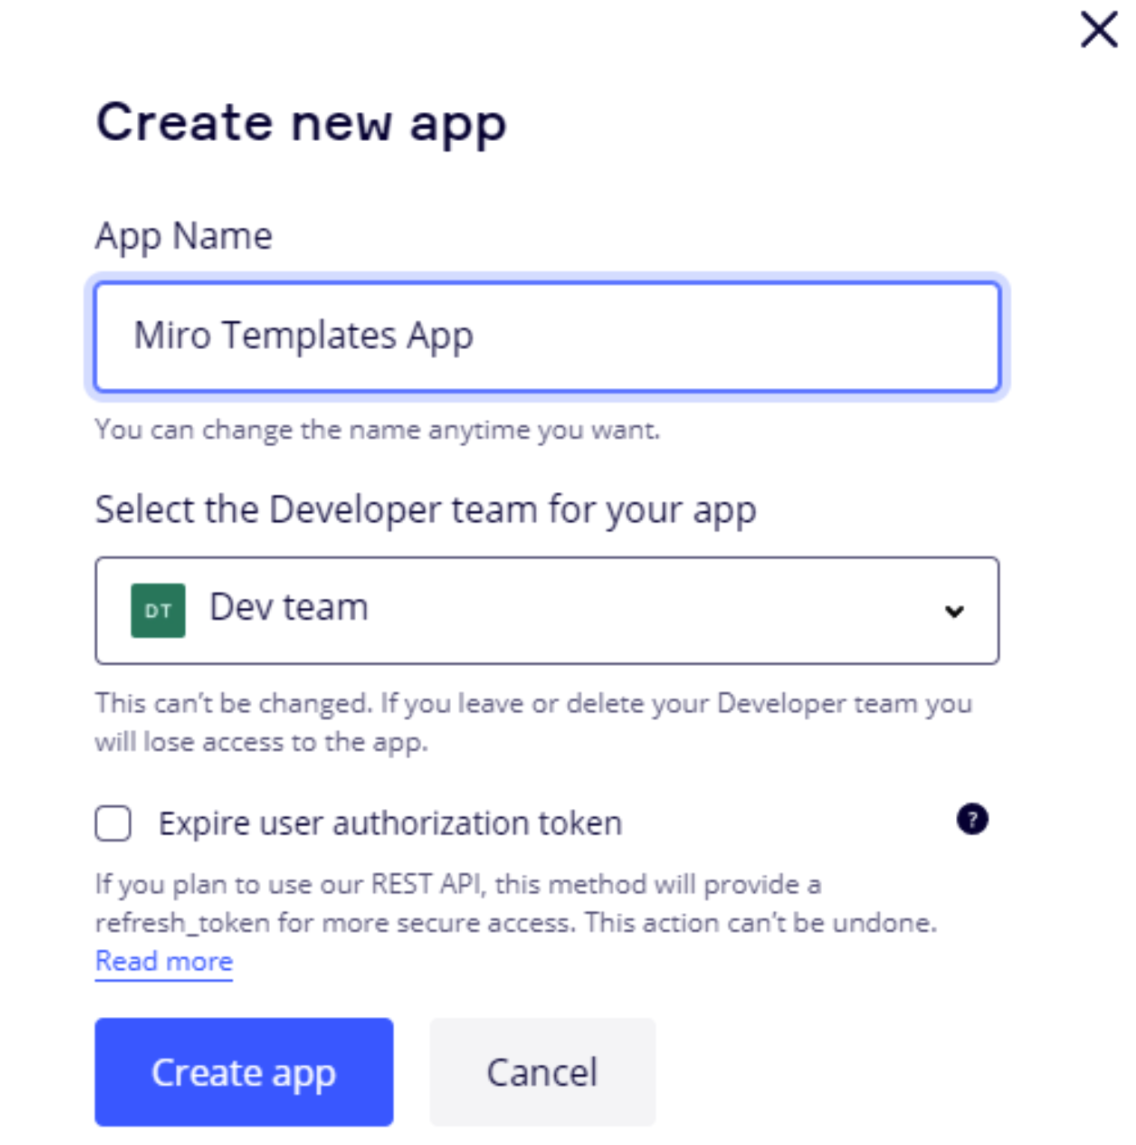
Figure 6. Create new app modal with the Create app button.
- Next, scroll down to App URL and set it to
http\://localhost:3000/. - Click Save.
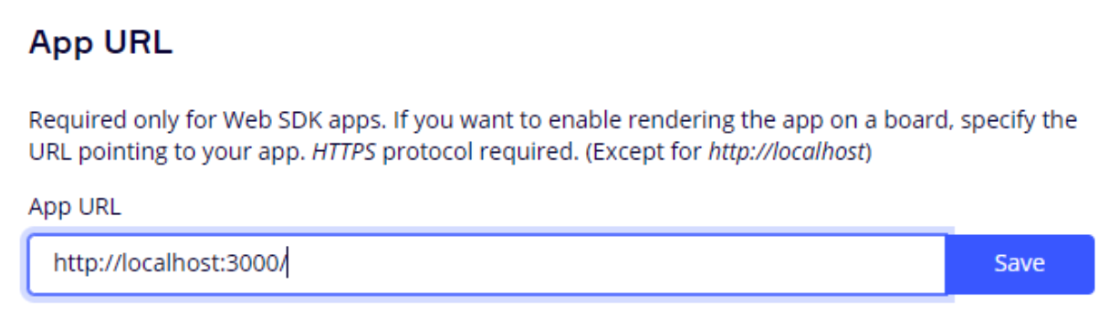
Figure 7. App URL field with the Save button.
- To assign the app read and write access to the board and read access to the current user details, select the following permissions:
- boards:read
- boards:write
- identity:read
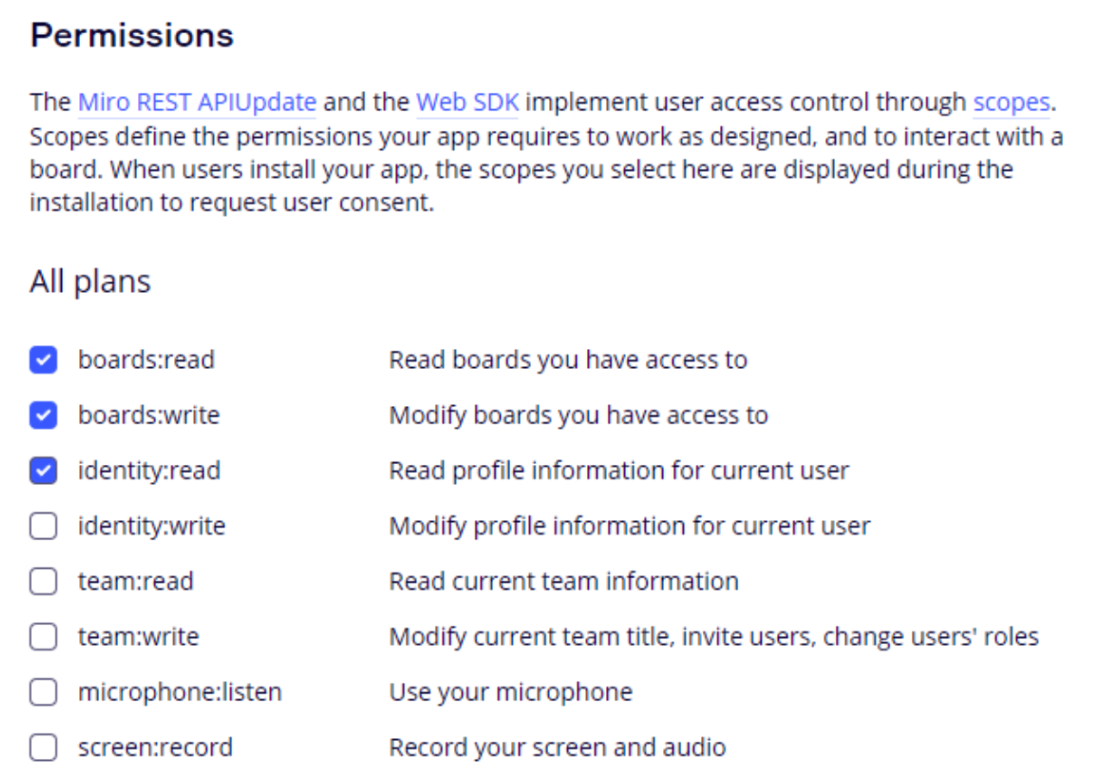
Figure 8. Profile settings page, Permissions section.
- Click Install app and get OAuth token, and then select a team to test this app and complete the installation. The app doesn’t require an access token, so click Close when done.
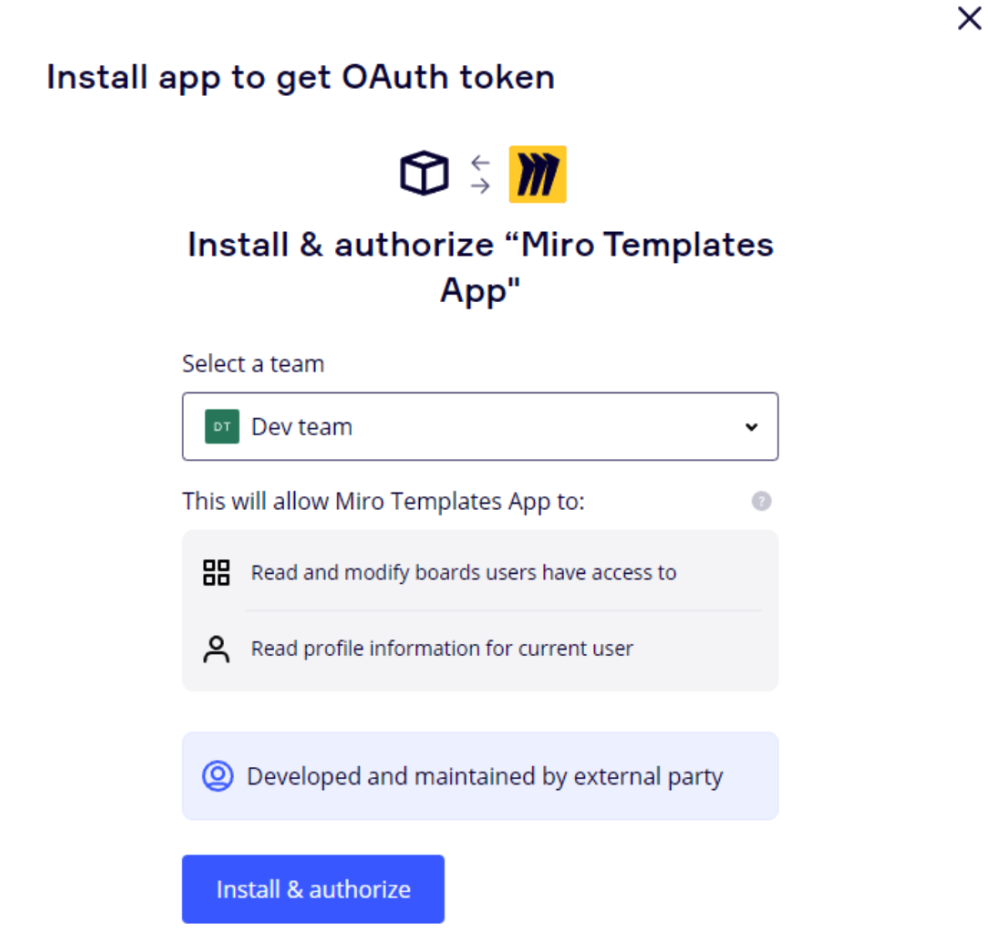
Figure 9. Install app to get OAuth token modal with Install & authorize button.
Test the Miro Node.js app
Now, you can test the app on a Miro board to see if everything is working correctly. To test your app:
- Open your Dashboard, click the Dev Team (DT) icon, and create a new board.
- Expand the Apps panel by clicking >> more apps on the app toolbar.
- Select your app.
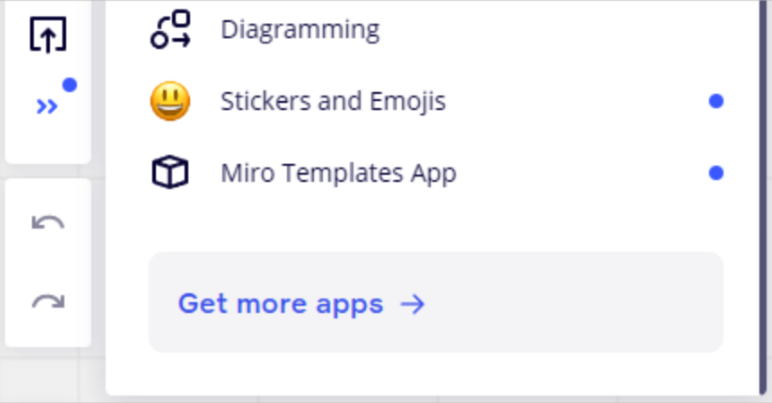
Figure 10. App options.
- To open the Hello, World example on a sticky note, click the app icon.
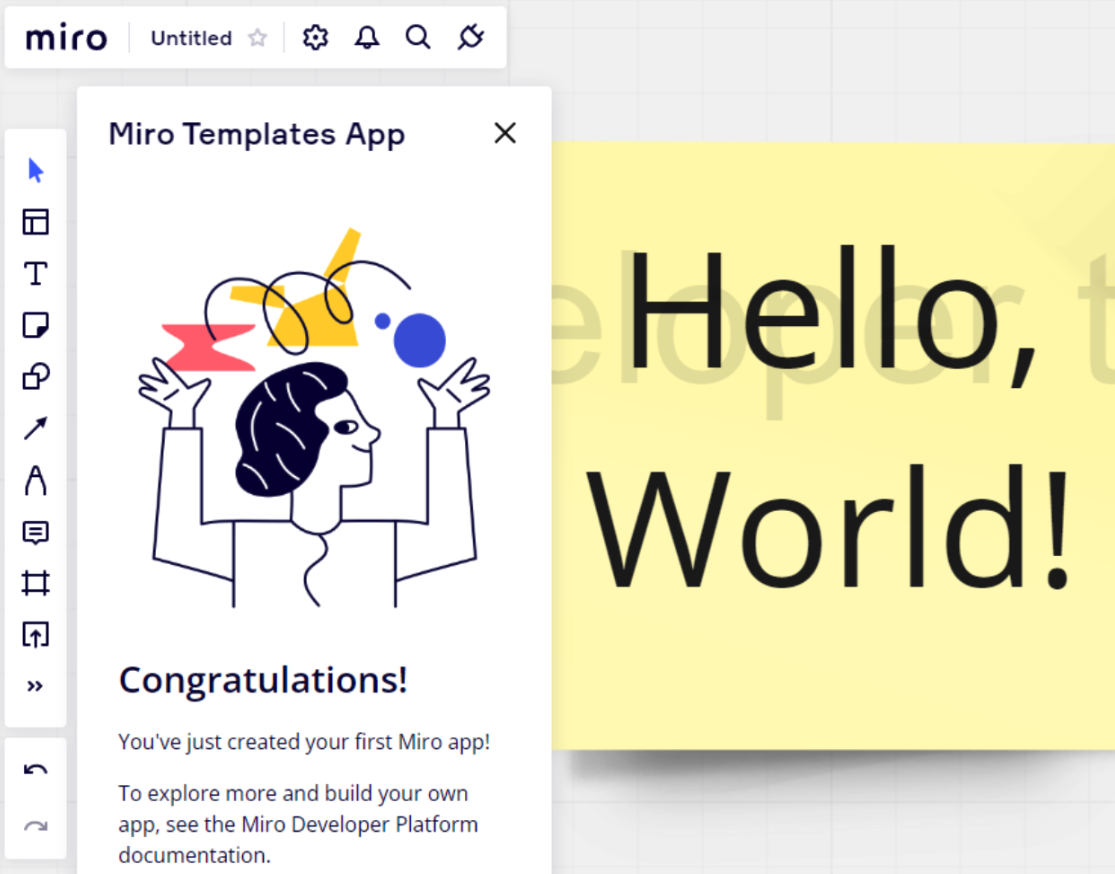
Figure 11. Board with Hello, World! Sticky note.
Set up a Firebase backend with a database
Next, create the database to store the app’s templates.
- First, open the Firebase console and create a new project. Use the Enter your project name field to give it a name, such as “Miro-Templates.”
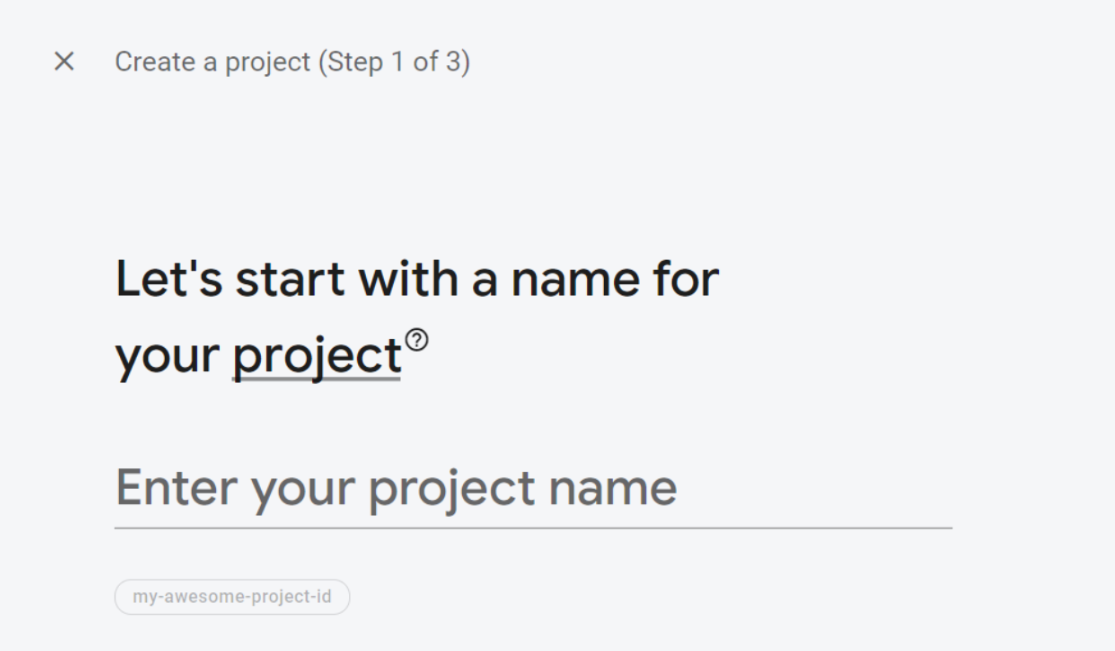
Figure 12. Create a project, step 1. Name your project in the Enter your project name field.
- Optionally, you can enable Google Analytics for the project.
- When your new project is ready, click Continue.
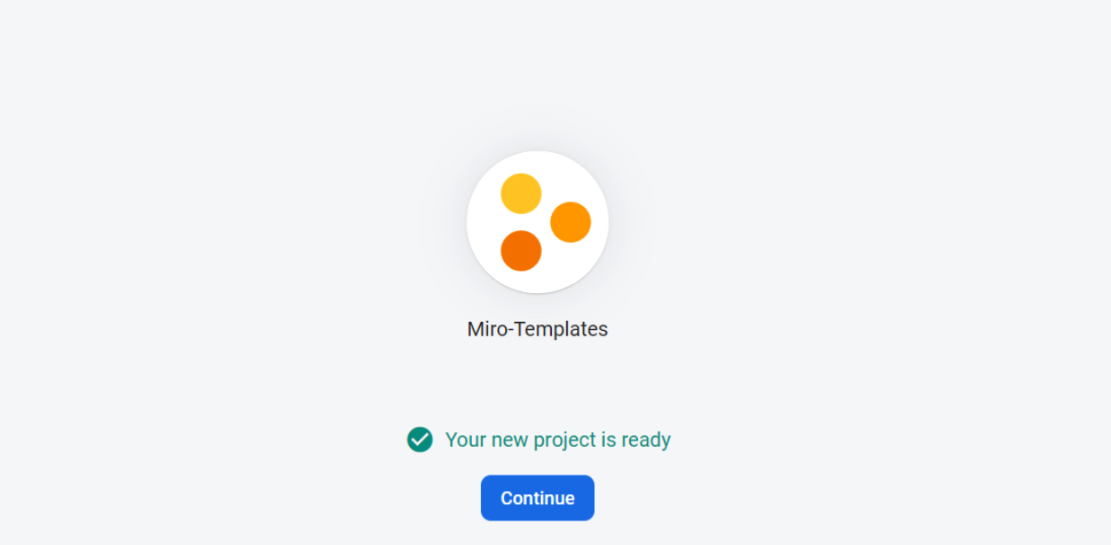
Figure 15. Your new project is ready notice.
- To store and sync data in real-time, click Build to expand it and select Realtime Database.
- Click Create Database.
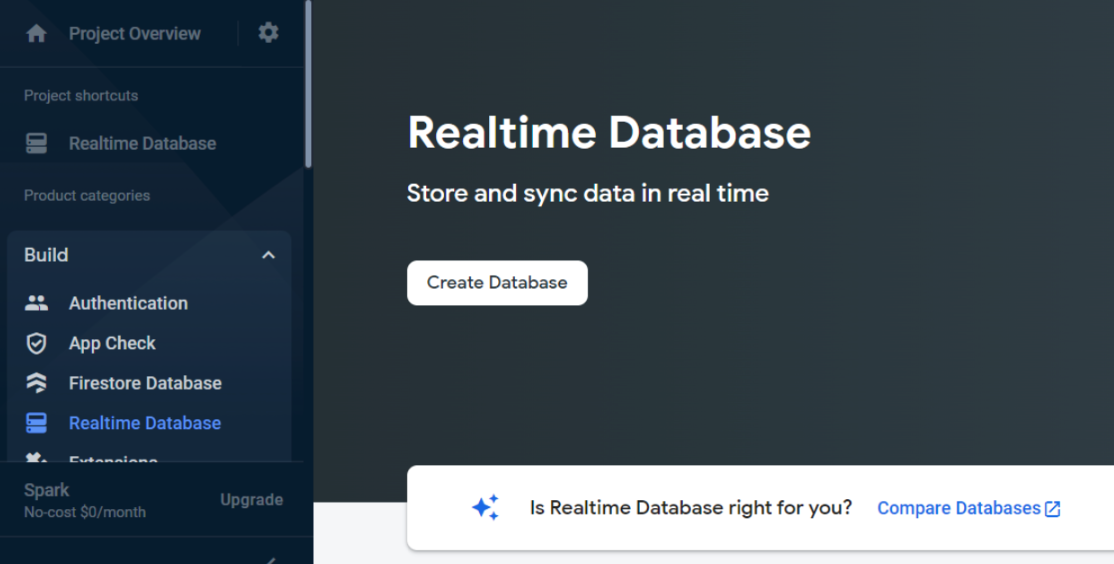
Figure 16. Project Overview showing the build options, including Realtime Database.
- Select the Realtime Database location, then click Next.
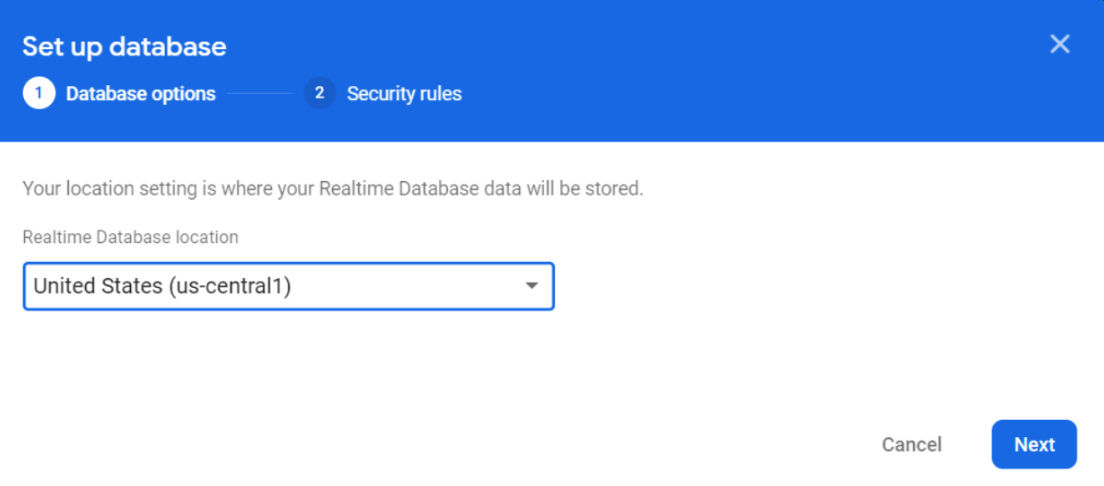
Figure 17. Set up database modal with Realtime Database location list.
- Select Start in test mode, then click Enable.
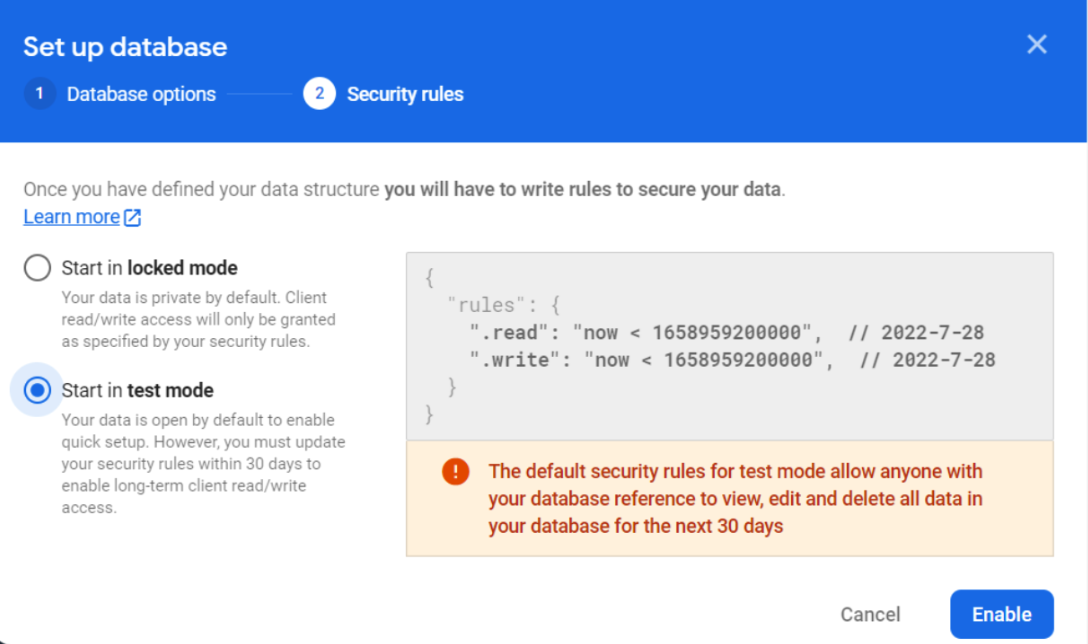
Figure 18. Set up database modal showing database start options.
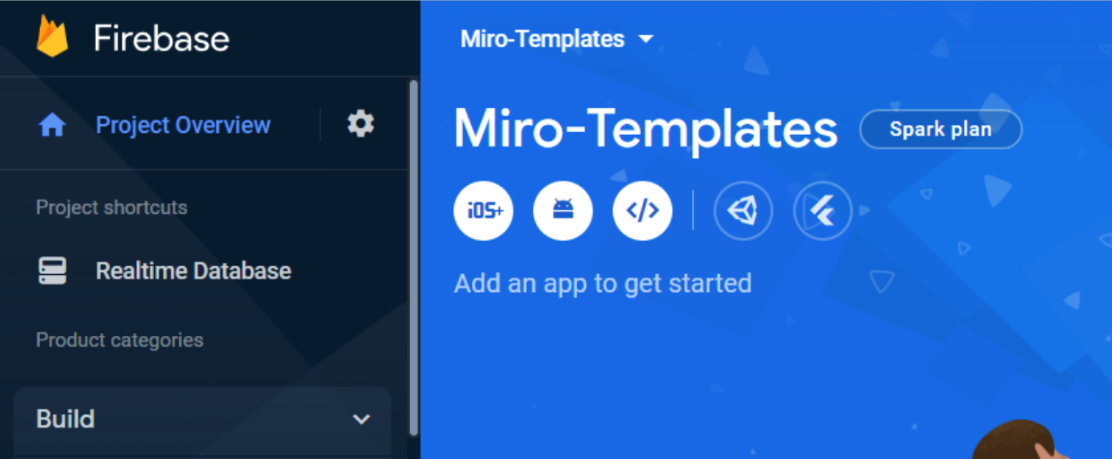
Figure 19. Miro-Templates on Firebase.
- Return to the Project Overview page and add an app to the project by selecting the Web (</>) option.
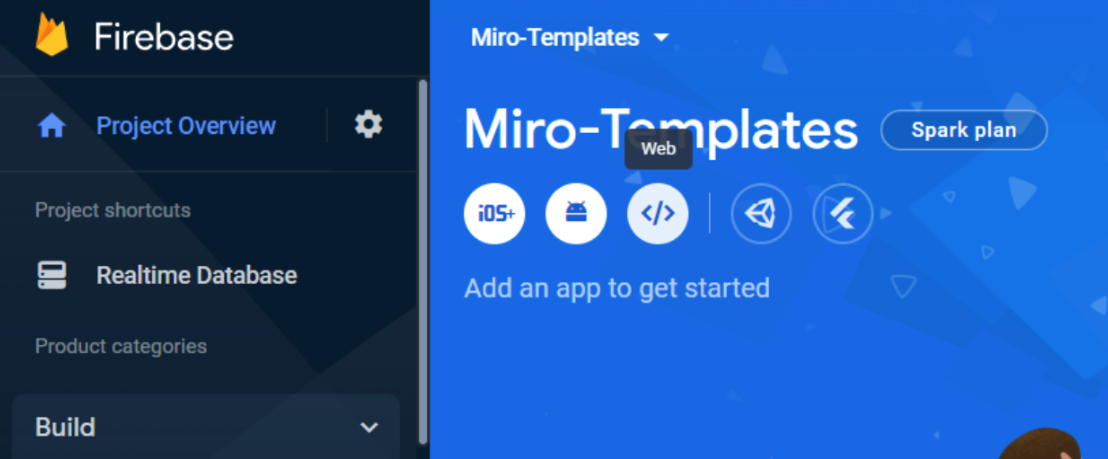
Figure 20. The Web (</>) option
- Enter an App nickname.
- Leave Also set up Firebase Hosting for this app deselected.
- Click Register app.
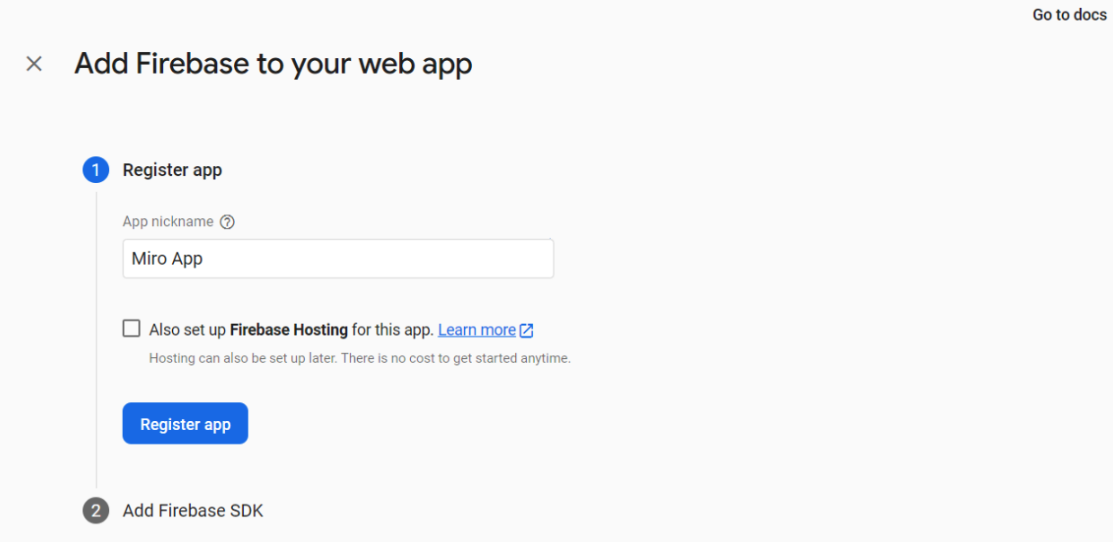
Figure 21. Add Firebase to your web app page with the App nickname field.
- Finally, select the Use a script tag option.
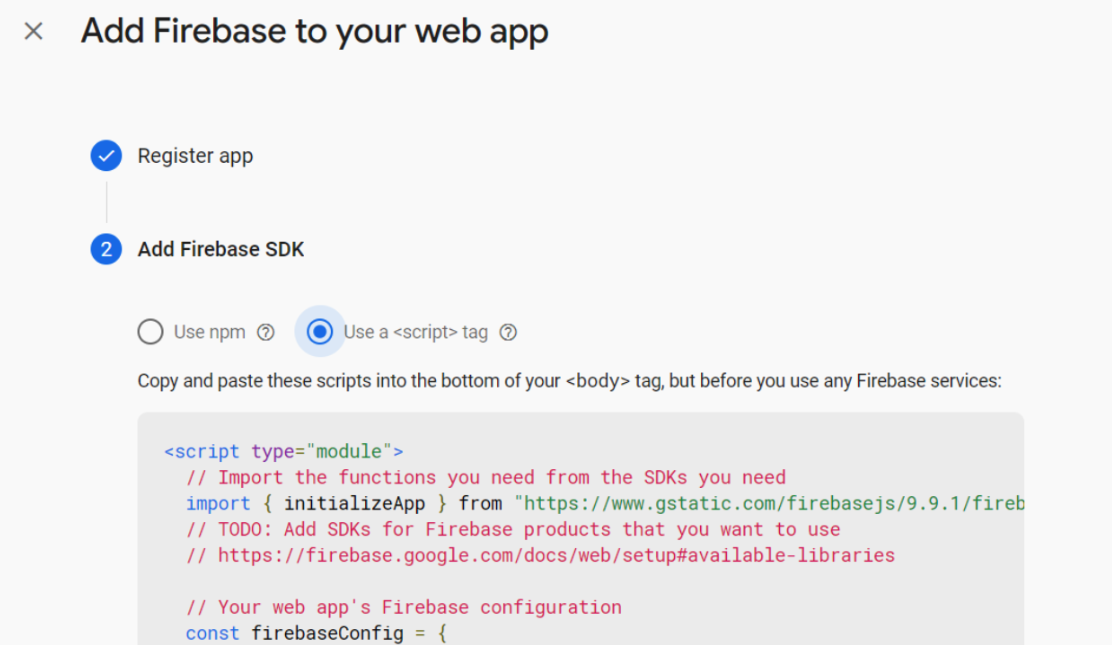
Figure 22. Add Firebase to your web app page showing script options.
- Copy and save the
firebaseConfigsection of the script. You need this for the Miro app code.
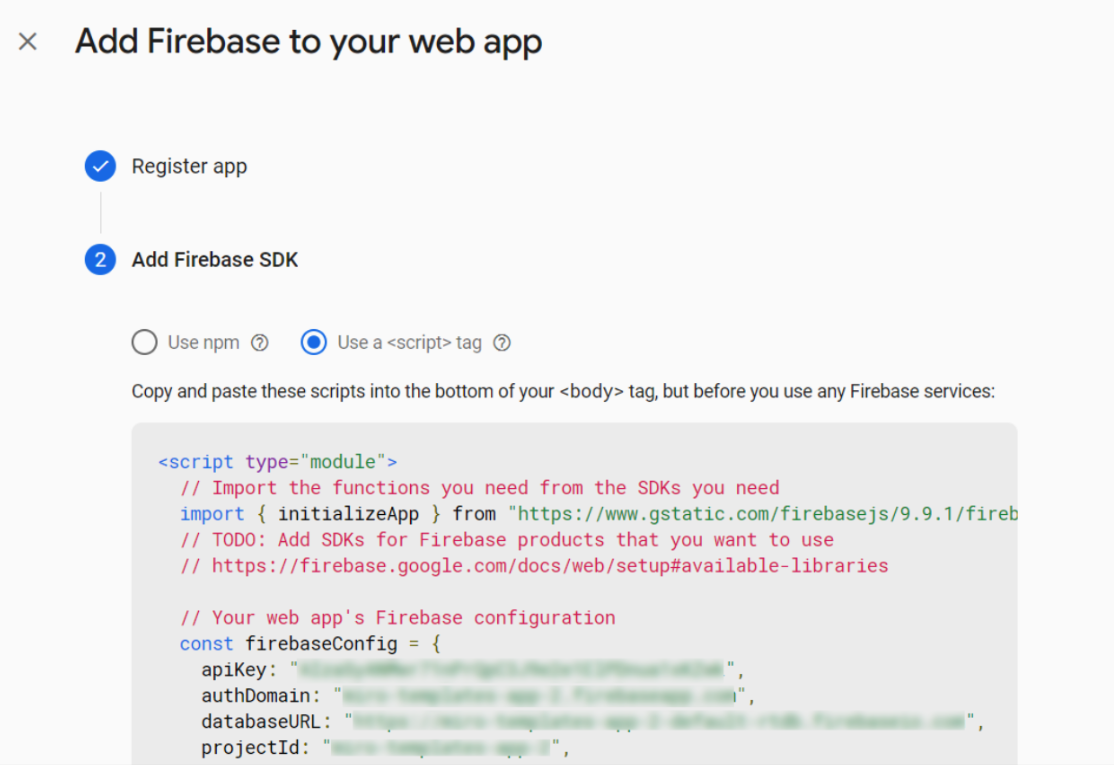
Figure 23. Add Firebase to your web app page showing Firebase configuration.
Access your database from your Miro app
Follow these steps to access your database from your Miro app:
- Return to your Miro App project code in your IDE.
- At the very top of the
app.jsfile, add the code below. - Replace the placeholders in the
firebaseConfigobject with the actual configuration values from your Firebase script:
import { initializeApp } from "https://www.gstatic.com/firebasejs/9.9.1/firebase-app.js";
import { getDatabase, ref, set, get } from "https://www.gstatic.com/firebasejs/9.9.1/firebase-database.js";

const firebaseConfig = {
  apiKey: "YOUR-API-KEY",
  authDomain: "YOUR-DOMAIN.firebaseapp.com",
  databaseURL: "https://YOUR-DOMAIN-rtdb.firebaseio.com",
  projectId: "YOUR-PROJECT-ID",
  storageBucket: "YOUR-BUCKET.appspot.com",
  messagingSenderId: "YOUR-SENDER-ID",
  appId: "YOUR-APP-ID"
};

// Initialize Firebase
const app = initializeApp(firebaseConfig);
const db = getDatabase( app );
- To read from and write to the Firebase database, add
getTemplatesFromDBandsaveTemplatesToDBhelper functions. These functions store the templates for each user using their ID:
async function getTemplatesFromDB( userId ) {
  const data = await get( ref( db, "templates/" + userId ) );
  if( data.exists() ) {
    return data.val();
  }
  return [];
}

function saveTemplatesToDB( userId, templates ) {
  set( ref( db, "templates/" + userId ), templates );
}
Interact with Miro items
To complete the project, you need to save selected board items as templates.
- To do this, add an element to the app panel to show the saved templates. On the app.html file, add a button inside the div class="grid wrapper" element. This element must also contain a text input field to enable search, and a div id="templates" to display the list of templates:
<div class="grid wrapper">
  <div class="cs1 ce12">
    <button id="save-btn" class="button button-primary">
      Save selection as template
    </button>
    <div class="form-group">
      <input id="search-bar" class="input" type="text" placeholder="Search templates"/>
    </div>
    <p>Drag templates to the board</p>
    <div id="templates"></div>
  </div>
</div>
Then, to maintain the templates locally:
- Go back to the
app.jsfile. - Add a
templatesarray. - To save and delete the templates in the Firebase database, add
saveTemplateanddeleteTemplatehandler functions undergetTemplatesFromDBandsaveTemplatesToDB. - For each saved template, the app stores its name, the selected items, and the relative center coordinates of the collection for use when dragging a template onto the board.
let templates = [];
let filter = "";

window.saveTemplate = ( userId, name, items ) => {
  // Calculate center of the selection
  let totalX = 0, totalY = 0;
  items.forEach( item => {
    totalX += item.x;
    totalY += item.y;
  });
  const center = { x: totalX / items.length, y: totalY / items.length };

  // Save to the Firebase database
  templates.push( { name, items, center });
  saveTemplatesToDB(
    JSON.parse( JSON.stringify(userId)),
    JSON.parse( JSON.stringify(templates))
  );

  displayTemplates( userId, templates );
}

window.deleteTemplate = ( userId, index ) => {
  templates.splice( index, 1 );
  saveTemplatesToDB( userId, templates );
  displayTemplates( userId, templates );
}
- Now, create a function to clear and show the current templates in the Miro app panel, filtering out any templates that do not match the search filter text. Each template needs a clickable option to enable removing it from the list.
function displayTemplates( userId, templates ) {
const templateList = document.getElementById( "templates" );
templateList.innerHTML = "";
templates.forEach( ( t, i ) => {
if( !t.name.toLowerCase().includes( filter.toLowerCase() ) ) { return; }
templateList.innerHTML +=
`<div class="cs1 ce12 miro-draggable" data-index="${i}" style="padding: 5px; margin: 5px; border: 5px solid black;">
<p><strong>${t.name} <span onclick="deleteTemplate('${userId}', ${i})">[X]</span></strong></p>
</div>`;
});
}
Your app needs one more utility function to:
- Take a JSON object of the template.
- Call the corresponding Miro Web SDK function to create the item and position it on the board by specifying X and Y coordinates.
- Add the following function, which you can update later to support more item types:
async function createWidgetFromJson( item, x, y ) {
  const clone = Object.assign( {}, item, { x: item.x + x, y: item.y + y } );
  switch( clone.type ) {
    case "card":
      await miro.board.createCard( clone );
      break;
    case "frame":
      await miro.board.createFrame( clone );
      break;
    case "shape":
      await miro.board.createShape( clone );
      break;
    case "sticky_note":
      await miro.board.createStickyNote( clone );
      break;
    case "text":
      await miro.board.createText( clone );
      break;
  }
}
Finally, to create the items from the template inside the init function that we’re about to use, the app must:
- Retrieve the current user information.
- Load the corresponding templates from the Firebase database.
- Assign the save button handler.
- Add an input handler for the search bar.
- Add a drag-and-drop Miro Board UI event handler.
- To achieve this, add the code below to your
app.jsfile. To use the selected items as templates, we need to strip some item properties before saving them.
async function init() {
  // Get current user info
  const user = await miro.board.getUserInfo();

  // Load templates from the database
  templates = await getTemplatesFromDB( user.id );
  displayTemplates( user.id, templates );

  // Save button handler
  document.getElementById( "save-btn" ).onclick = async () => {
    const name = prompt( "Please enter a name for the template" );
    // Save items
    const items = await miro.board.getSelection();
    // Remove unnecessary properties
    items.forEach( item => {
      delete item.id;
      delete item.parentId;
      delete item.height; // Note: only save the width and not the height
      delete item.createdAt;
      delete item.createdBy;
      delete item.modifiedAt;
      delete item.modifiedBy;
      delete item.assignee;
      delete item.dueDate;
    });
    saveTemplate( user.id, name, items );
  };

  // Search handler
  document.getElementById( "search-bar" ).addEventListener( "input", (e) => {
    filter = e.target.value;
    displayTemplates( user.id, templates );
  });

  // Drag-and-drop handler
  miro.board.ui.on( "drop", async ({ x, y, target }) => {
    const index = target.getAttribute( "data-index" );
    const template = templates[ index ];
    template.items.forEach( item => {
      createWidgetFromJson( item, x - template.center.x, y - template.center.y );
    });
  });
}

init()
Test the Miro app
- Return to the board and add some items to your app, such as sticky notes, shapes, or text.
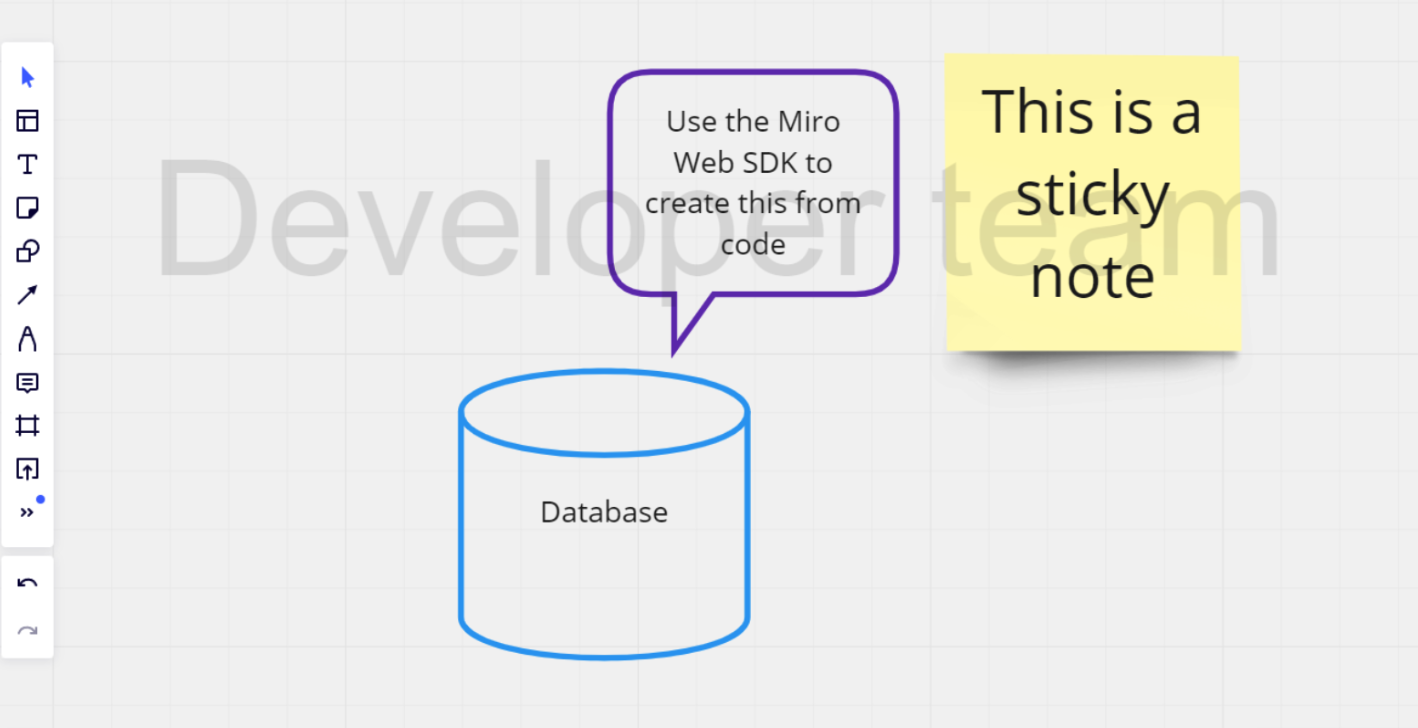
Figure 24. Board with some shapes and a sticky note.
- Open the app, select an item on the board, click Save selection as template, and enter a name for the template.
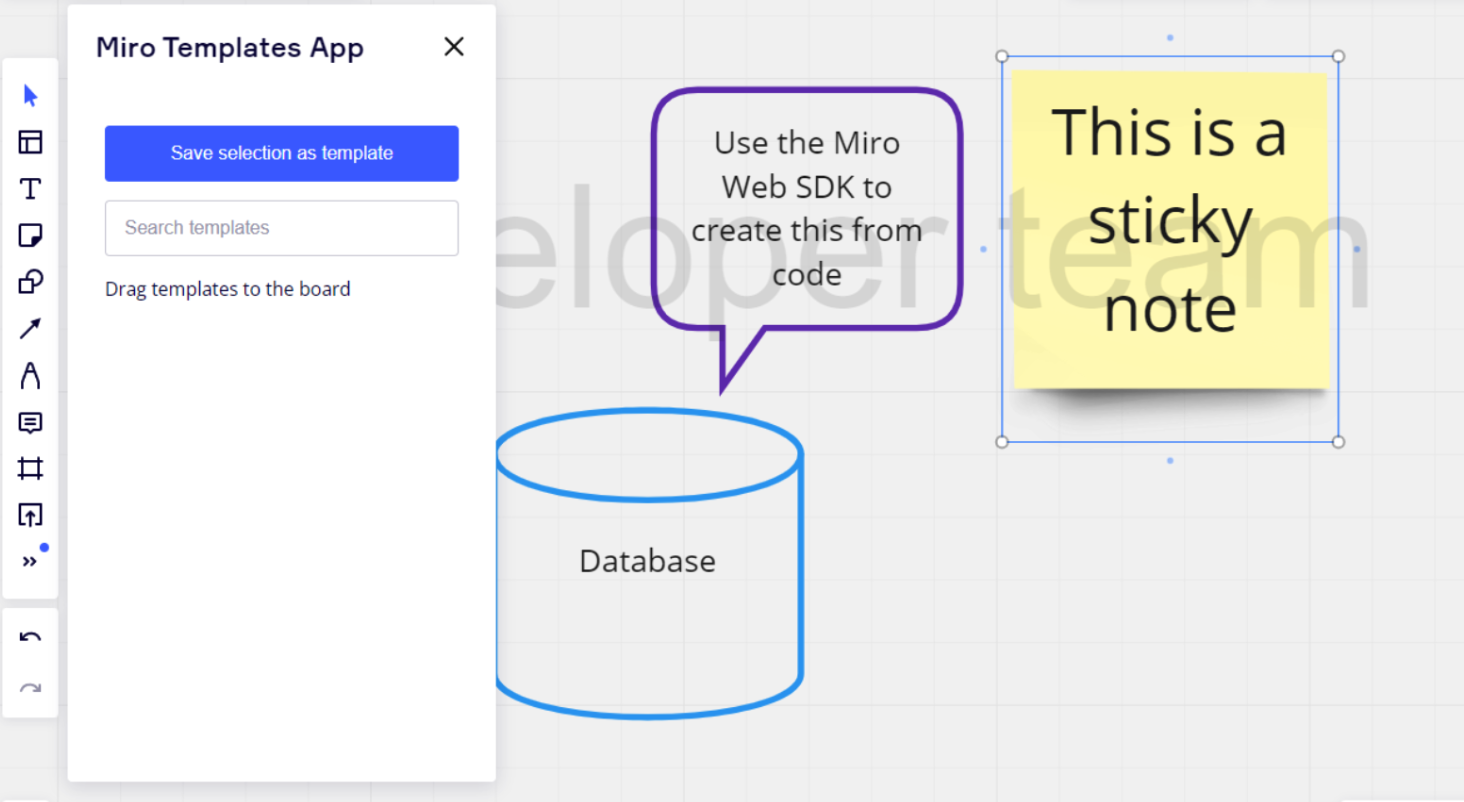
Figure 25. Board showing a selected item and the Save selection as template button.
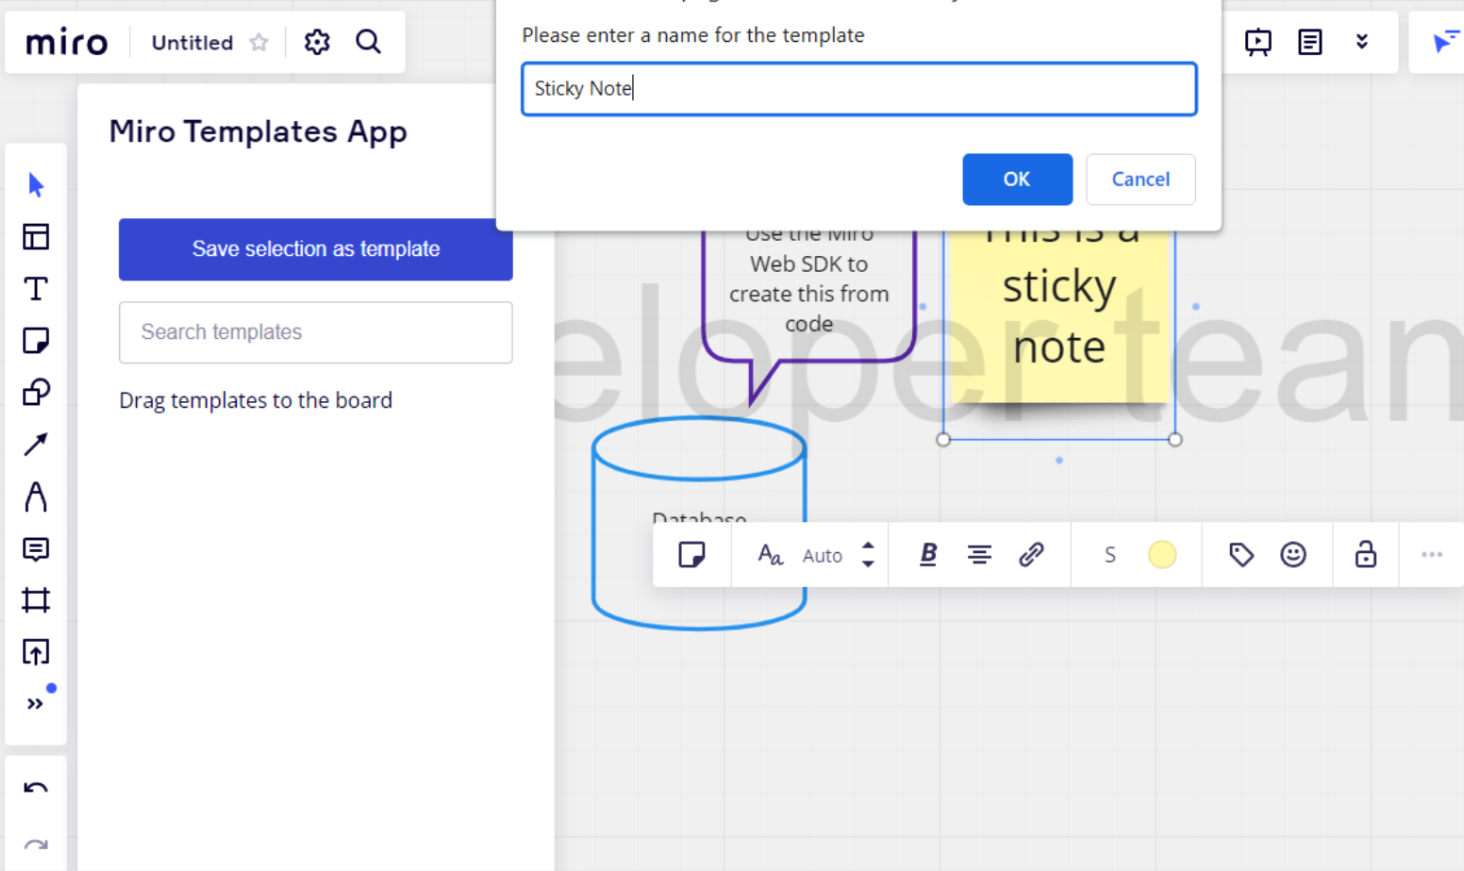
Figure 26. Enter a name for the template field.
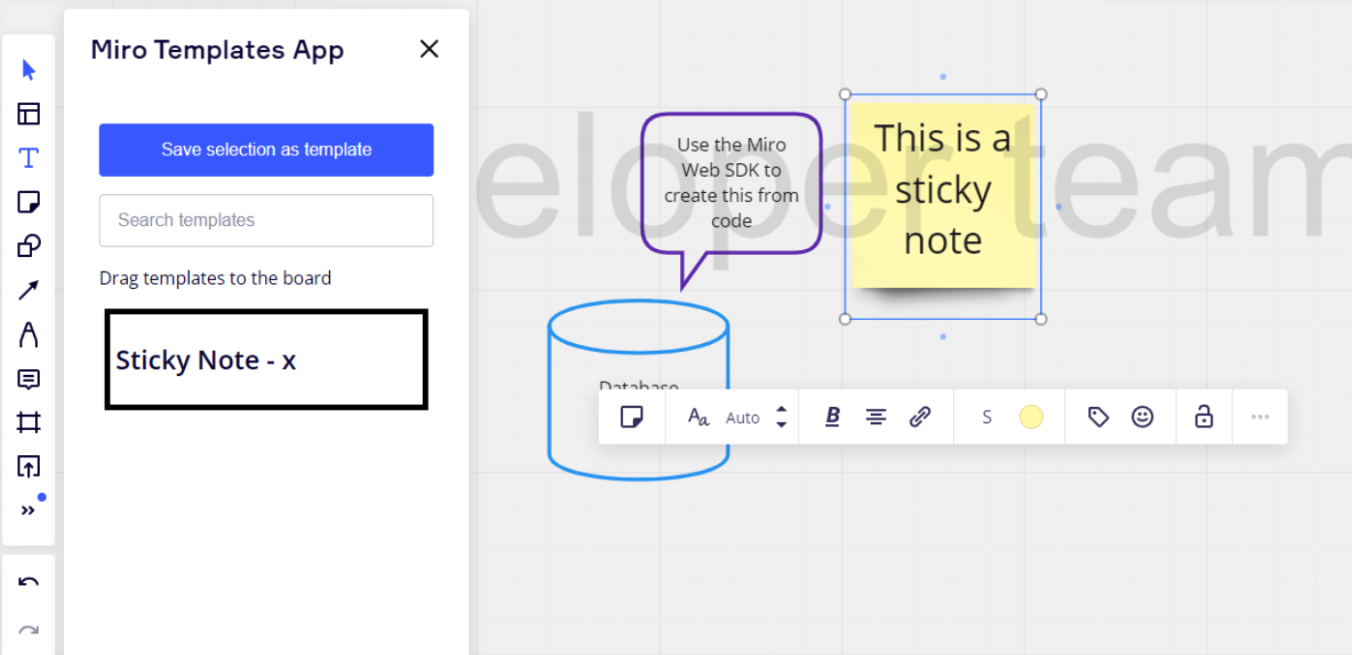
Figure 27. The result of clicking the Save selection as template button.
- Try selecting multiple widgets and saving more templates.
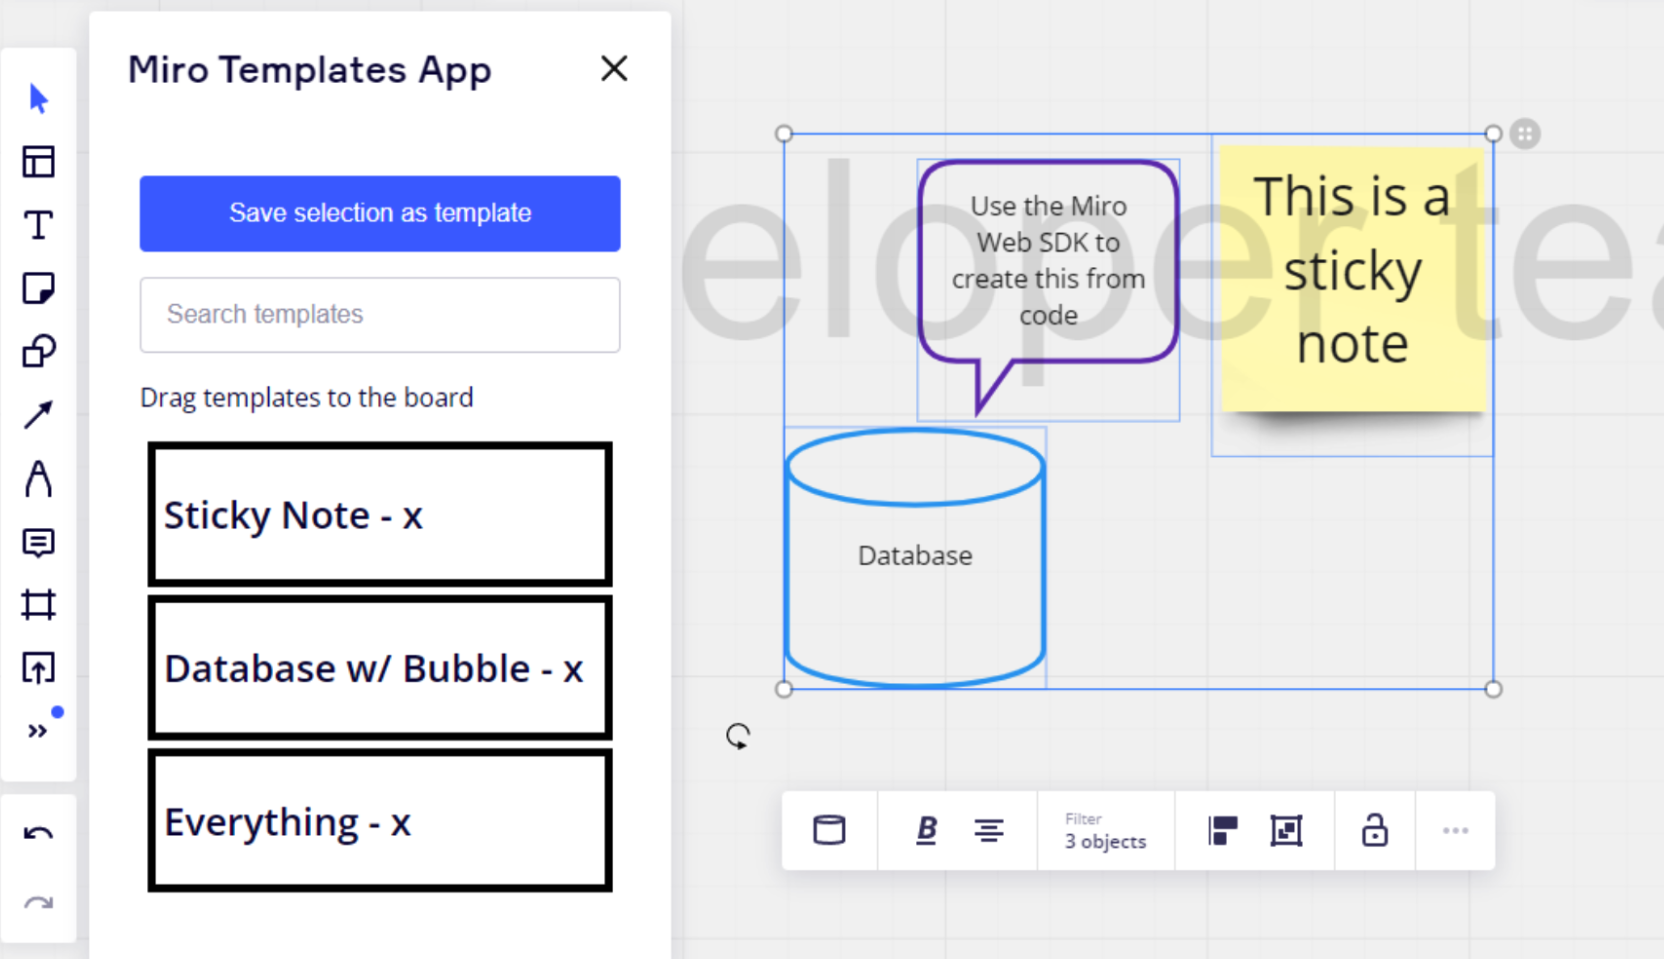
Figure 28. Multiple templates are named for their widgets.
- To easily create the items, drag and drop a saved template to the board.
- Since the stored templates include the user ID, the same user can reuse them on multiple boards.
- To delete a template, click the corresponding x icon.
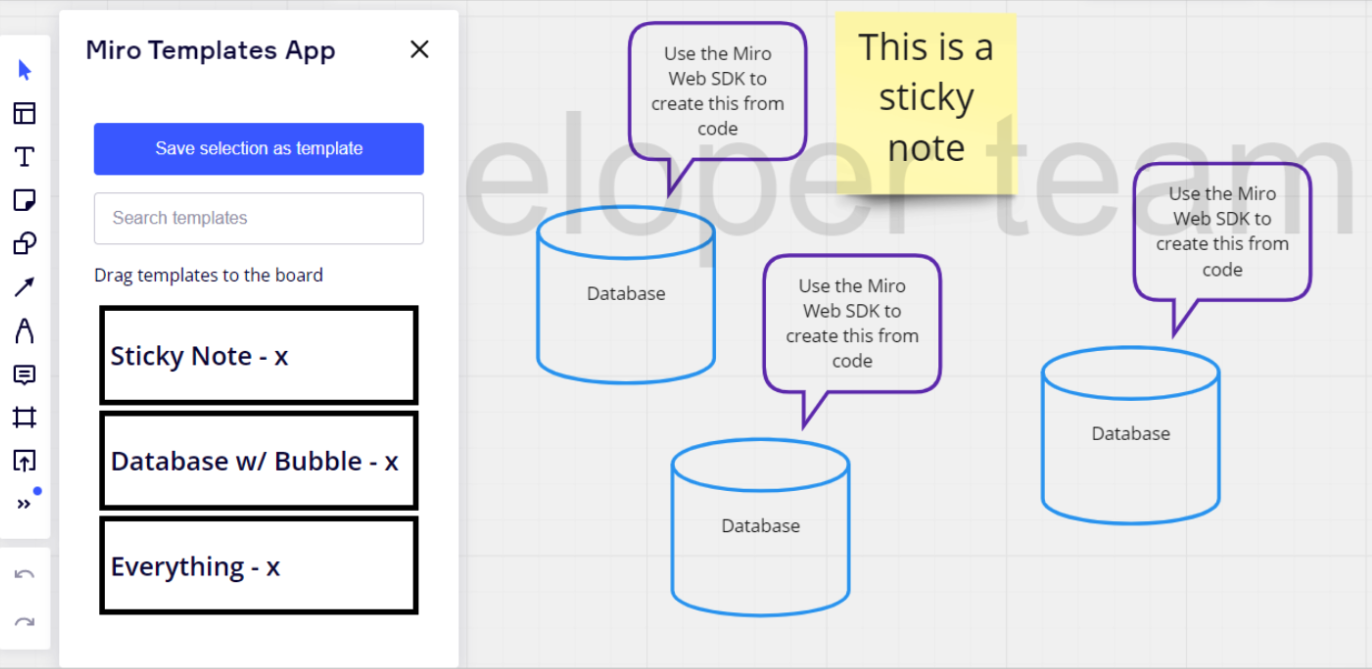
Figure 29. Deleting a template.
- To view the templates stored as JSON objects, inspect your Firebase Realtime Database.
What's next?
You learned how to create a Miro app that uses the Miro Web SDK with a separate backend database. The Web SDK enables your team to use Miro boards more easily and efficiently.
To explore what else you can build using Miro, check out the Web SDK and REST API documentation.
Updated 3 months ago