Display banner/modal on a Miro board using AWS S3
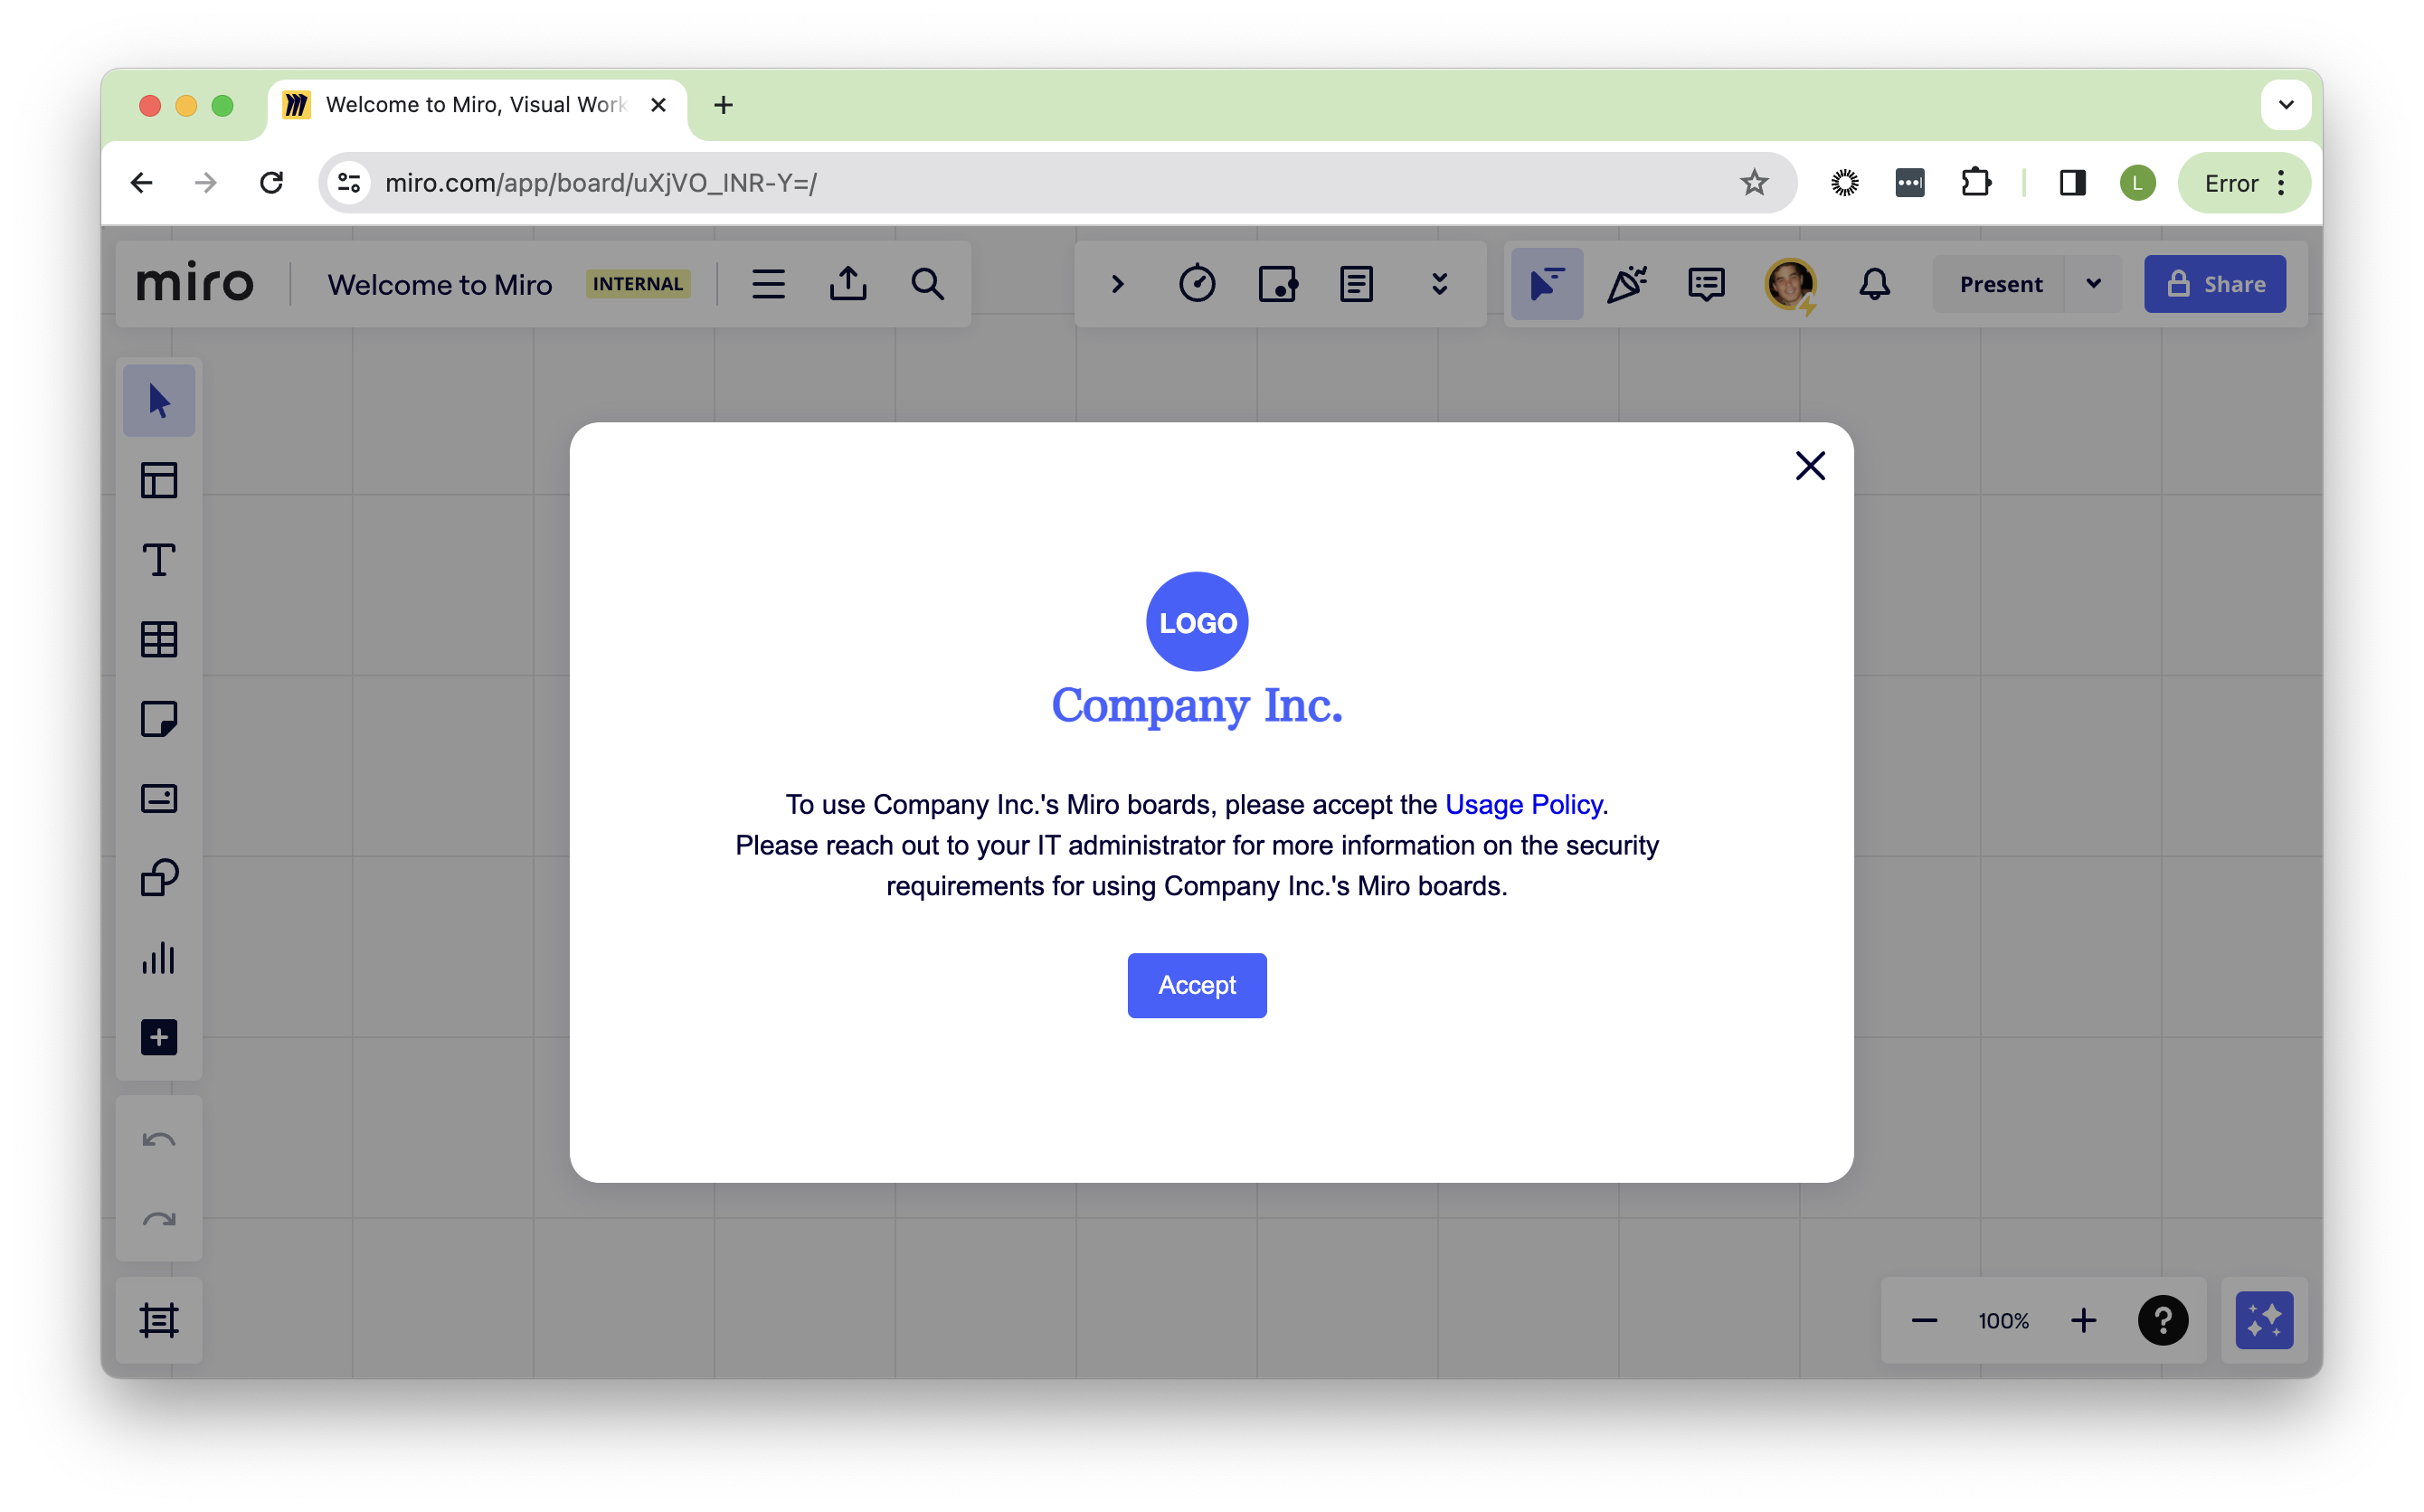
Using the Miro Web SDK, you can seamlessly display a custom banner/modal (Figure 1) into your Miro board—a powerful way to strategically showcase tailored content or compelling calls to action, providing an enhanced and personalized user experience.
NoteWe use the terms banner and modal interchangeably in this guide. In the Miro Developer Platform, a modal is a visual screen that can display custom information. A modal might also be called as a banner in general terms. We use the terms banner/modal to make it easier for everyone to follow the context.
In this guide, we will walk you through the process of creating and implementing a banner/model where we display a company's terms of usage policy using:
- Miro Web SDK
- AWS S3: Host your HTML files and serve them as regular web pages so they can load within Miro. Additionally, you can also use AWS S3 to add custom functionality for your Miro app to track which users have already accepted the modal so that the modal does not keep appearing for those users.
There are four main action items for displaying a banner on a Miro board. We will walk through the steps in each of these main action items in detail.
- Create a public AWS S3 bucket with an endpoint to read and write data.
- Upload/host the
app.html,modal.html, andvariables.jsfiles on the AWS S3 bucket. - Create the application in Miro that will run the hosted
app.htmlfile. - Install the banner/modal app in all Miro teams where you want to display the modal/banner.
DisclaimerThe information in this guide is provided as an example and guidance only. Any production setup is at your sole discretion and responsibility and is to be throughly tested and validated on your side by the responsible teams to ensure it works as desired and intended.
Step 1: create an AWS S3 bucket with an endpoint
HintThe steps explained within this section use the AWS Serverless Application Model (AWS SAM). You must install AWS SAM CLI and set up your AWS credentials so you can programmatically create AWS resources using AWS SAM.
In this step we will create the following AWS resources:
- S3 Bucket: in this publicly accessible S3 bucket, you can host the
app.html,modal.htmlandvariables.jsfiles but it also will serve as a database to capture the users, who have accepted the terms modal. Users will be captured in the form of a text file where the Miro User ID is the file name. You can use this later to check, via a GET request, if a user has already accepted the terms. - API Gateway: this endpoint allows you to call a Lambda function and get a signed URL to write text files to the S3 bucket from the
modal.html. - Lambda Function: this Lambda function allows you to get a signed URL from the S3 bucket where you can write text files. This procedure is based on the AWS article: Uploading to Amazon S3 directly from a web or mobile application, but instead of uploading images to the S3 bucket (as explained in the original AWS article), we will be writing text files on the S3 bucket where the Miro User ID is the file name.
- Stack Name: miro-terms-banner
- AWS region: add your desired region or hit Enter to accept the default
- Confirm changes before deploy [Y/N]: accept default
- Allow SAM CLI IAM role creation [Y/N]: Y
- Disable rollback [Y/N]: N
- *MiroBannerAcceptersRequestFunction has no authentication. Is this okay? [Y/N]: Y
- Save arguments to configuration file [Y/N]: accept default
- SAM configuration file [samconfig.toml]: accept default
- SAM configuration environment [default]: accept default
After providing the inputs for these prompts, the AWS resources will be automatically created for you. Please wait until the process is complete.
- When the process is complete, you will see the Outputs with the relevant information as shown below (your values might be slightly different).
------------------------------------------------------------------------------------------------------------------
Outputs
------------------------------------------------------------------------------------------------------------------
Key           S3RecordTermsAcceptanceEndpointUrl
Description   HTTP API endpoint URL to get the s3 signed URL to write files on the S3 bucket
Value         https://<your-s3-terms-url>.amazonaws.com

Key           S3BucketName
Description   Name of the S3 bucket that captures users who have accepted the terms modal in Miro
Value         <your-s3-bucket-name>

Key           S3BucketBaseUrl
Description   Base URL of the S3 bucket that captures users who have accepted the T&C banner in Miro
Value         https:<your-s3-bucket-base-url>.amazonaws.com
------------------------------------------------------------------------------------------------------------------
ImportantKeep your AWS SAM CLI window open. You will need the values within in the Outputs in the next steps.
TroubleshootingAWS SAM uses CloudFormation in the background to create your AWS resources programatically. If the deployment fails or if you closed the AWS SAM CLI window without noting the outputs, perform the following steps to clean up your AWS resources to ensure you can redeploy successfully:
- Empty S3 buckets.
- Delete S3 buckets.
- Delete Lambda function.
- Delete API gateway service.
- Delete the CloudFormation stack created by AWS SAM.
- In the CLI window, navigate to your dedicated local folder for this project and ensure you are in the
app-examples/examples/terms-modal-banner-s3/directory, and then run the following command:
sam deploy --guided- Proceed with step 5, entering values for each of the prompts.
Step 2. Upload and host app files on AWS S3
-
Navigate to the local folder where you downloaded the GitHub repository and locate the files app.html, modal.html and variables.js (downloaded in step 1.3).
-
In your AWS account, go to your newly created S3 bucket (you can find the S3 bucket name in the Outputs of your SAM CLI), and then create a new folder named webassets.
-
Upload the files
app.htmlandmodal.htmlto the webassets folder in your S3 bucket.
Do not upload the filevariables.js. -
After uploading the files into the webassets folder in your S3 bucket, copy the URLs provided of the
modal.htmlandapp.htmlfiles. Paste these URLs into a text editor of your choice. You will need these URLs in the next steps. -
Open your local
variables.jsfile (downloaded in step 1.3) and replace the values of the variables as follows:-
MODAL_URL: enter the S3 URL of the
modal.htmlfile (copied in step 2.4).var MODAL_URL = '<your-s3-url-from-step2.4>.amazonaws.com/webassets/modal.html'; -
S3_BUCKET_BASE_URL: enter the value for S3BucketBaseUrl visible in the Outputs of your AWS SAM CLI.
var S3_BUCKET_BASE_URL = '<your-s3-bucket-base-url>.amazonaws.com'; -
S3_RECORD_TERMS_ACCEPTANCE_ENDPOINT_URL: enter the value for S3RecordTermsAcceptanceEndpointUrl from the AWS SAM CLI Outputs.
var S3_RECORD_TERMS_ACCEPTANCE_ENDPOINT_URL = 'https://<your-s3-terms-url>.amazonaws.com'; -
SECONDS_TO_WAIT: leave the default value (3) or enter your desired value (enter value as a number not as a string). This is the interval in seconds the app will check if the current user has accepted the terms banner/modal. With the default value (3), the app will check every 3 seconds if the user has accepted the banner/modal until the it has been successfully accepted.
var SECONDS_TO_WAIT = 3; -
MODAL_WIDTH: leave the default value (590) or enter a value as required based on your own pop-up design and content (enter value as a number not as a string). This is the width of the banner/modal pop-up in pixels.
var MODAL_WIDTH = 590; -
MODAL_HEIGHT: leave the default value (300) or enter a value as required based on your own pop-up design and content (enter value as a number not as a string). This is the height of the banner/modal pop-up in pixels.
var MODAL_HEIGHT = 300;
-
-
Save the
variables.jsfile locally. -
Upload your local
variables.jsfile into the webassets S3 folder created in step 2.2.
Step 3: create the banner/modal app in Miro
NoteTo perform the steps within this section you must be a Company Admin in your Miro account, as you will be creating an application and installing it on individual Miro teams or across the entire account.
After creating the AWS assets and hosting the app.html, modal.html and variables.js files on the newly created S3 bucket, you will need to create your banner/modal pop-up application in Miro. This application will launch the banner/modal pop-up window for each board in the Miro teams where this application is installed.
-
If you already have a Dev team in Miro, skip this step and proceed to step 2.
Create a Dev Team in your Miro account by clicking the following link:
https://miro.com/app/dashboard/?createDevTeam=1If you are unable to create a Dev Team because the Domain Control feature is enabled and set to "Full" in your Miro account, please let your dedicated CSM or Solutions Engineer at Miro know and they will arrange to create a Dev Team for you.
-
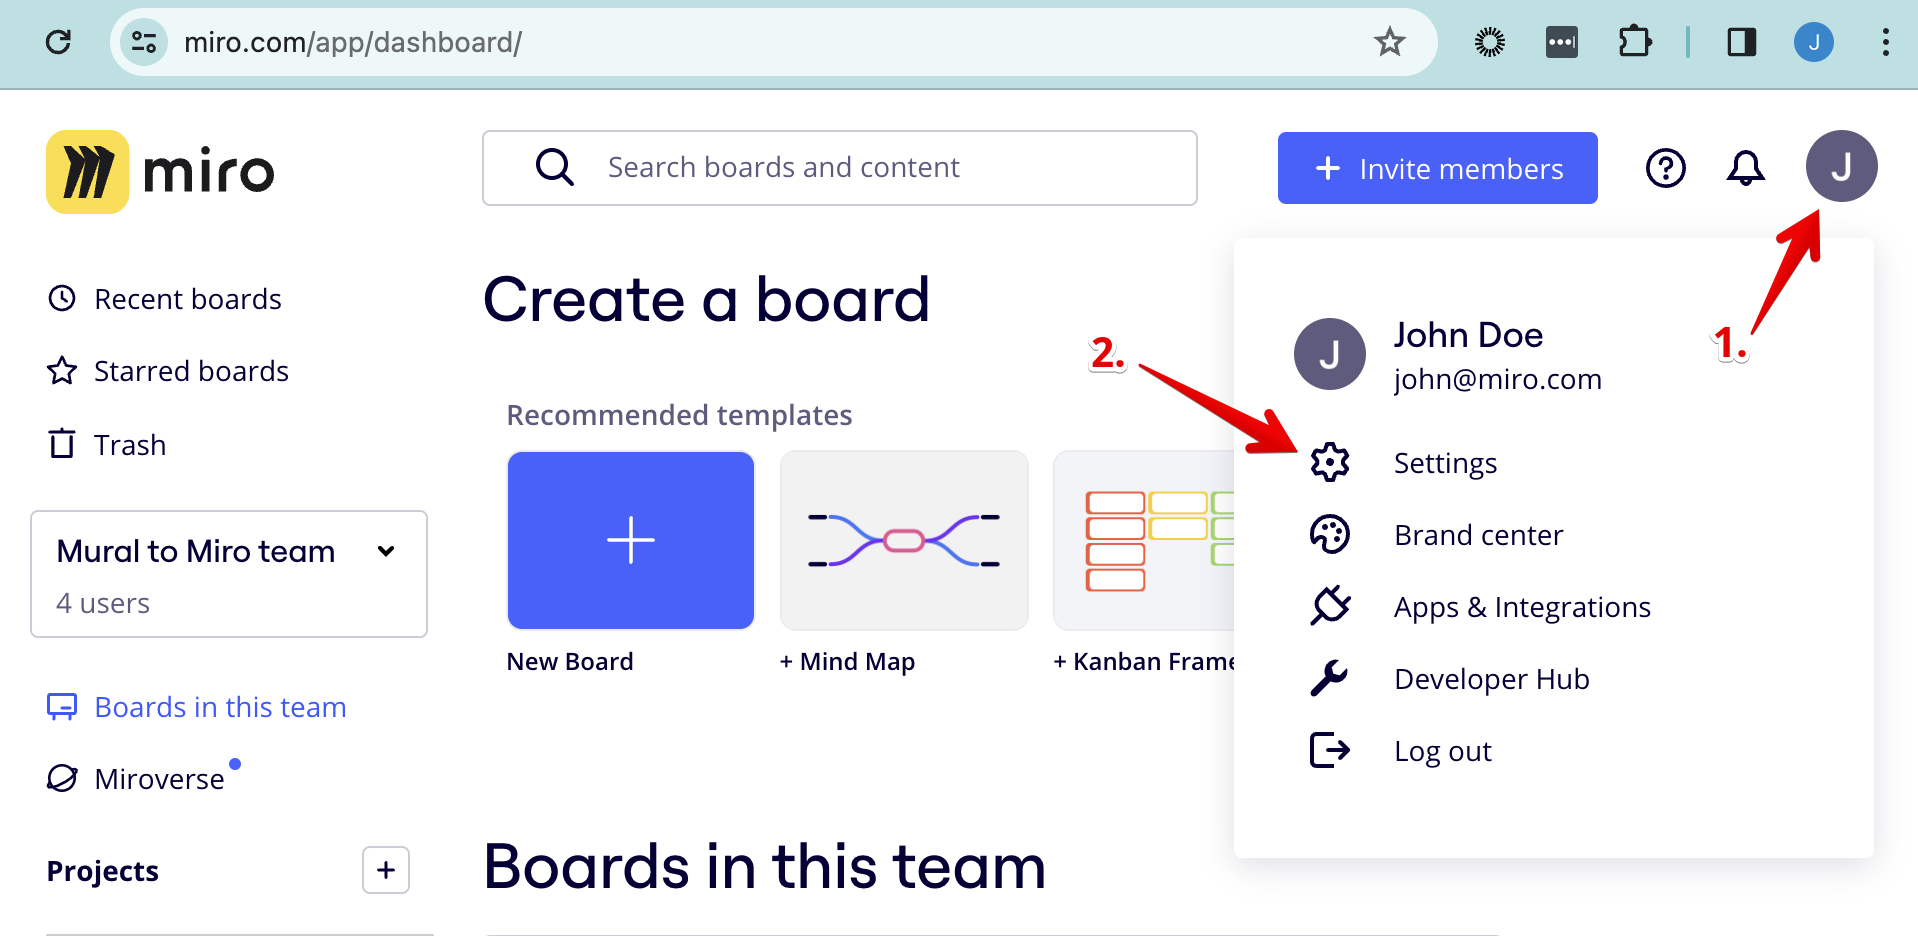
Click the top-right corner avatar on your Miro dashboard page, and then click Settings.

-
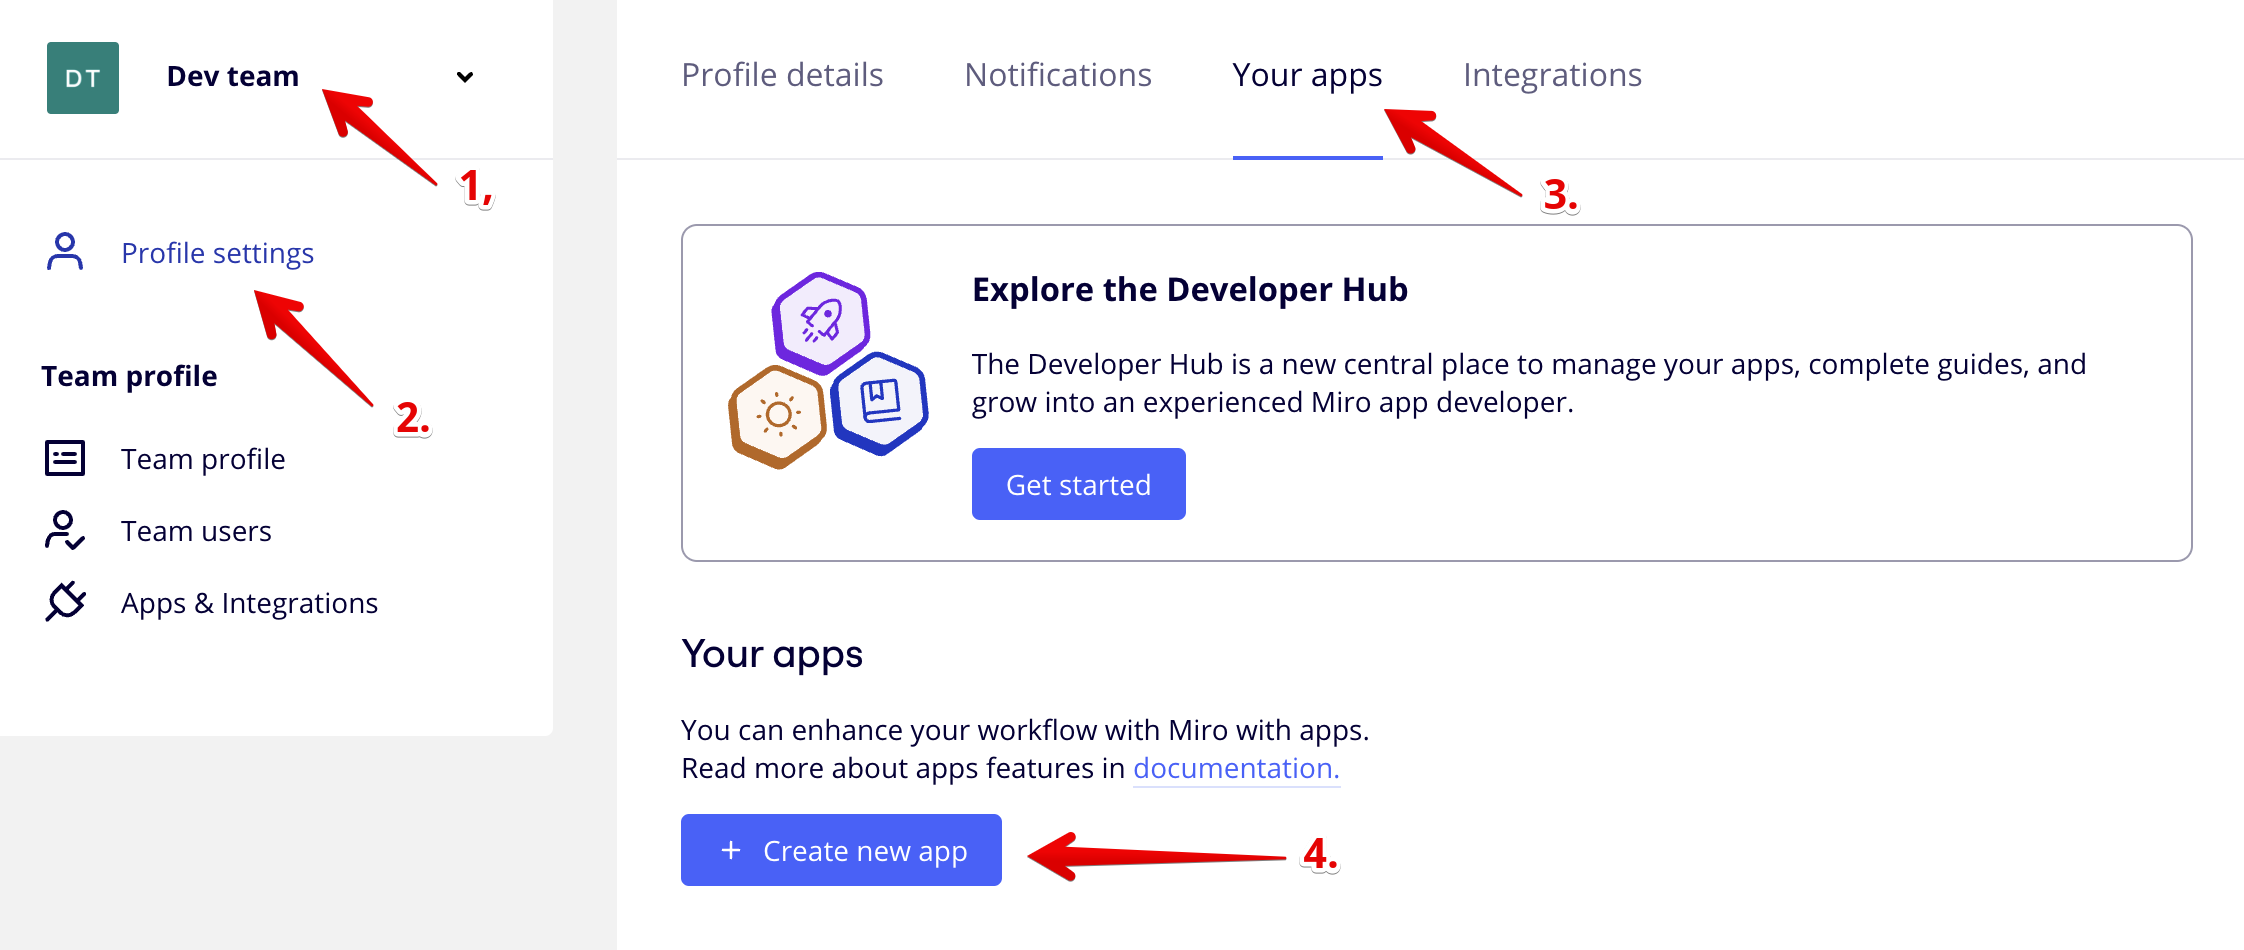
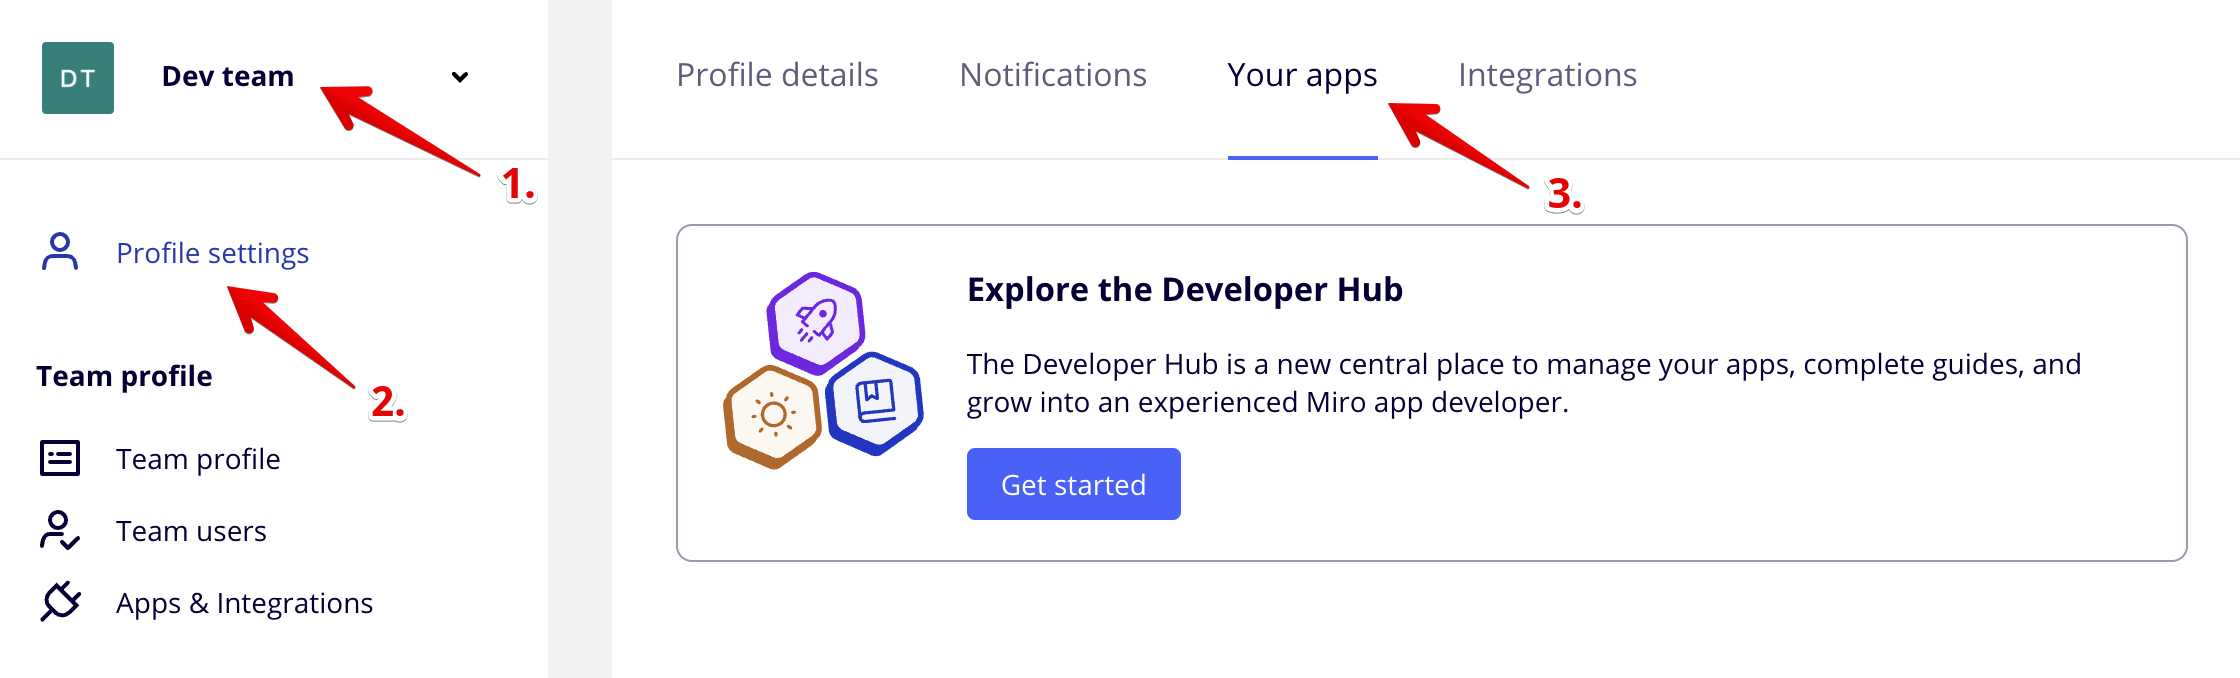
Switch the profile selector to your Dev Team, and then click Profile settings > Your apps > Create new app.

-
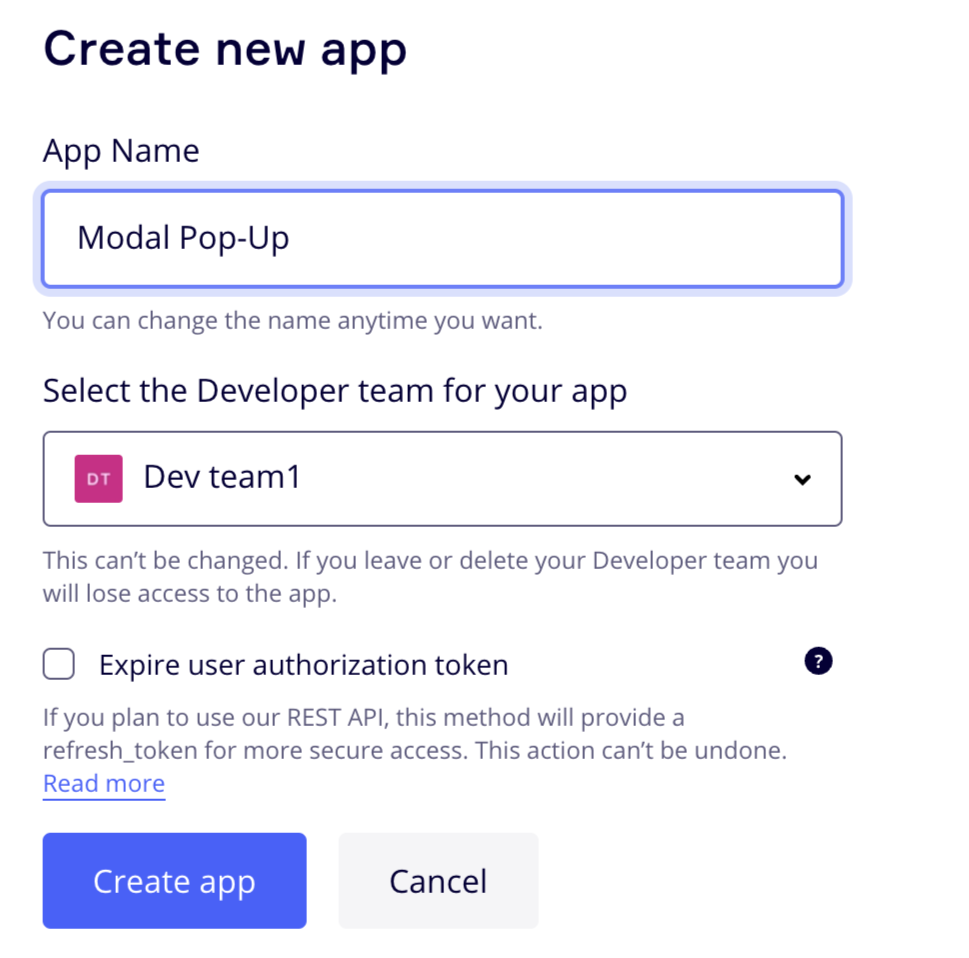
Enter an app name, and then click Create app.
-
Navigate to the App URL field, enter the full URL of the
app.htmlfile (provided by AWS in step 2.4), and then click Save.
-
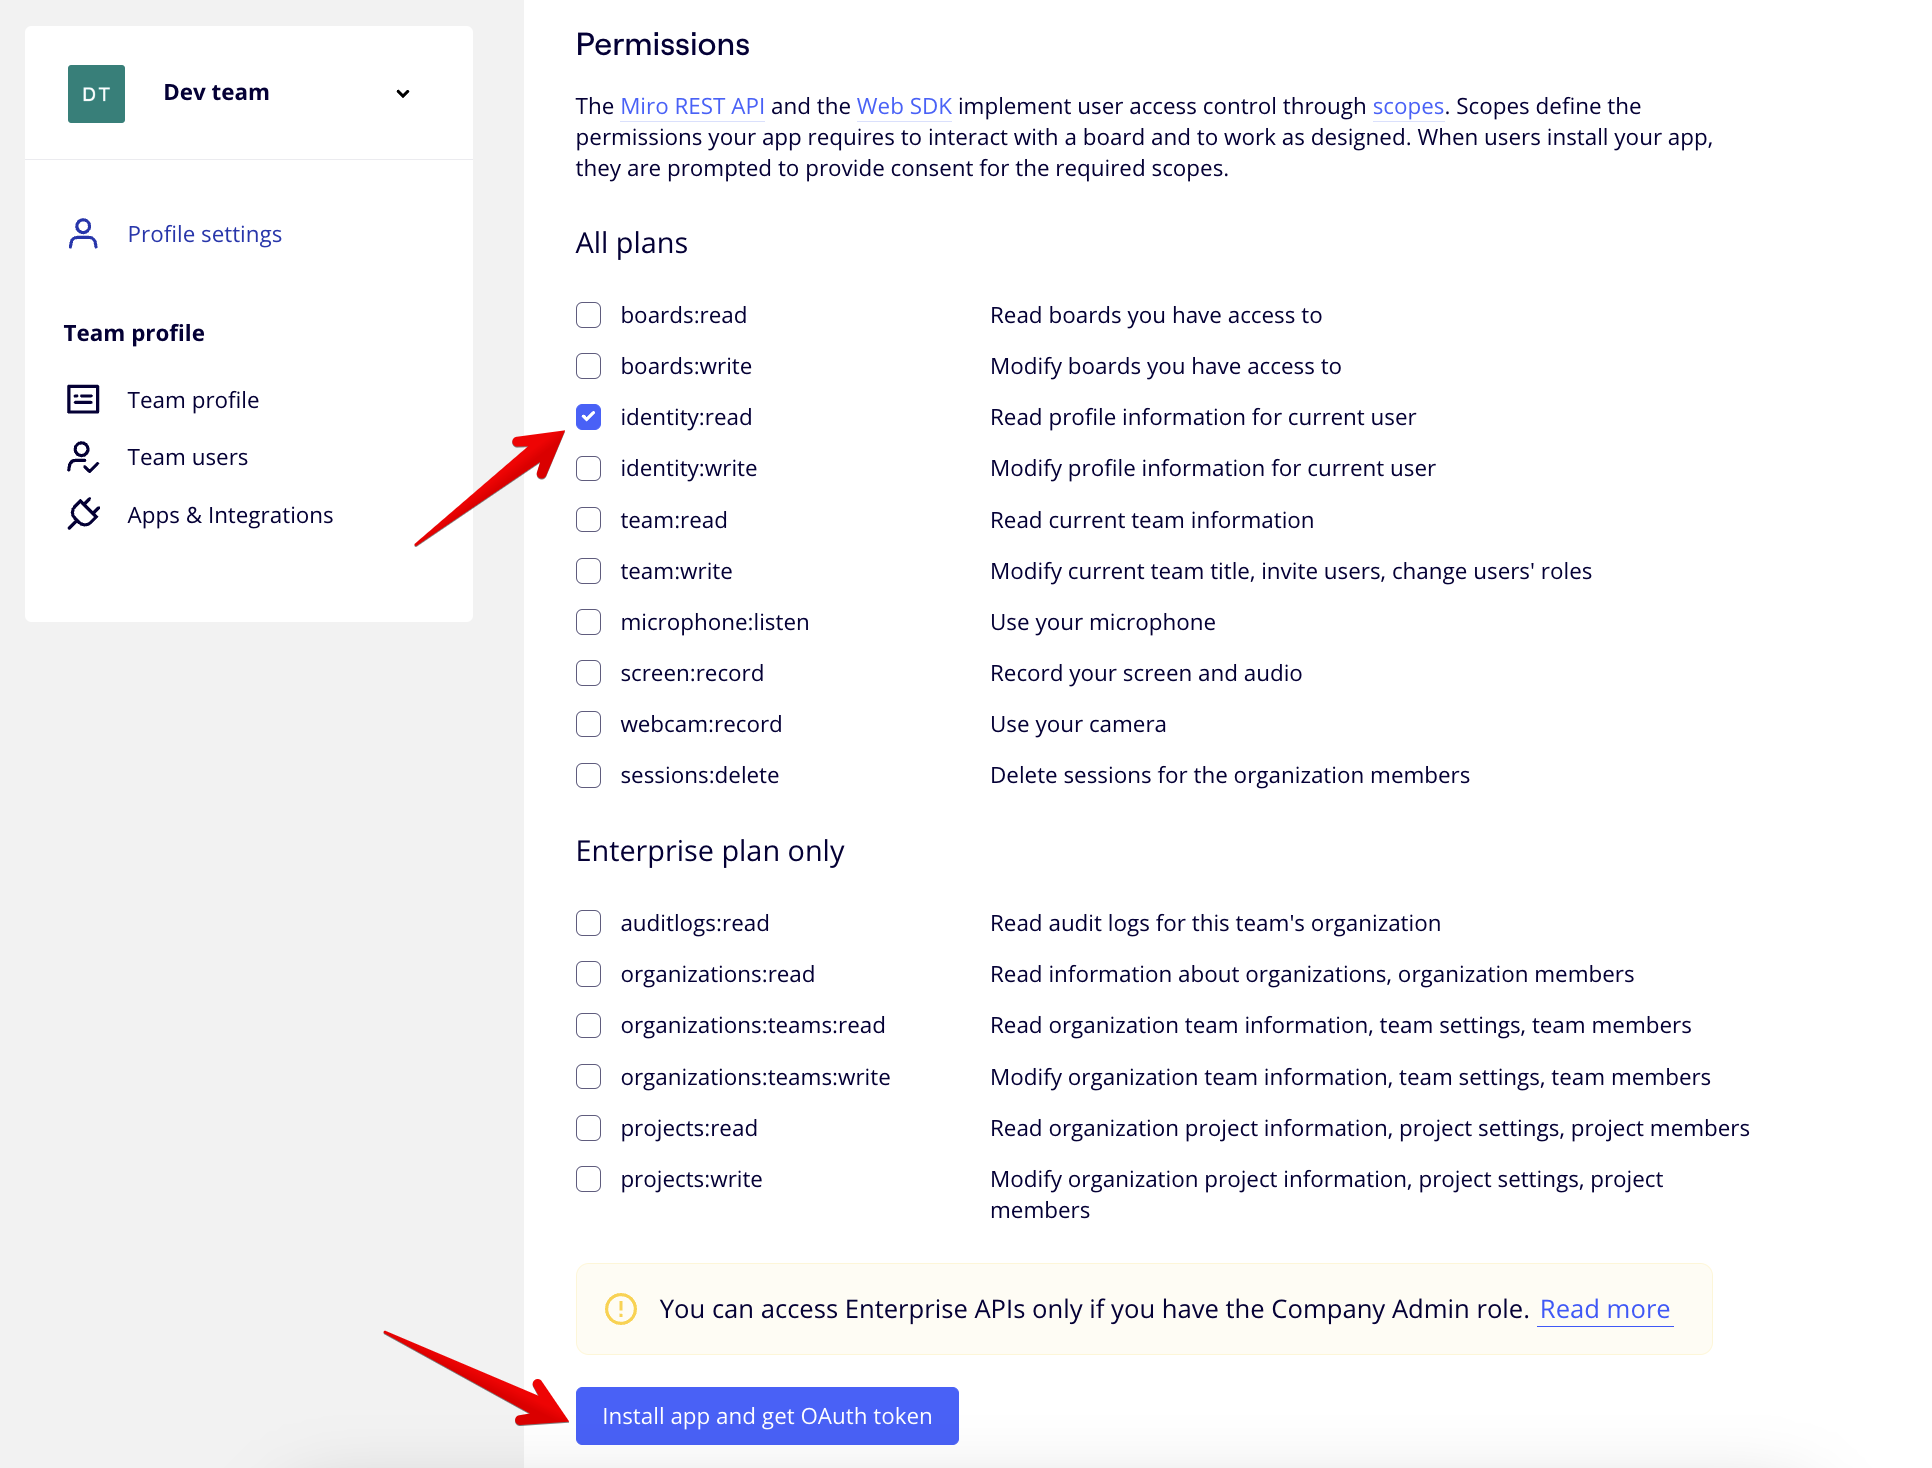
Scroll down to the Permissions section, click to select the identity:read check box as the banner/modal app requires this permission, and then click click Install app and get OAuth token.
-
Select your Dev Team, and then click Install & authorize.
This will install the app on the Dev Team only for you to review and test before releasing it to the rest of the teams.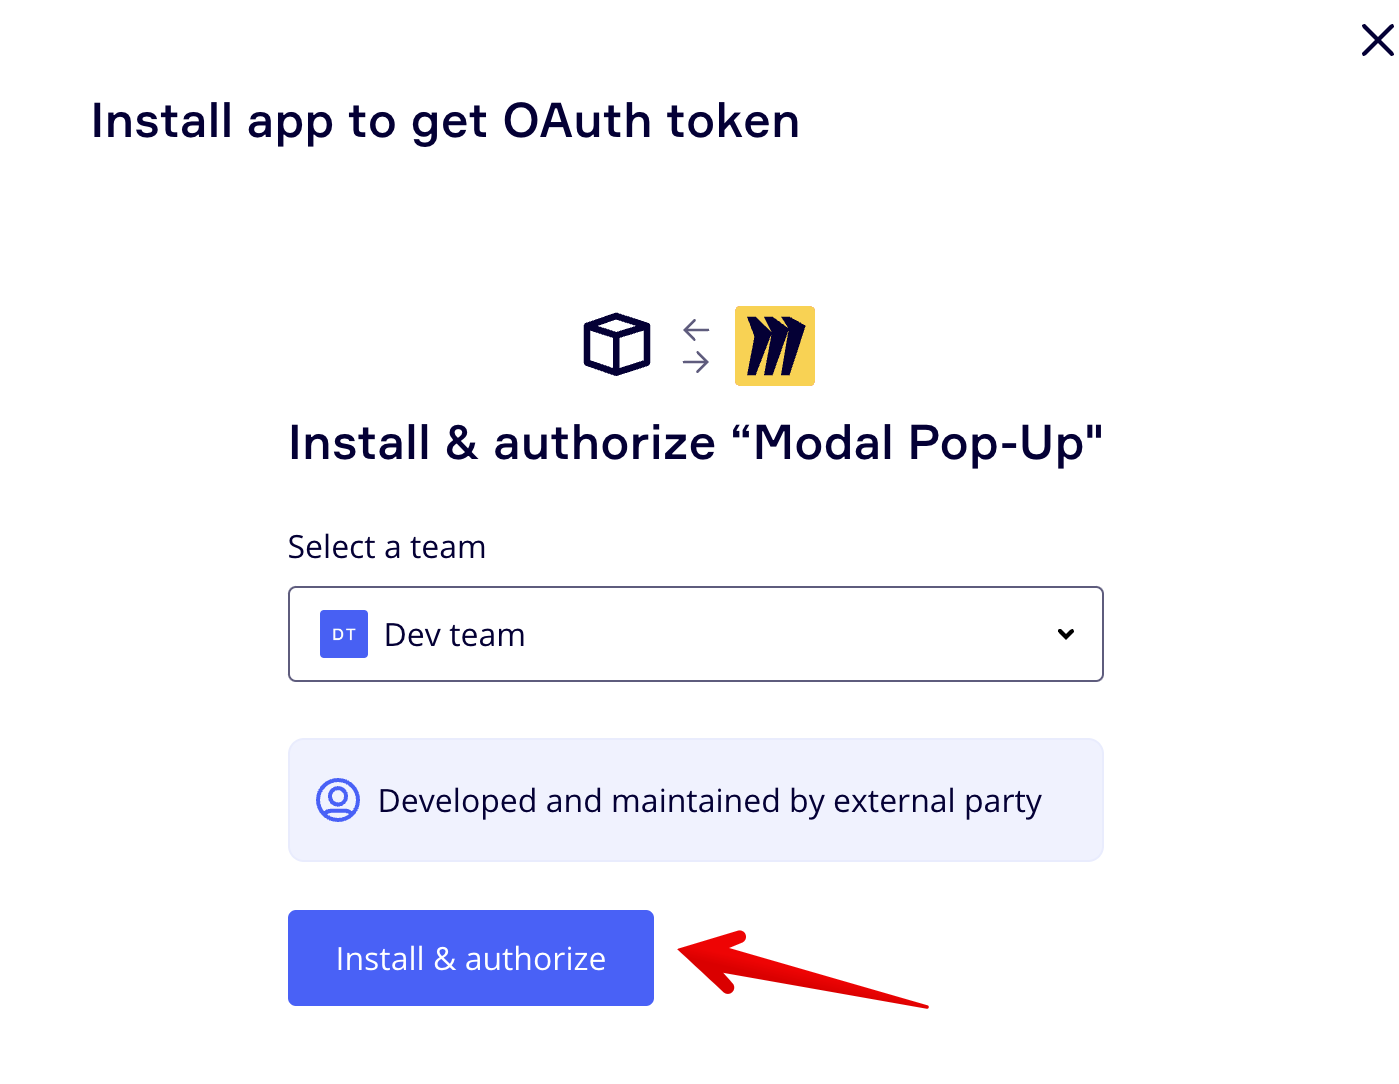
-
Create a new Miro Board within your Dev Team, and refresh the page. The banner/modal pop-up appears.
You can proceed to update the look and feel of the banner (modal.html) as required. Any changes to theapp.htmlormodal.htmlfiles will reflect in Miro as well so you can easily update the content without having to do any additional work on Miro side.
HintThe logic that captures the Miro User ID of the user accepting the banner/modal and the logic that checks if the user has already accepted the banner/modal, is set within the JavaScript of the
app.html,modal.htmlandvariables.jsfiles. Once a user was recorded in the S3 bucket (by accepting the banner/modal) you can find the user within the users folder of the AWS S3 bucket created in step 1.6 (search for the Miro User ID). Users within this users folder in the AWS S3 bucket will not see the modal once again.During your tests, if you need to allow your test-user to see the modal again (after having accepted the modal), simply locate the Miro User ID of your test-user within the AWS S3 folder users and delete the text file with that Miro user ID as the file name.
Step 4: install the banner app in your Miro teams
Once you have finalized all your changes to the banner/modal pop-up and you are ready to deploy it to other teams, proceed as follows:
-
Go to your Dev Team profile, and then go to Profile settings > Your apps.
-
Locate your banner/modal pop-up app in the list of apps, and then click it.
-
Copy the Client ID of your app.

-
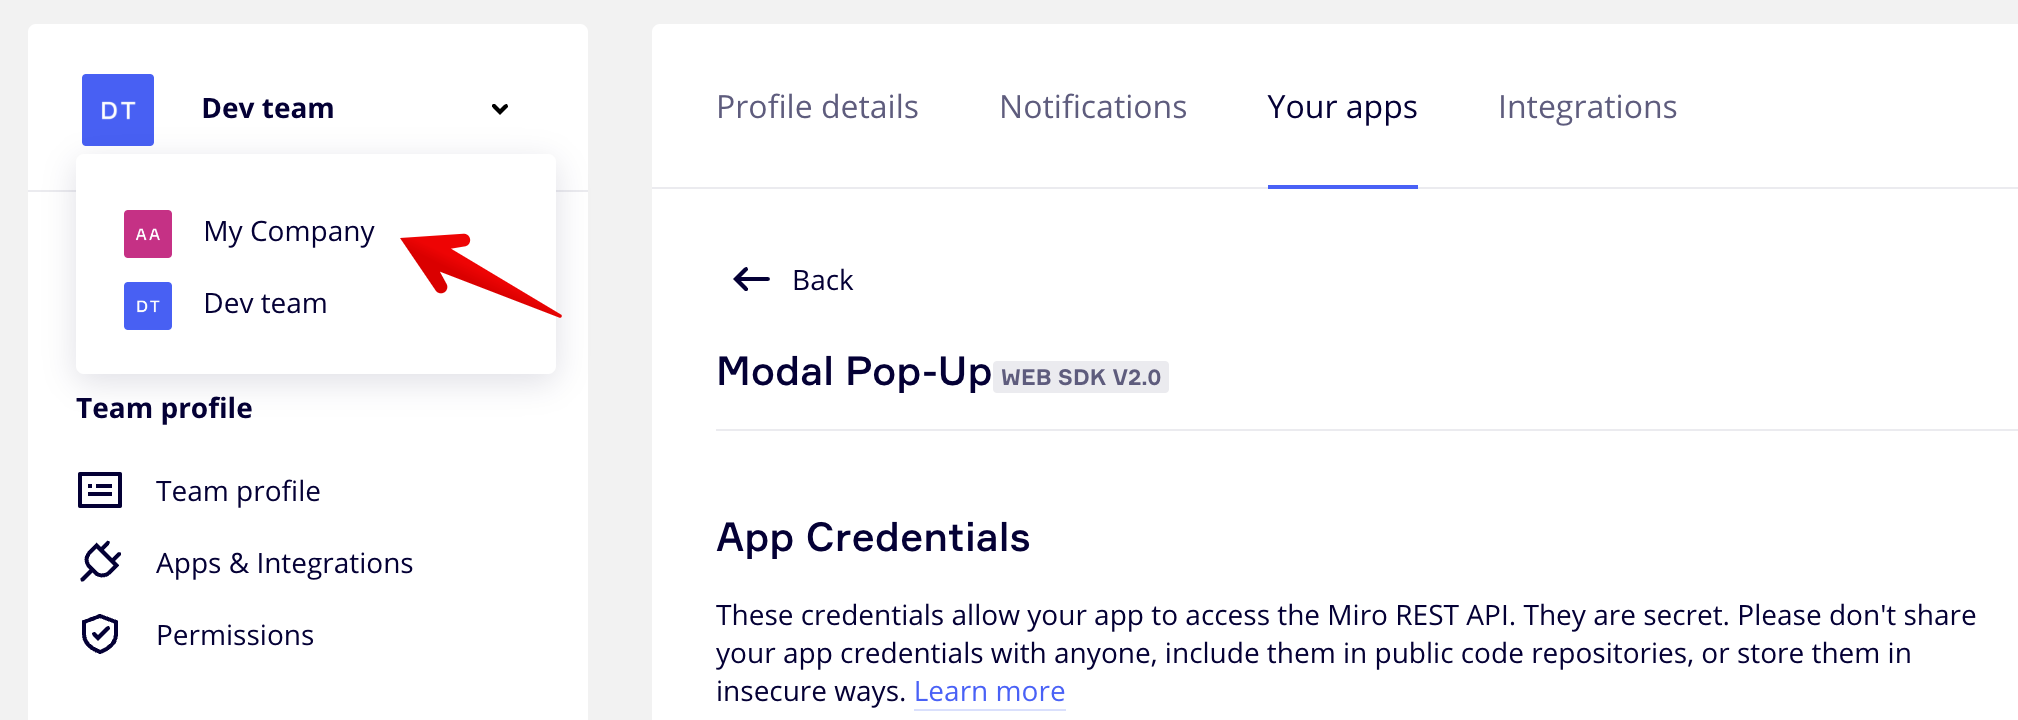
Switch from the Dev Team to the main profile of your organisation.
-
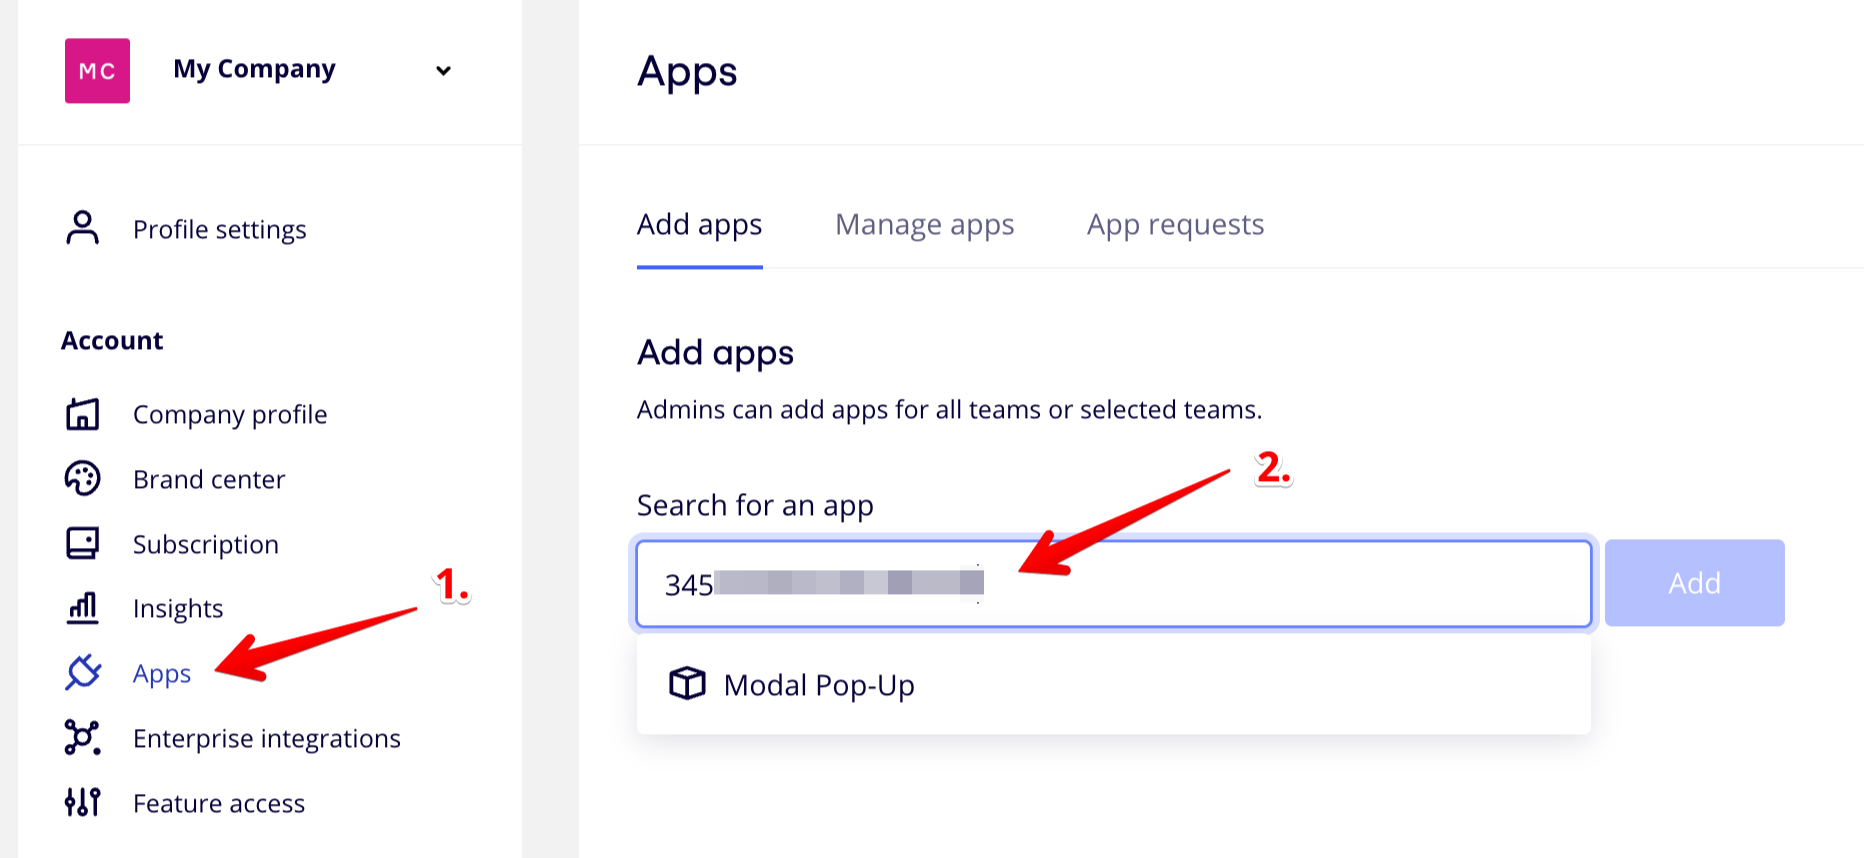
Click Apps and paste the Client ID of your app into the Search for an app field.
You will notice that the name of your app appears directly below the input field as soon as you paste the app Client ID.
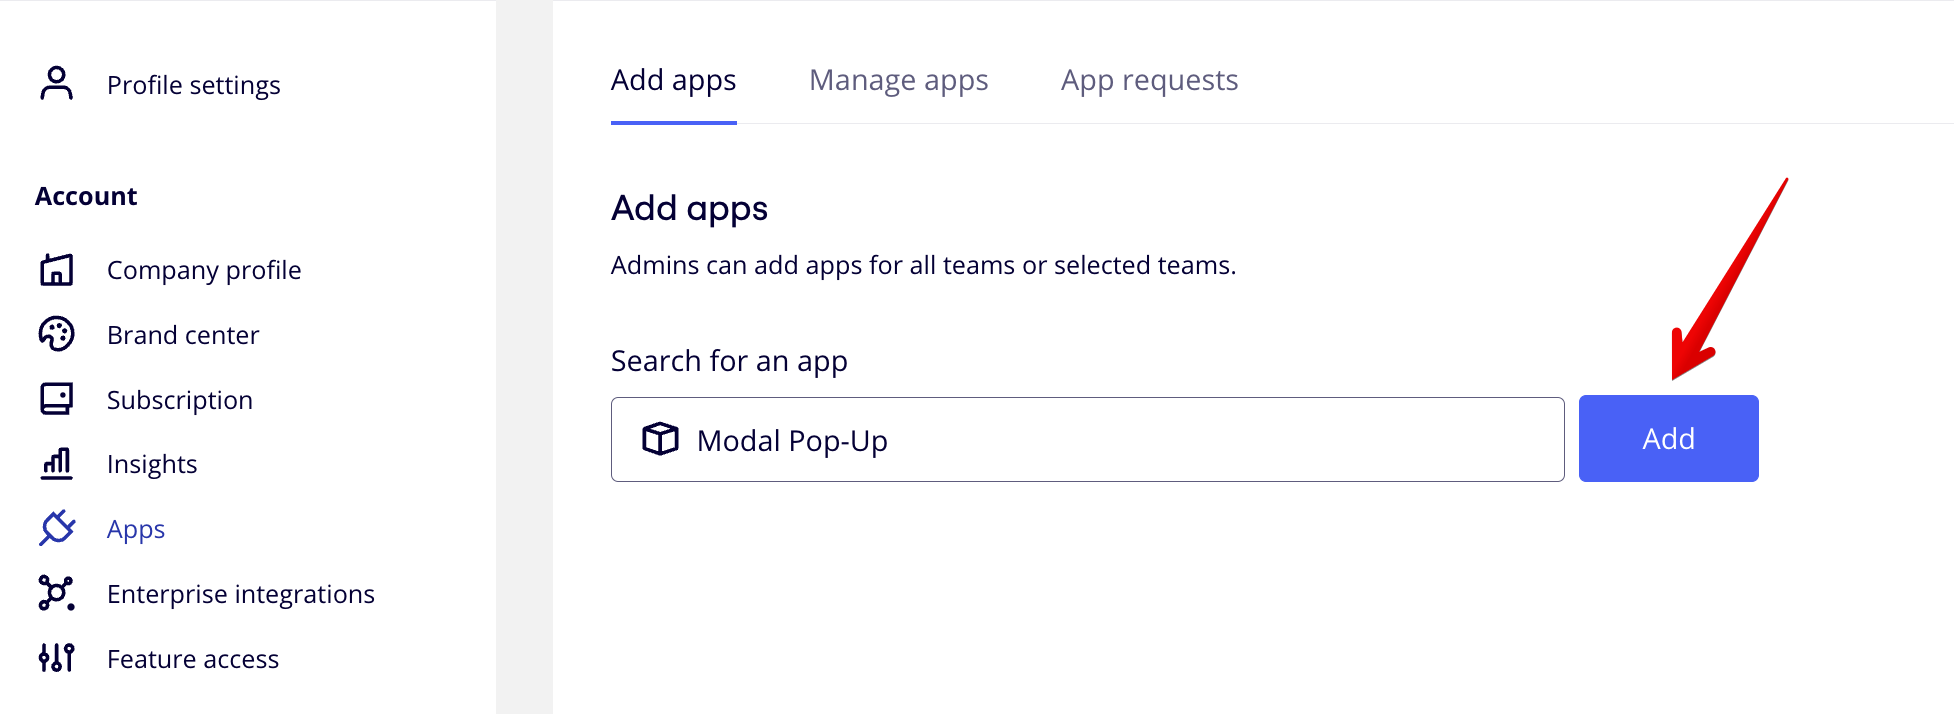
-
Click on the name of your app that appears below the input field, and then click the Add button.
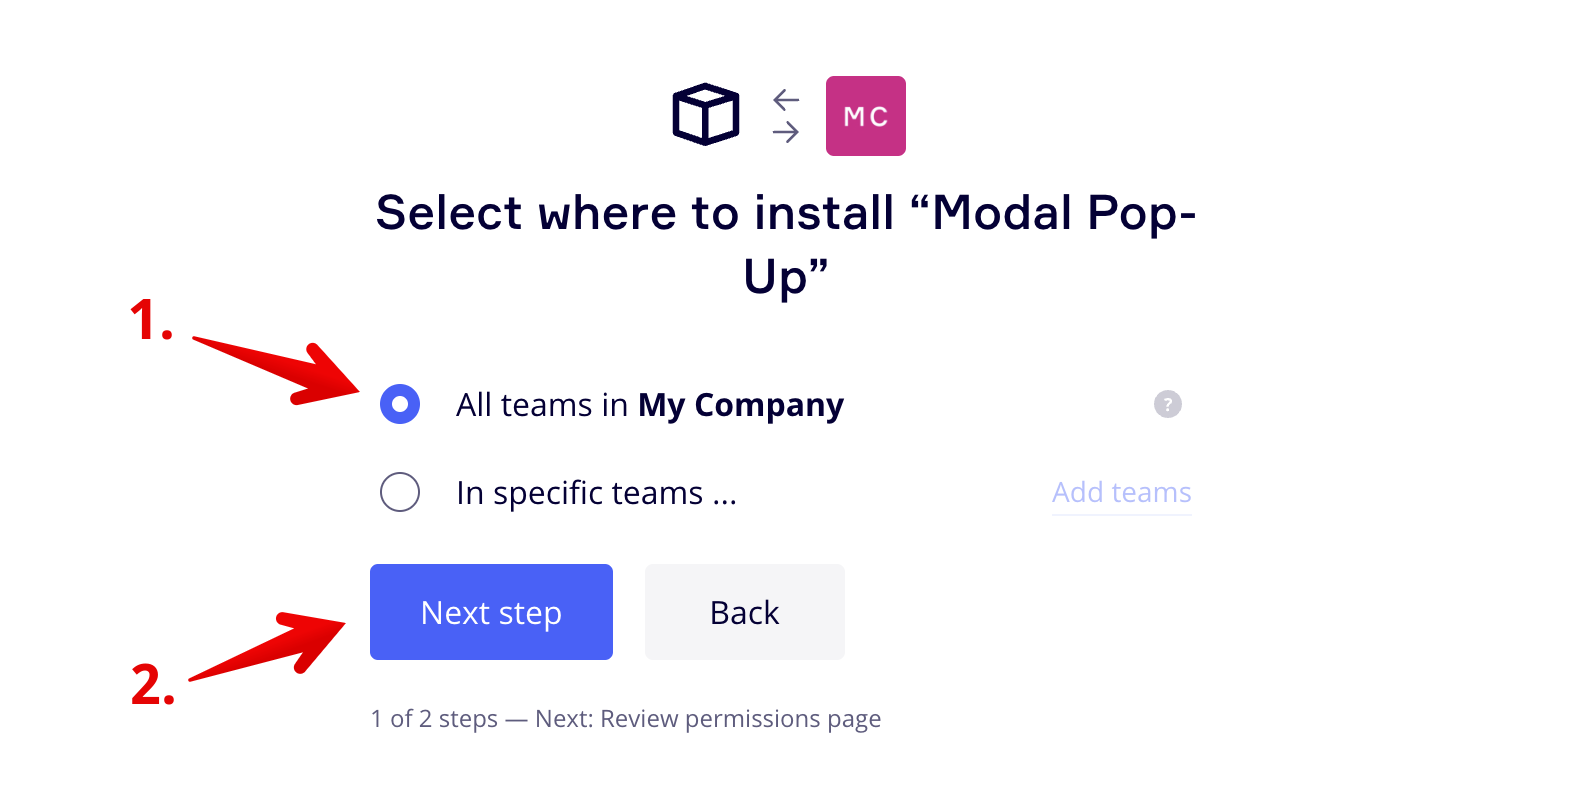
-
A page appears asking you to select in which teams you would like to install the app. You have the option to install the app in all teams (at once) or in individual teams. For this guide we will install the app in all teams, but you can select specific teams, if required.
HintIf you select all teams when installing an app in Miro, any new teams you create later on will inherit the app automatically.
-
After making your selection, click Next step.
-
Activate the Allow for all teams check box, and then click the Install & allow button.
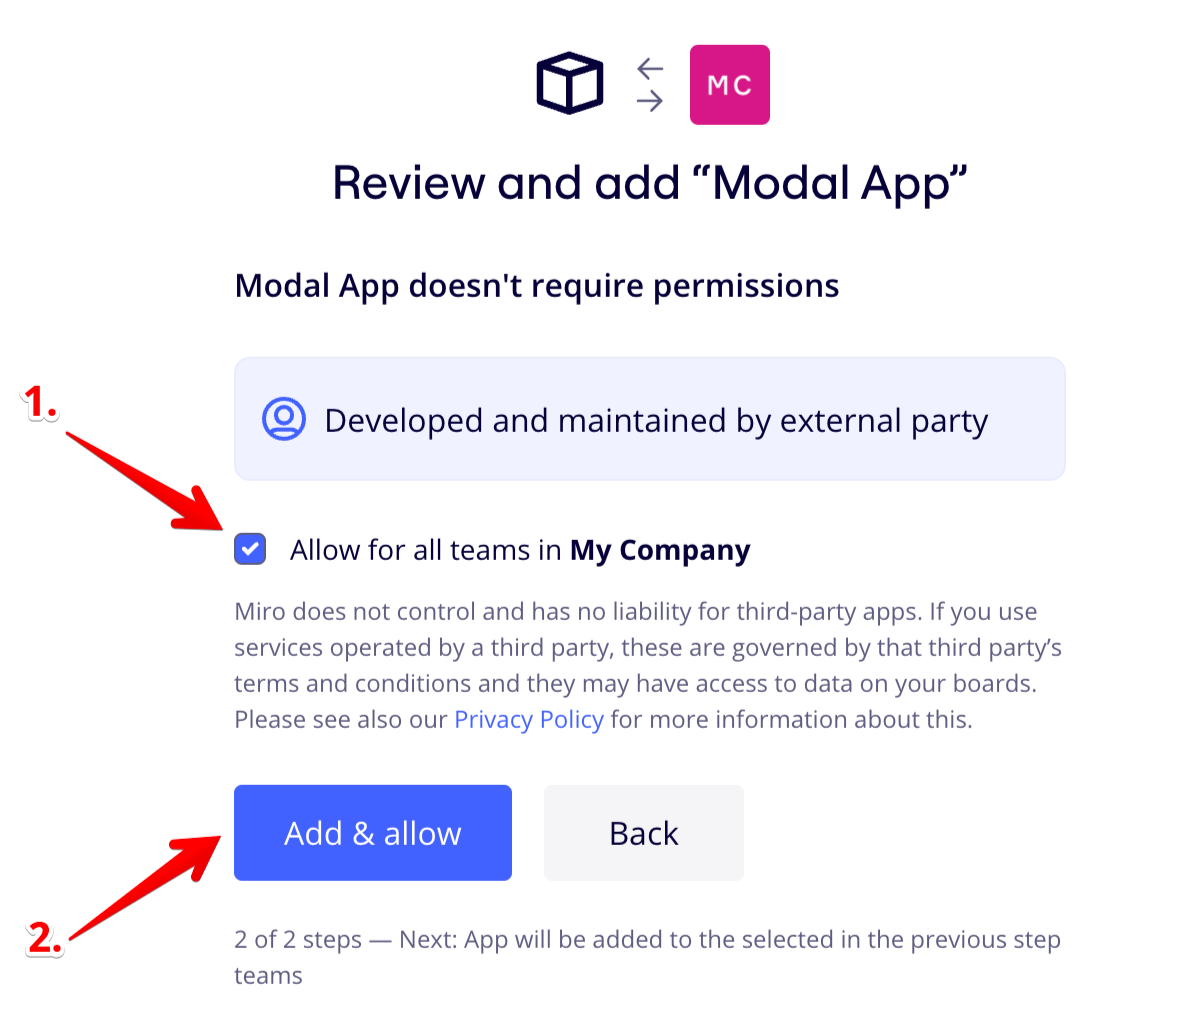
You will receive a message confirming the app has been installed in the selected teams.
The banner/modal pop-up app will check if the user opening a Miro Board has accepted the banner/modal terms every time a board opens on the teams where the app was installed. If the user has not accepted the terms, the banner/modal pop-up appears and will continue to appear until the user accepts the terms.
Updated 4 months ago