Create mind map from CSV
Use the Miro Web SDK to build an app that imports data from a CSV file and automatically creates a mind map on a Miro board.
The Miro Developer Platform allows developers to create apps and integrations on top of Miro that add extra or custom functionality.
Whether it's something creative, useful, or something that allows you and your team to collaborate more efficiently together, Miro’s Developer Platform gives you all the pieces you need to build your next big idea.
Goal
In this guide, we’ll be exploring one of our example apps, which allows you to import data from a CSV file and automatically create a mind map on a Miro board.
Here’s what it will look when we’re done:
Associated Video
Watch the video below for a demo, short code walkthrough, and other ways to use Mind Maps in Miro.
Get started
We’ll be creating this app from the create-miro-app tool, which gives us a starting point with everything we need to build. Additionally, we’ll be creating this app in React and Typescript.
To start, open a terminal session and create a new app by running the following command:
npx create-miro-appSelect the prompts for React, and then Typescript.
This will give us a starting template to start building our app with.
After we’ve got this up and running, we’ll need to set up our developer team in Miro.
Create a Developer team
If you already have a developer team, skip this section and proceed to the Create your app section.
To create apps in Miro, you must first create a developer team. This is a team that allows you to test and build your app without having to worry about it messing up any projects on your main team.
Create your app
After you create a developer team in Miro, you’ll be able to start building apps right from the dashboard.
-
Navigate to your developer team’s dashboard, and click Create app in the upper-right corner of the page.
-
From here, we’ll need to fill in information about our app. As we develop our app, we’ll be developing on
localhost:3000.In the App URL box, add
http://localhost:3000, and then click Save.
- To run your app locally, your web browser must allow the HTTP transport protocol.
- Recommended web browser: Google Chrome
- Apple Safari doesn't allow HTTP so it doesn't allow the app to run locally.
-
Enable required scopes and install app.
a. In the Permissions section, select the boards:read and boards:write check boxes.b. Click Install app and get OAuth token.
c. In the Install app to get OAuth token modal, select your developer team, and then click Add & allow.
Try out the app
You can try out the app by creating a new board in your developer team, and launching the app from the sidebar. If you don’t see your app appear, ensure your app is running by running npm start in your project directory and checking again.
Now that we see the app in Miro, we’re ready to understand the project structure and start building the new app!
Understand the project structure
The following table lists the project structure and some important files we’re using.
| File | Description |
/src/app.tsx | This file contains the structure and logic for our app. We’ll be creating the app’s UI in this file, and calling the Miro SDK to manipulate the board. |
/src/csv-utils.ts | This file contains the code to read and parse the CSV file. |
/src/mindmap.ts | This file contains the code to create a tree structure from the parsed CSV file and generate a mind map from the tree structure using the Miro Web SDK. |
/src/index.ts | This file contains the code to initialize the app when opened from the sidebar. |
/example-data/mindmap.csv | This is the example CSV file with some example data. |
app.html | Miro requires an HTML file in order to work. This file contains the main structure of the app, but since we’re using React, the majority of the code will be located in App.tsx. |
/assets/style.css | The main styles for our app. We’re also going to be using Mirotone for adding elements, but any custom styles can be added here as well. Mirotone is simple to use, and contains a lightweight library of components that match Miro’s UI styles. |
Create the app UI
Our CSV to Mind Map app allows users to select a CSV file or drag and drop a CSV file to import, and click a button to create a mind map on the Miro board. Before we add logic to our app, we’re going to need some UI for the app in the sidebar. Figure 1 illustrates what your app UI looks like when a user clicks your app icon on the sidebar.
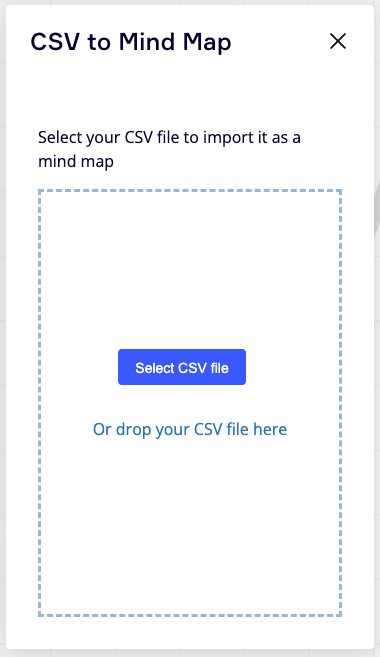
Figure 1. CSV to Mind Map app UI.
Copy and paste the following code into the app.tsx file. Each section provides the comments on what the code is for. Read through the comments to understand each section.
// Import necessary libraries, including React, react-dom/client, react-dropzone, csv-utils, and mindmap.

// `React` is the main library that the app is built on
import * as React from "react";
// `react-dom/client` is used to create a root node for the React app
import { createRoot } from "react-dom/client";
// `useDropzone` is a hook from a library called `react-dropzone` that enables drag-and-drop file uploading
import { useDropzone } from "react-dropzone";
// `parseCsv` and `createMindmap` are functions from custom modules that are used to parse the CSV file and generate a mind map, respectively
import { parseCsv } from "./csv-utils";
import { createMindmap } from "./mindmap";

// Defines a constant called `dropzoneStyles`, which contains a set of styles for the drag-and-drop area where the user can upload their CSV file. These styles are later applied to the drop zone container element.
const dropzoneStyles = {
  display: "flex",
  height: "100%",
  flexDirection: "column",
  justifyContent: "center",
  textAlign: "center",
  border: "3px dashed rgba(41, 128, 185, 0.5)",
  color: "rgba(41, 128, 185, 1.0)",
  fontWeight: "bold",
  fontSize: "1.2em",
} as const;

// The `App` component is defined using the `React.FC` type. This component sets up the `files` state using `useState` hook, which tracks the uploaded CSV files. It also uses the `useDropzone` hook to enable drag-and-drop file uploading. When a file is dropped into the drop zone, the `onDrop` callback is fired, which sets the uploaded file to the `files` state.
const App: React.FC = () => {
  const [files, setFiles] = React.useState<File[]>([]);
  const dropzone = useDropzone({
    accept: {
      "text/csv": [".csv"],
    },
    maxFiles: 1,
    onDrop: (droppedFiles) => {
      setFiles([droppedFiles[0]]);
    },
  });

// The `handleCreate` function is defined, which is called when the user clicks the "Create Mind Map" button. This function iterates through each of the uploaded files, parses their contents using the `parseCsv` function, and generates a mind map using the `createMindmap` function. If there is an error while parsing or creating the mind map, the file is added to the `failed` array and an error is logged to the console. Finally, the `files` state is reset to an empty array.
  const handleCreate = async () => {
    const failed = [];
    for (const file of files) {
      try {
        const contents = await parseCsv(file);
        await createMindmap(contents);
      } catch (e) {
        failed.push(file);
        console.error(e);
      }
    }

    setFiles([]);
  };

// The `style` constant is defined using the `useMemo` hook, which generates a style object for the drop zone container element based on the `dropzoneStyles` constant and the state of the `useDropzone` hook. The `isDragAccept` and `isDragReject` properties are used to change the border color of the container element when a file is being dragged over it.
  const style = React.useMemo(() => {
    let borderColor = "rgba(41, 128, 185, 0.5)";
    if (dropzone.isDragAccept) {
      borderColor = "rgba(41, 128, 185, 1.0)";
    }

    if (dropzone.isDragReject) {
      borderColor = "rgba(192, 57, 43,1.0)";
    }
    return {
      ...dropzoneStyles,
      borderColor,
    };
  }, [dropzone.isDragActive, dropzone.isDragReject]);

// The `return` statement of the `App` component contains the JSX code that defines the UI of the app. It contains a `div` element with the class `dnd-container`, which contains a paragraph with instructions on how to upload a CSV file. The `div` element also contains the drop zone container element, which is created using the `getRootProps` and `getInputProps` functions provided by the `useDropzone` hook. If a file is being dragged over the drop zone, the text changes to "Drop your CSV file are here". Otherwise, a button and a text element appear that tell the user to either select a file or drop it into the container.
  return (
    <div className="dnd-container">
      <p>Select your CSV file to import it as a mind map</p>
      <div {...dropzone.getRootProps({ style })}>
        <input {...dropzone.getInputProps()} />
        {dropzone.isDragAccept ? (
          <p className="dnd-text">Drop your CSV file are here</p>
        ) : (
          <>
            <div>
              <button
                type="button"
                className="button button-primary button-small"
              >
                Select CSV file
              </button>
              <p className="dnd-text">Or drop your CSV file here</p>
            </div>
          </>
        )}
      </div>
      {files.length > 0 && (
        <>
          <ul className="dropped-files">
            {files.map((file, i) => (
              <li key={i}>{file.name}</li>
            ))}
          </ul>

          <button
            onClick={handleCreate}
            className="button button-small button-primary"
          >
            Create Mind Map
          </button>
        </>
      )}
    </div>
  );
};

// The `container` and `root` constants are defined and the `App` component is rendered to the root node using the `createRoot` function from the `react-dom/client` library.
const container = document.getElementById("root");
const root = createRoot(container!);
root.render(<App />);
Create a sample CSV file to import
Create a CSV named mindmap.csv file with the following data. Each row in the CSV file represents a path from the root node of a mind map to a child node.
| 0 | 1 | 2 |
|---|---|---|
| Miro Mind Map | Use cases | Brainstorm |
| Miro Mind Map | Use cases | Structure research results |
| Miro Mind Map | Use cases | Design information architecture |
| Miro Mind Map | Use cases | Plan projects |
| Miro Mind Map | Use cases | Create org charts |
| Miro Mind Map | Use cases | Develop sales strategies |
| Miro Mind Map | Use cases | Analyze problems |
| Miro Mind Map | Robust collaborative features | Real-time collaboration |
| Miro Mind Map | Robust collaborative features | Endless canvas |
| Miro Mind Map | Robust collaborative features | Comments |
| Miro Mind Map | Robust collaborative features | Video chat |
| Miro Mind Map | Robust collaborative features | Presentation mode |
| Miro Mind Map | Robust collaborative features | High resolution export |
| Miro Mind Map | Mind mapping features | Different themes |
| Miro Mind Map | Mind mapping features | Keyboard shortcuts |
| Miro Mind Map | Mind mapping features | Auto arrange |
| Miro Mind Map | Mind mapping features | Links to anything |
Read and parse the CSV file
Create a new file named csv-utils.ts in the src folder, and then copy and paste the code below to read and parse the CSV file. This is a module that exports a function called parseCsv. The function takes a single argument, a File object representing a CSV file, and returns a promise that resolves to a parsed representation of the CSV data.
The parseCsv function uses the readFile function to asynchronously read the contents of the file, and then uses the csvParse function from the d3-dsv library to parse the CSV data into an array of objects.
The readFile function is defined using the FileReader API to asynchronously read the contents of the file as a text string. The readFile function returns a promise that resolves to the file contents, or rejects with an error message if there is a problem reading the file.
import { csvParse } from "d3-dsv";

const readFile = (file: File): Promise<string> =>
  new Promise((resolve, reject) => {
    const reader = new FileReader();
    reader.onload = (e) => {
      if (!e.target) {
        reject("Failed to load file");
        return;
      }

      resolve(e.target.result as string);
    };
    reader.onerror = (e) => {
      reject("Failed to load file");
    };

    reader.onabort = (e) => {
      reject("Failed to load file");
    };
    reader.readAsText(file, "utf-8");
  });

export const parseCsv = async (file: File) => {
  const str = await readFile(file);
  return csvParse(str);
};
Create tree structure from parsed CSV
Create a new file named mindmap.ts in the src folder, and then copy and paste the code below to create a tree structure from a parsed CSV file.
The following code exports a function called createGraph that takes an array of rows in CSV format and returns a graph representation in a tree-like format that can be directly to SDK method.
The function iterates over every cell of every row. In order to allow duplicate texts in different columns of CSV, we create a key that is based on column and the contents of a cell. Then we check if an item is already visited. If it is visited, we set the item in current iteration as our parent, then go to the next iteration. If an item is not visited, we check if an item has a parent. If it does not have a parent (i.e it is the first column), we set the item as the root node. If it does have a parent, we add the item as a child of the item. The function returns the root node.
import { DSVRowArray } from "d3-dsv";

/**
 * Create graph from CSV rows
 *
 * @param contents CSV rows
 * @returns Schema that can be directly passed to createMindmapNode
 */
const createGraph = (contents: DSVRowArray<string>) => {
  let root: Node | undefined;

  const visited: Record<string, Node> = {};

  for (const row of contents) {
    let parent = undefined;
    for (const col of contents.columns) {
      const value = row[col]!;

      const key = `${col}-${value}`;

      if (!visited[key]) {
        const node = { nodeView: { content: value }, children: [] };
        visited[key] = node;

        if (parent) {
          parent.children.push(visited[key]);
        } else {
          root = node;
        }
      }

      parent = visited[key];
    }
  }

  return root;
}
Use the Miro Web SDK to create mind map from the tree structure
Add the following code to the mindmap.ts file to create a mind map from the tree structure.
The following code exports a function called createMindmap, which takes CSV rows as input. It creates a graph representation of the data using the createGraph function and passes the result to miro.board.experimental.createMindmapNode function to create the mind map.
/**
 * Create mindmap from CSV rows
 *
 * @param contents CSV rows
 */
export const createMindmap = async (contents: DSVRowArray<string>) => {
  const root = createGraph(contents);
  await miro.board.experimental.createMindmapNode(root);
};
Let's wrap up
You created an app that allows you to import data from a CSV file and automatically create a mind map on a Miro board.
The Miro Developer Platform allows you to create all kinds of fun, useful apps and integrations. It’s flexible enough to let you build what you want, while being powerful enough to support essential workflows for you or your team.
We have many more examples of other apps and ideas you can build: check Miro App Examples to find more.
Updated 4 months ago