Enable running apps as instant apps
Apps that use only the Miro Web SDK and that don't need OAuth are on a fast-lane to reach Miro users.
Instant app is available for apps that:
- Use only the Miro Web SDK.
- Don't require redirect URLs to implement OAuth authorization.
Goals
- Reduce friction and accelerate app adoption among board users.
- Make it easier for board users to run your app.
Video 1. When users run the app for the first time, they are prompted to grant the required app permissions. Then, they can start using the app right away.
Prerequisites
Before you begin, ensure that you have the following prerequisites:
- You have a Developer team.
- Your development environment includes Node.js 14.15 or a later version.
- To run your app locally, your web browser must allow the HTTP transport protocol.
Recommended web browser: Google Chrome
Apple Safari doesn't allow HTTP; therefore, it doesn't allow the sample app to run locally.
Step 1: create your app in Miro
You don't need to start from scratch to create your app:
- Start from our boilerplate app.
- Clone and customize one of our sample apps.
-
Sign in to Miro, and then click your user account avatar.
-
From the drop-down menu, select Settings.
-
In the app settings view, click the Your apps tab.
-
In the Your apps view, click + Create new app.
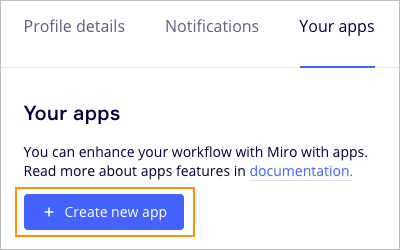
Figure 1. To start creating a new app from your app settings, click + Create new app. -
On the Create new app modal:
- In the App name input field, enter the name of your app.
For example: Hello world. - Click Create app.
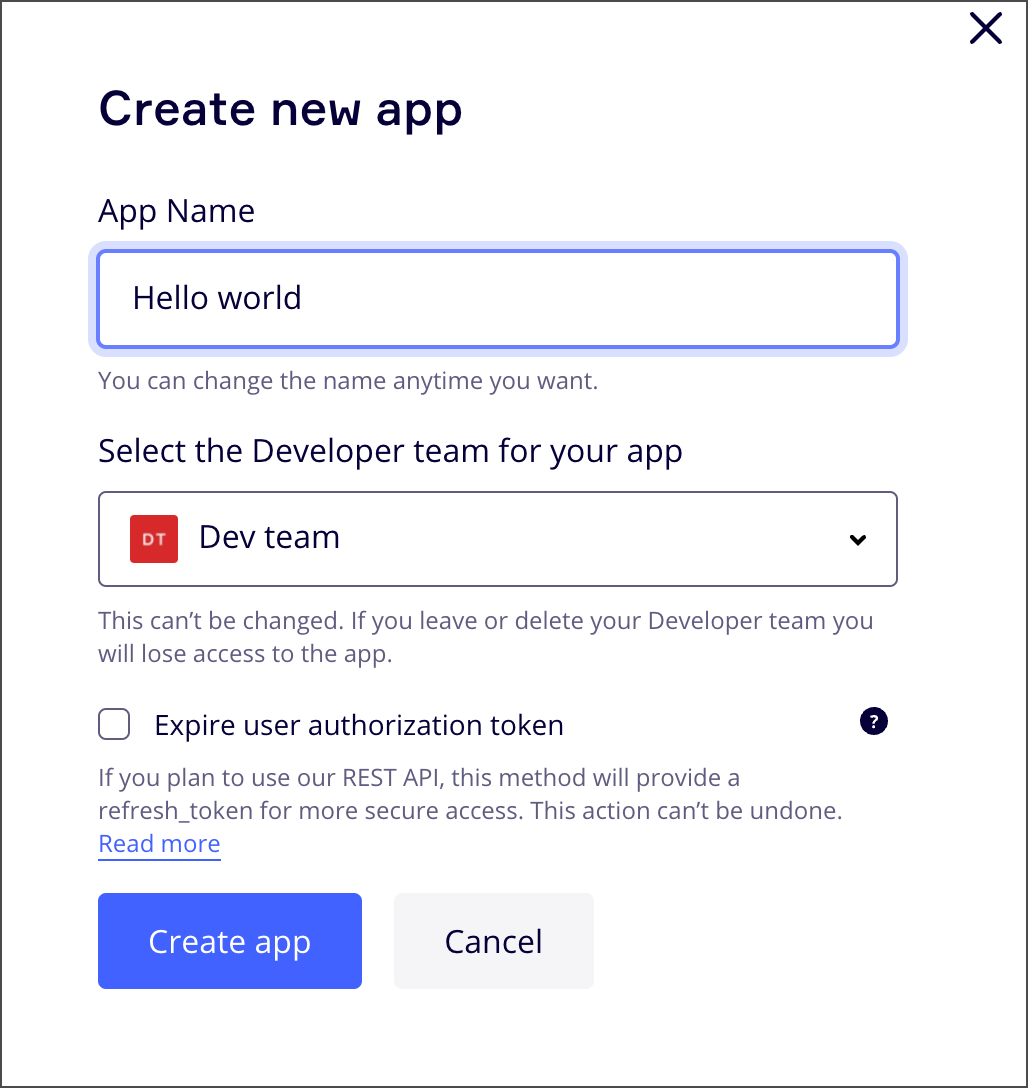
Figure 2. On the Create new app modal, give the app a name and assign it to a team.
- In the App name input field, enter the name of your app.
Step 2: configure your app in Miro
Since your app doesn't use redirect URLs, don't assign any values to the following properties in the app manifest:
You can configure your app in one of the following ways:
- Edit the plain text app manifest in the online editor.
- Select the appropriate options in the app settings UI.
This step described how to configure your app using the app manifest editor.
-
On the app settings page, click Edit in Manifest.
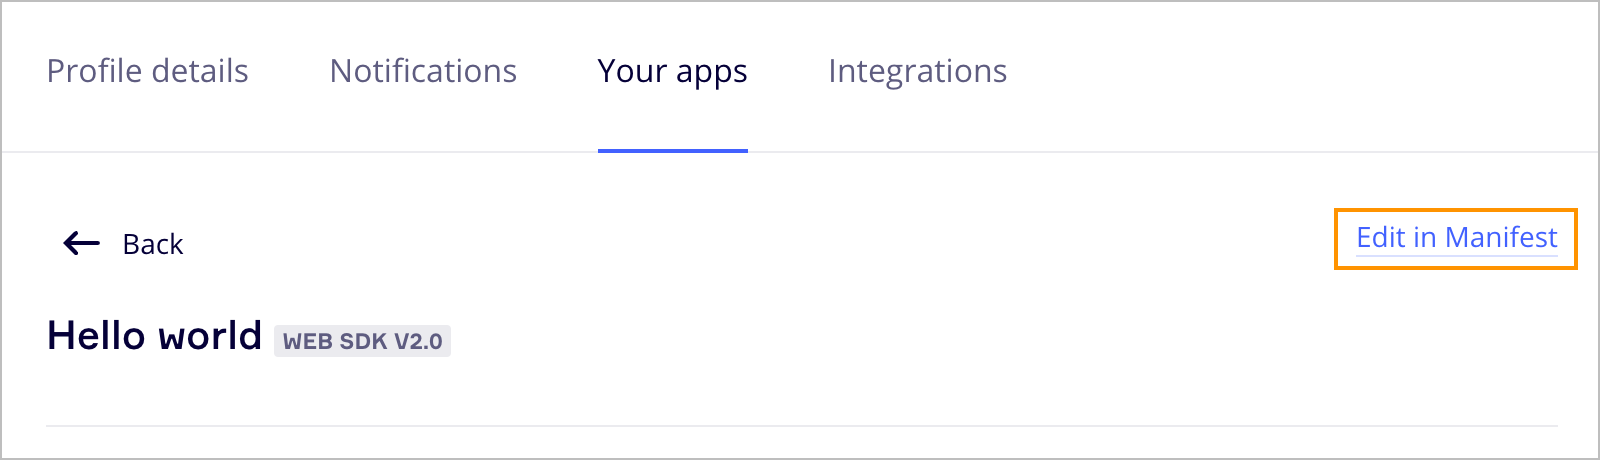
Figure 3. Click Edit in Manifest to open the app manifest editor. -
In the app manifest editor, set at least the following properties:
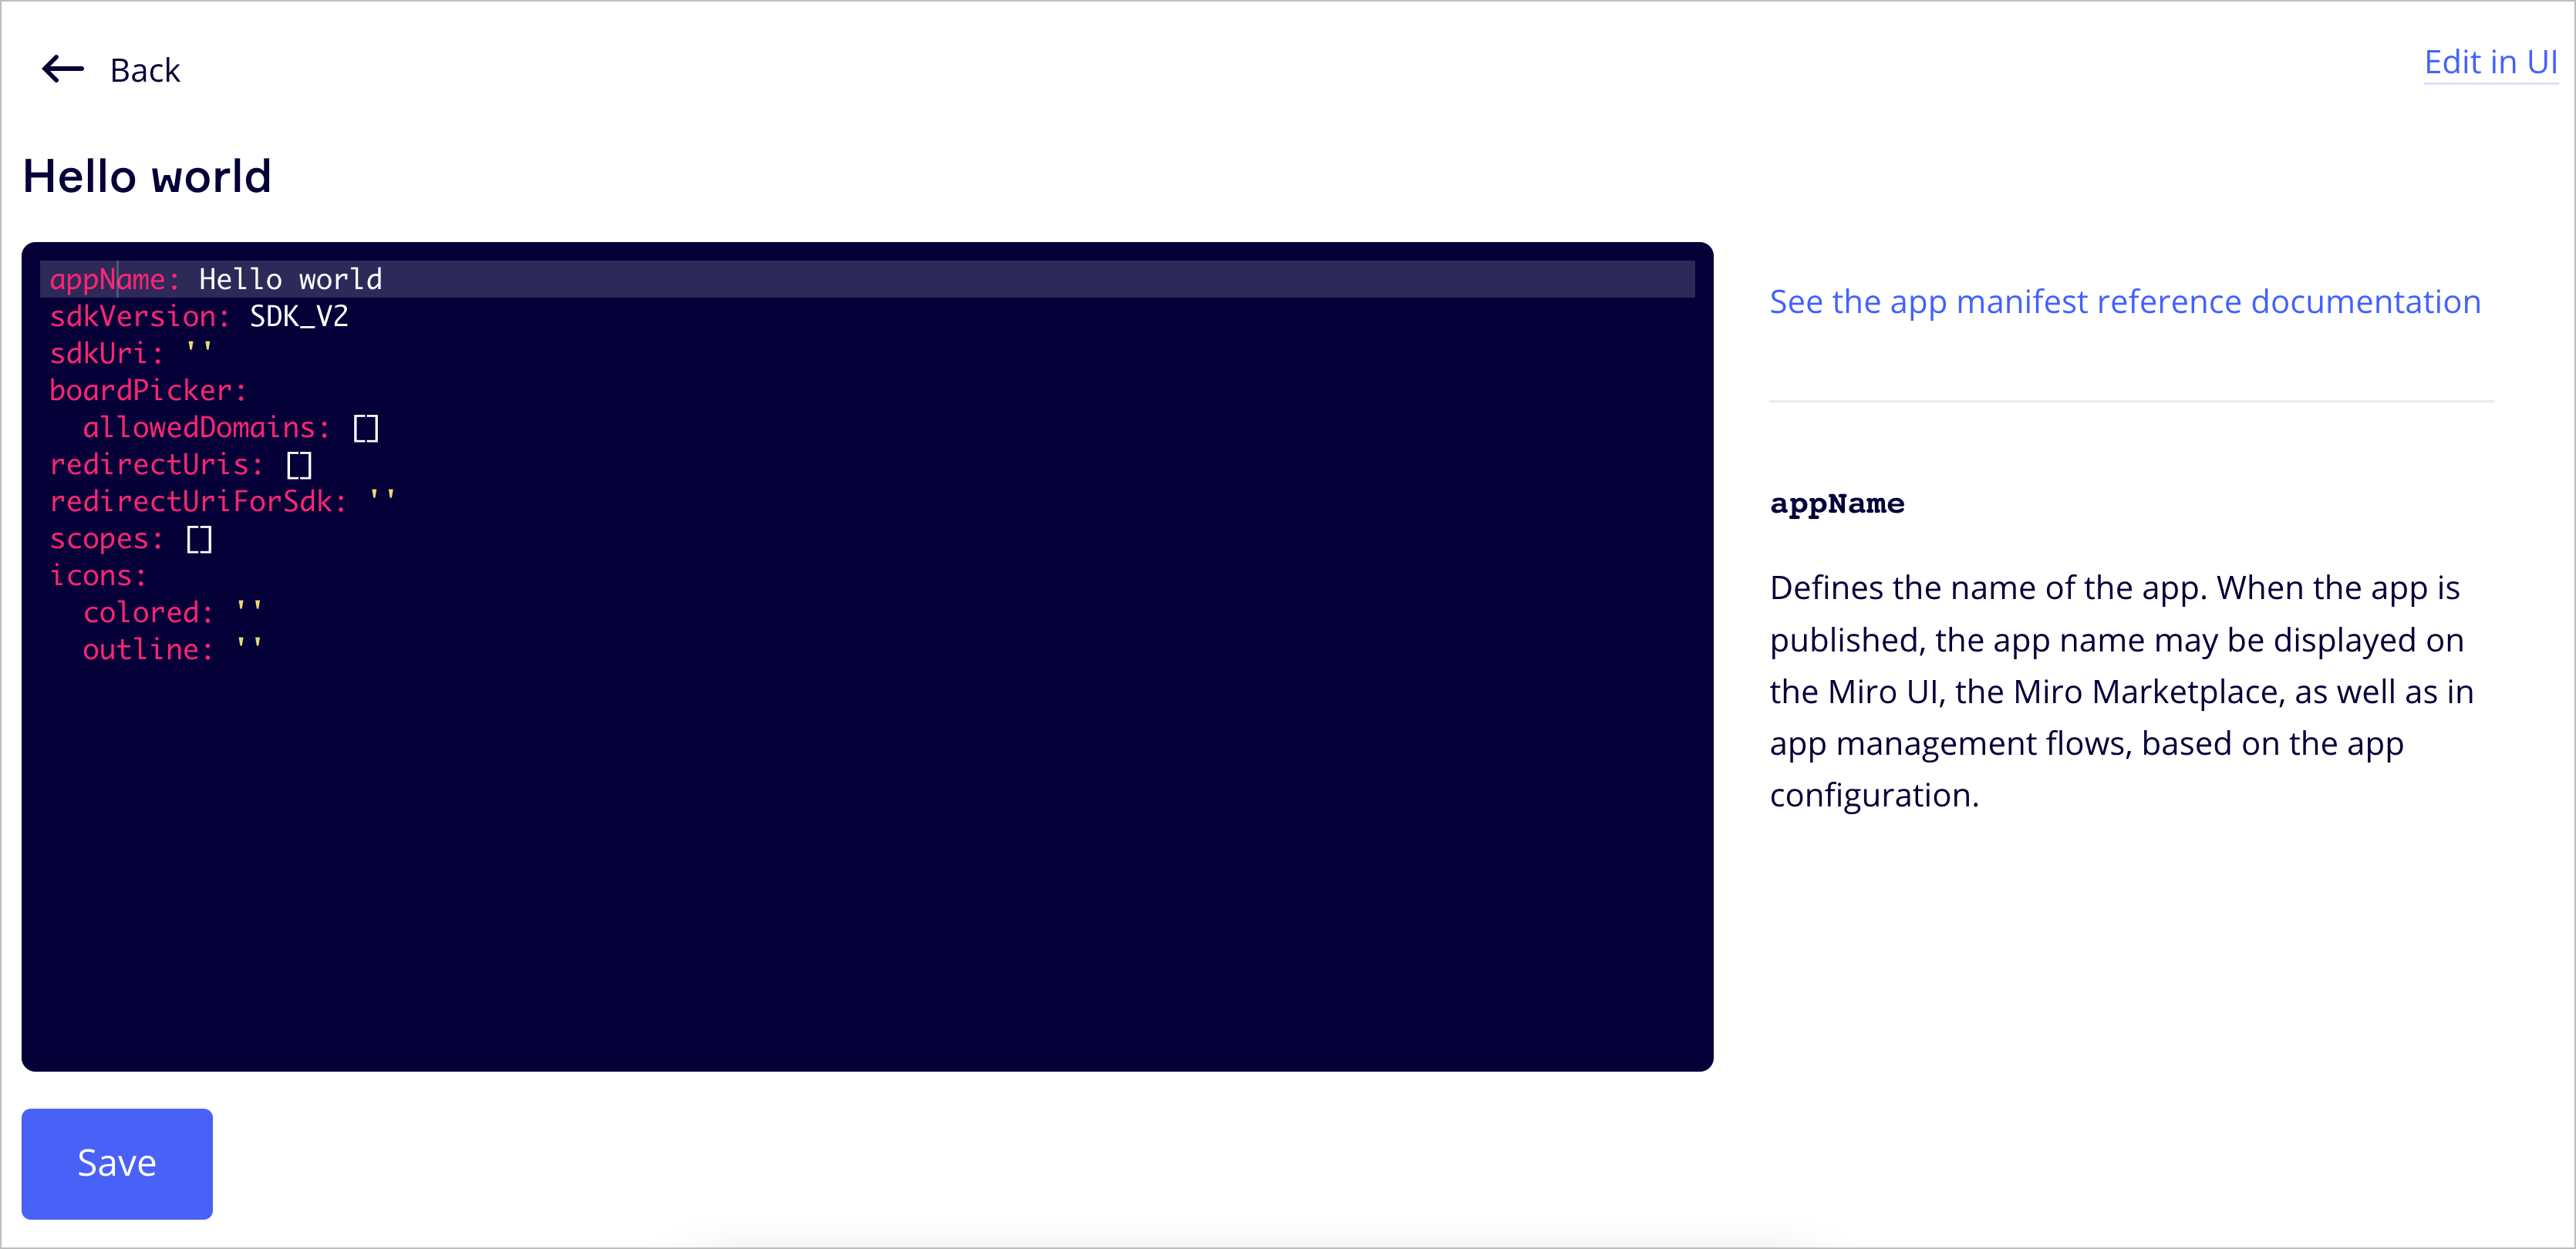
Figure 4. Configure your app by editing the app manifest.-
appName: the name of the app that you entered in the App name input field, on the Create new app modal. -
sdkVersion: the field is pre-populated with theSDK_V2value.
The app is configured to use the Miro Web SDK version 2.0.
After setting the target Web SDK version to 2.0, it's not possible to change this property. -
sdkUri: enter the URL of the server hosting your app.
Required only for apps that use the Web SDK.
To enable rendering the app on a board, specify the URL pointing to your app on the server that hosts it.
The protocol must be HTTPS.Public vs private app URL- If you're developing locally, you can use
localhostand HTTP.
Example:http://localhost:3000/ - If you set a URL that is part of a LAN or a VPN, the app is available to all users who can access the LAN or VPN.
In this case:- The app isn't publicly available through the internet.
- It's not possible to register Miro webhooks with a non public URL.
- If you set a URL that is publicly accessible on the internet, the app is available to any users who can access the URL.
In this case:- The app is publicly available through the internet.
- It is possible to register Miro webhooks with a public URL.
- If you're developing locally, you can use
-
scopes: the Miro REST API and the Web SDK implement user access control through scopes.
Scopes define the permissions your app requires to interact with a board and to work as designed.
When users install your app, they are prompted to provide consent for the required scopes.
For example, to enable your app to read from and write to the board, specify the following permissions:boards:readboards:write
-
icons:colored: enter the<svg .../>contents of your app's monochrome icon.outline: enter the<svg .../>contents of your app's full-color icon.
-
-
Once done, save your settings by clicking Save.
-
To go back to the app settings UI and proceed with the app installation, in the top-right corner of the page click Edit in UI.
Step 3: install your app
In the app settings UI, do the following:
-
Under Permissions, click Install app and get OAuth token.
-
On the Install app to get OAuth token dialog:
-
In the Select a team list, select Dev team.
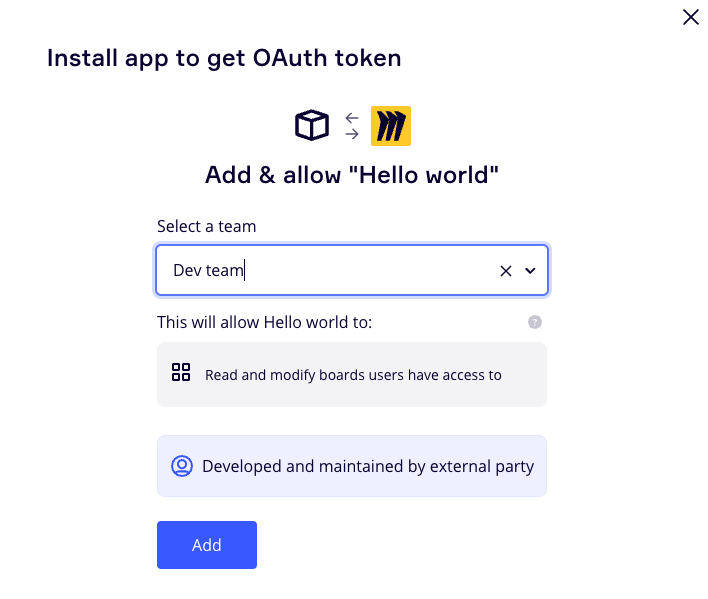
Figure 5. Install app to get OAuth token dialog. -
Click Install & authorize.
A message notifies you that the app is installed.
If you're using only the Miro Web SDK ignore the access token information.

Figure 6. Installation confirmation and tokens. -
Click Close.
-
Run the app for the first time
This configuration enables the following scenario for your app users:
- They can discover your app on the Discover tab on the app toolbar panel.
- When they click Run for the first time:
- They need to grant the app the required permissions.
- They can start using the app right away.
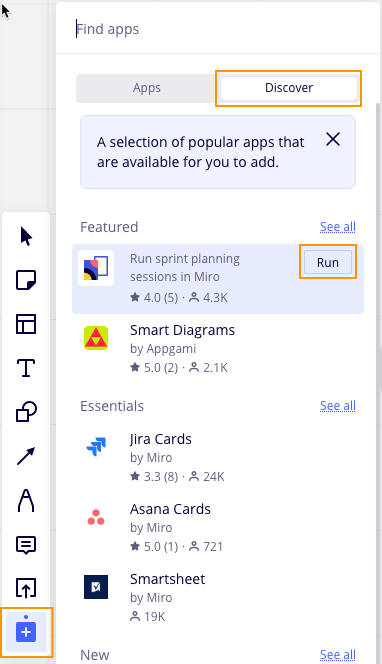 | 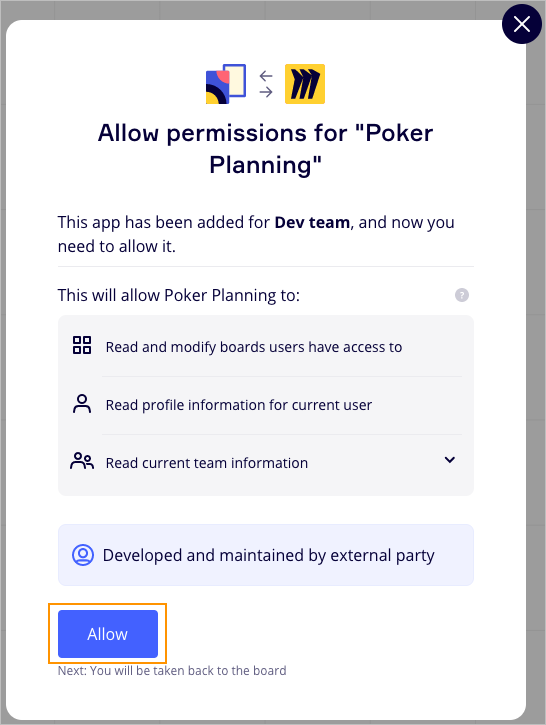 |
Figure 7. Users click More apps, Discover, and Run to start using the app. When they click Run for the first time, users grant the required app permissions, and then they can start using the app right away.
Run vs Connect
If your app uses the Miro REST API, or if it initiates the OAuth authorization flow, when users click the button for the first time, the Run caption changes to Connect.
When users click Connect, they initiate a standard OAuth authorization code grant flow, where they:
- Select a target team to install the app to.
- Grant the app the required permissions.
- Install the app so that they can start using it.
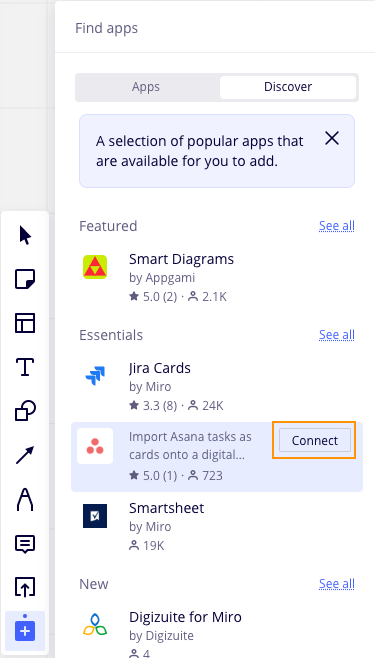 | 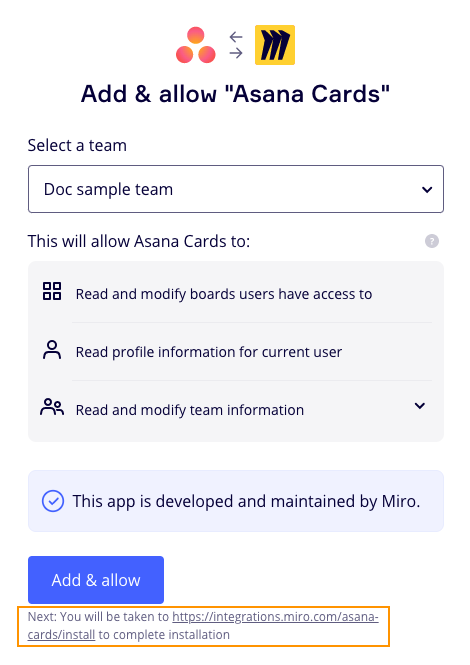 |
Figure 8. If your app uses the Miro REST API, or if it initiates the OAuth authorization flow, the Run button caption changes to Connect. Users need to select a team to install the app to and grant the required app permissions. Then, they are redirected to the redirect URL target to complete the app installation.
See also
- Build your first Hello, World app with the Miro Web SDK 2.0
- Check Miro App Examples on GitHub
- App manifest reference
Updated 4 months ago