Securely manage boards and teams at scale
Administrators can use Miro's Team API to manage user and team access rights in large organizations.
This tutorial is relevant for you if:
- Your organization is on an Enterprise plan.
- A user with a company administrator role on a Miro Enterprise account has been granted access to the Teams API. Only company administrator roles can access the Teams API.
While you're developing locally, you can use a non-expiring OAuth token.
However, in a production environment we recommend using expiring OAuth tokens to increase security.
Managing users and teams is simple enough for small groups. However, as teams scale up and add new members, it becomes challenging to manage them manually. Miro's Teams API allows large enterprise organizations with many employees to collaborate effectively by enabling administrators to manage users and teams.
Using API calls, administrators can create, update, delete, and manage teams, and set audit permissions at the team level.
This tutorial shows you how to use the Teams API together with Node.js to automate common workflows in large groups.
The app code is available on our GitHub repo.
Prerequisites
Before you begin, ensure that you satisfy the following prerequisites:
- To request Team's API access, you need to have a company administrator role on a Miro Enterprise account.
- Your development environment includes Node.js 14.15 or a later version.
- Your Miro Enterprise account has a Miro Developer team to create and test apps without affecting production boards.
Create and configure a Miro app
- To create a new app, click + Create new app under Your apps.
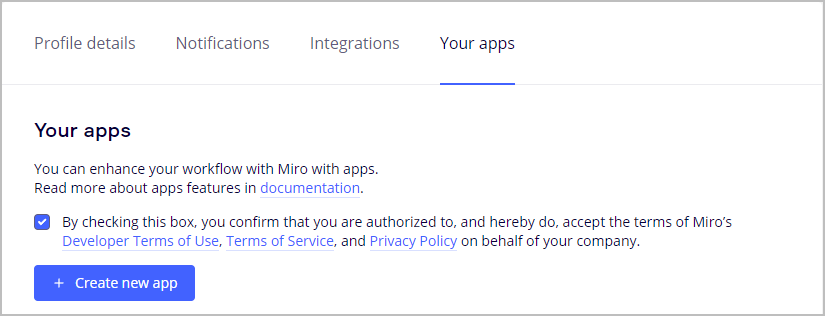
Figure 1. The Your apps view with the + Create new app button.
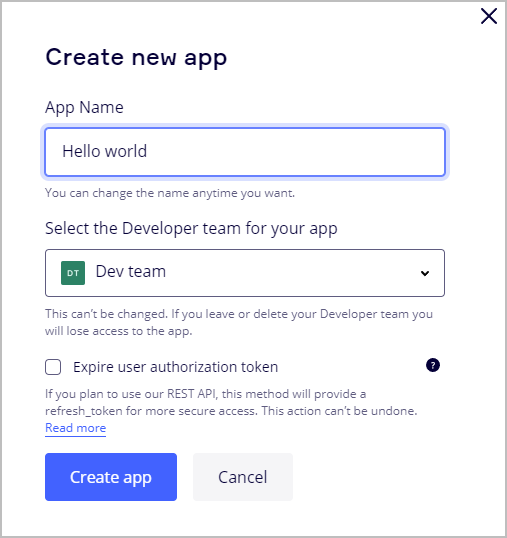
Figure 2. The Create new app modal with the Create app button.
- In the newly created app settings view, go to Permission, and select the following permissions to enable them:
- boards:read
- boards:write
- identity:read
- organizations:read
- organizations:teams:read
- organizations:teams:write
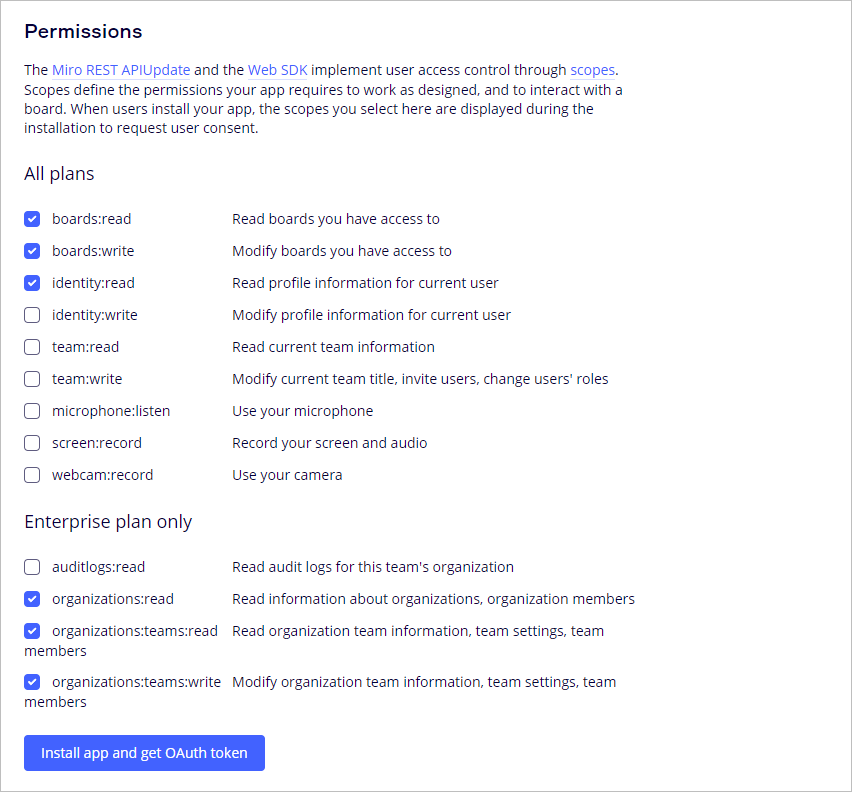
Figure 3. Select the checkboxes corresponding to the permission that you want to enable.
- Click Install app and get OAuth token.
- Select the developer team that you want to install the app for, check the permissions that the app requests, and then click Install & authorize to obtain an OAuth token.
Save this token, because you’ll need it later.
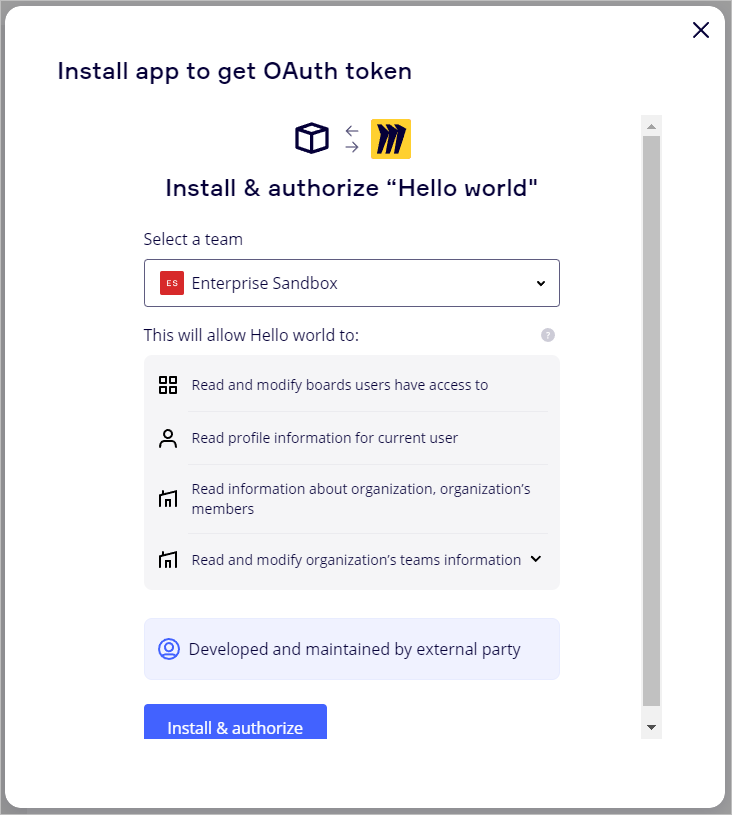
Figure 4. Review the app permissions, and then install the app to get an OAuth token.
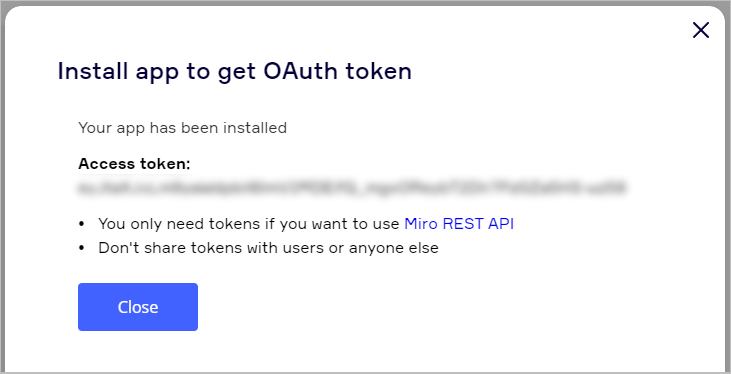
Figure 5. The access token displayed on the Install app to get OAuth token modal is the access token that you need to save for later use.
- Go to the top of the app settings view, and note down Client ID and Client secret, as you'll need them later.
Set up the Node.js project
This tutorial uses node-fetch, so that you can use the example code within a browser’s JavaScript code. Alternatively, you can call the API using your preferred Web request library.
Now, you'll create a Node.js app that calls the Miro APIs to create and manage boards and teams programmatically.
The app code is available on our GitHub repo.
-
Create a directory for your project.
-
In the newly created directory, open a terminal session, and then run:
npm init -y -
Install the dependencies for the project, so that you can start a node server and make Web requests to the REST API, by executing:
npm install dotenv @mirohq/miro-api
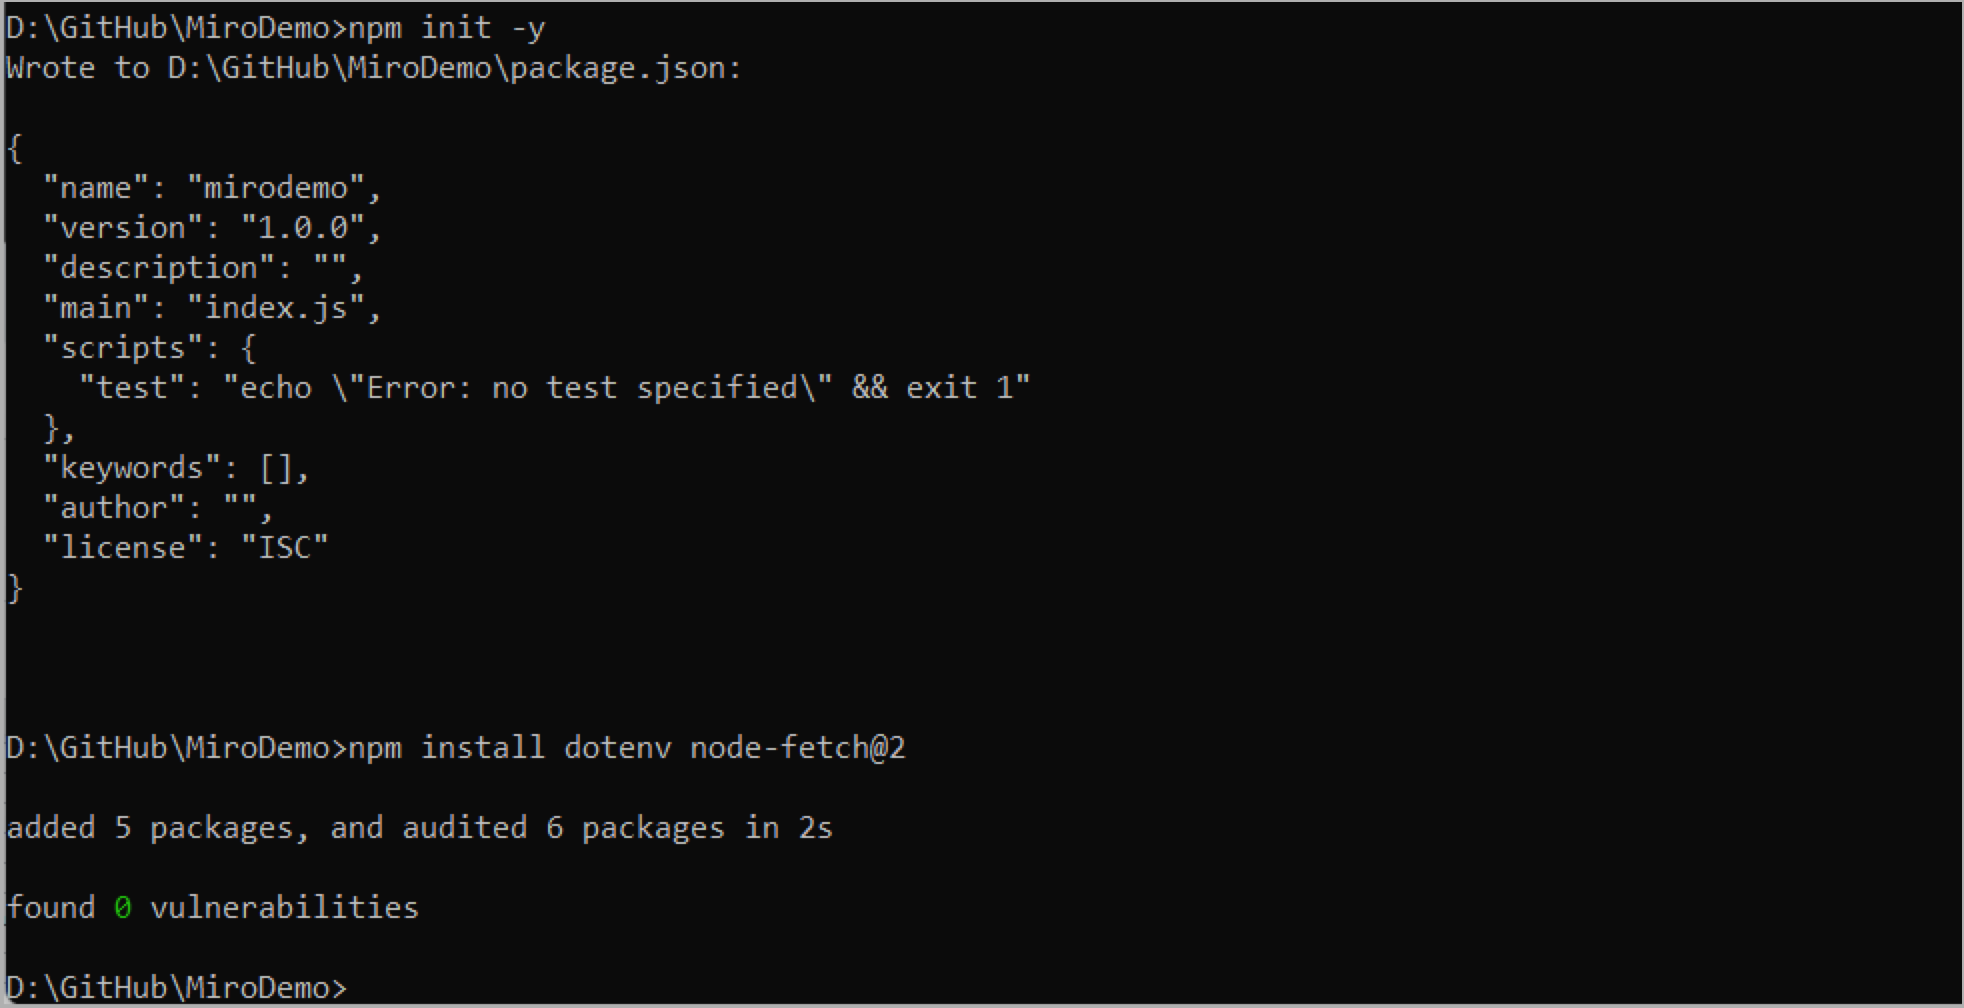
Figure 6. The output of the commands to create a package.json file and to install the dependencies, as printed to the terminal.
-
In the project root directory, create a
.envfile.
Populate the file with the OAuth access token that you saved earlier.ACCESS_TOKEN=<YOUR-APP-OAUTH-ACCESS-TOKEN> -
Then, in the project root directory create an
index.mjsfile to store the logic for your board and team management. Add the following code:import {config} from "dotenv" import {MiroApi} from "@mirohq/miro-api" config(); const api = new MiroApi(process.env.ACCESS_TOKEN)
Miro Teams API examples
Now you’re ready to use the Teams API to automatically create and manage boards and teams for different scenarios.
Let's explore some typical use cases.
Retrieve current information from Miro
Start by making API calls to get information about your access token, organization, teams, and boards.
Add the following code to index.js:
(async () => {
  // 1. Retrieving Current Information from Miro
  const tokenInfo = await api.tokenInfo();
  console.log(tokenInfo);

  const orgInfo = await api.getOrganization(tokenInfo.organization.id);
  console.log(orgInfo);
  const teamInfo = await orgInfo.getTeam(tokenInfo.team.id)
  console.log(teamInfo);
  for await (const board of teamInfo.getAllBoards()) {
    console.log(board)
  }
})();
This code logs to the console information about your board in JSON format. It includes IDs, ownership, and permissions policies. These details about the board and your teams help you manage them appropriately.
Create and invite teams in the organization
The next step is to create different teams inside your organization. For example, let’s suppose that you need to assign employees to different teams, such as product development or product marketing.
Instead of manually creating each team and adding each employee to the corresponding team, you can use the API and add them programmatically from a list.
Add the following code to index.js:
 // 2. Creating and inviting teams in the organization
  const allTeams = [
    {
      name: "The Development Team",
      employees: ["[email protected]", "[email protected]"],
    },
    {
      name: "The Marketing Team",
      employees: ["[email protected]", "[email protected]"],
    },
  ];

  const org = api.getOrganization(tokenInfo.organization.id)

  allTeams.forEach(async (team) => {

    // Create the team
    const team = await org.createTeam({name: team.name})

    // Invite members
    team.employees.forEach(async (email) => {
      console.log("Inviting team member: " + email);

      await team.inviteTeamMember({
          userEmail: email,
      })
    });
  });
To view the list of teams you created and the members you invited to join the teams, run this code with the following command:
node index.mjs
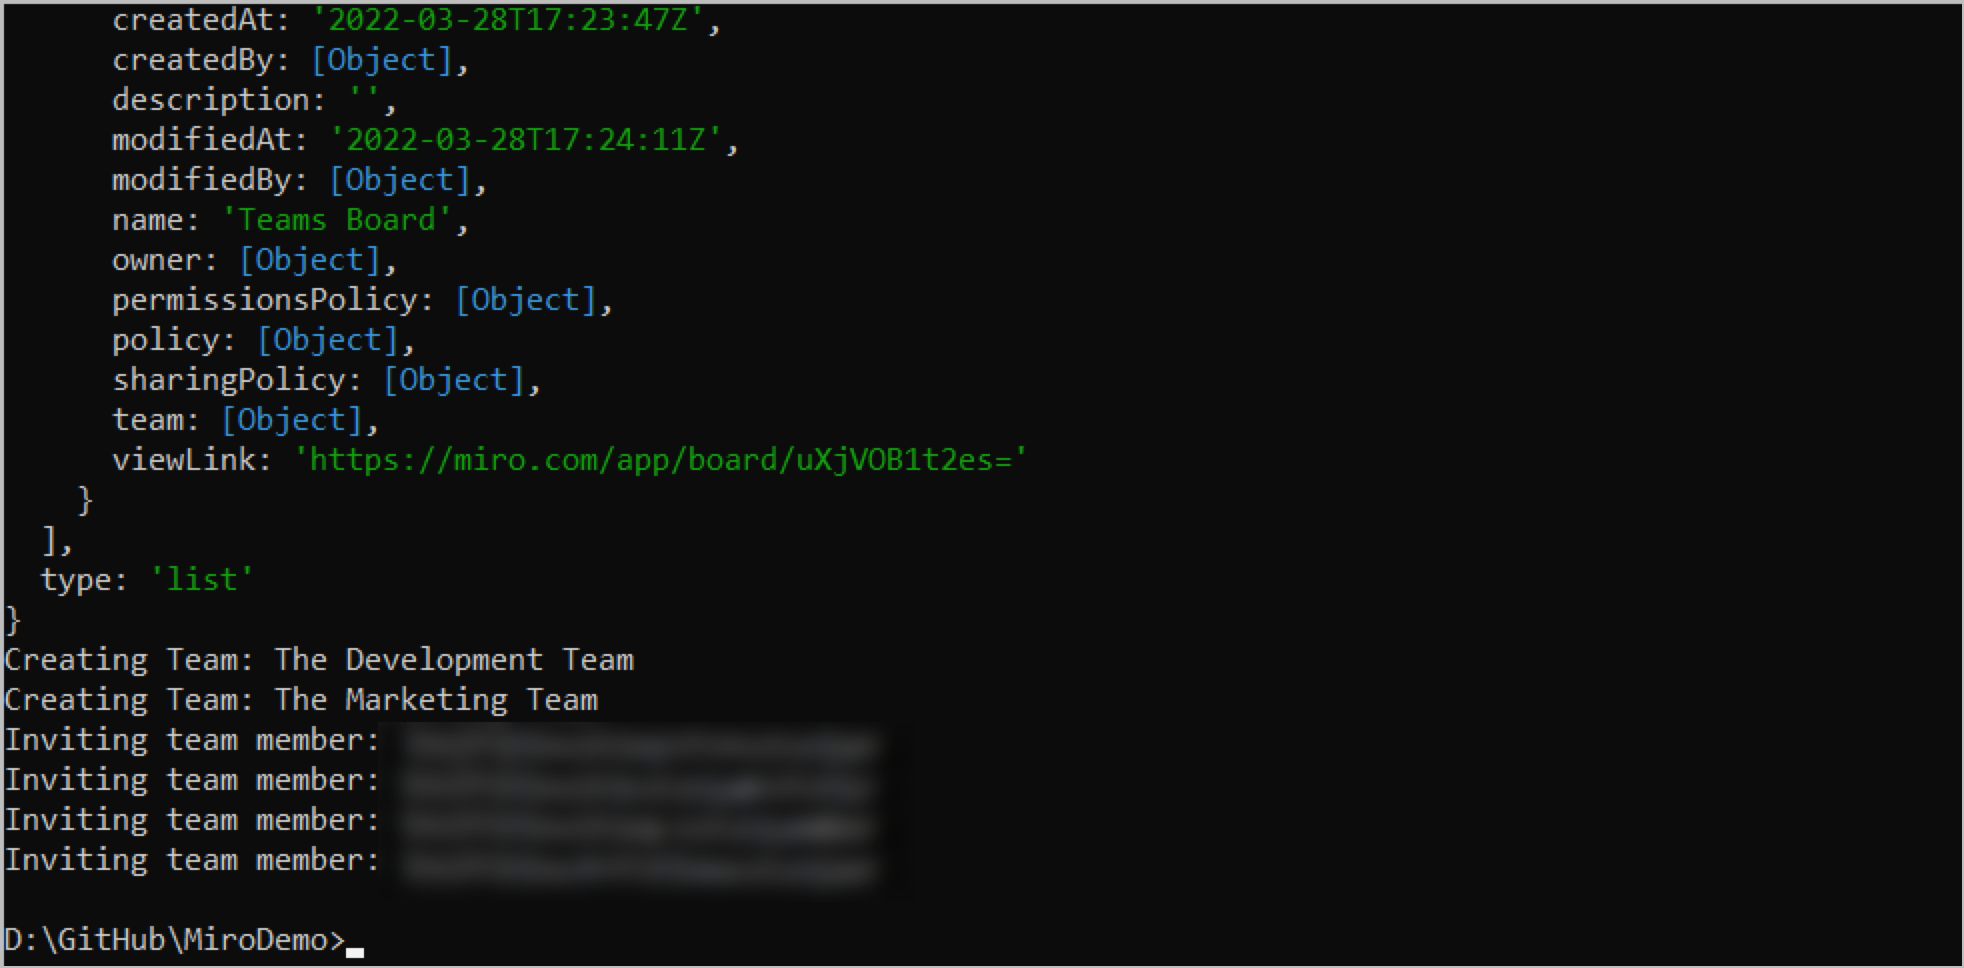
Figure 7. List of teams created and members invited, as printed to the terminal.
If you check your Company teams view page in your Miro profile settings, you can see the teams with the team members that you added programmatically.
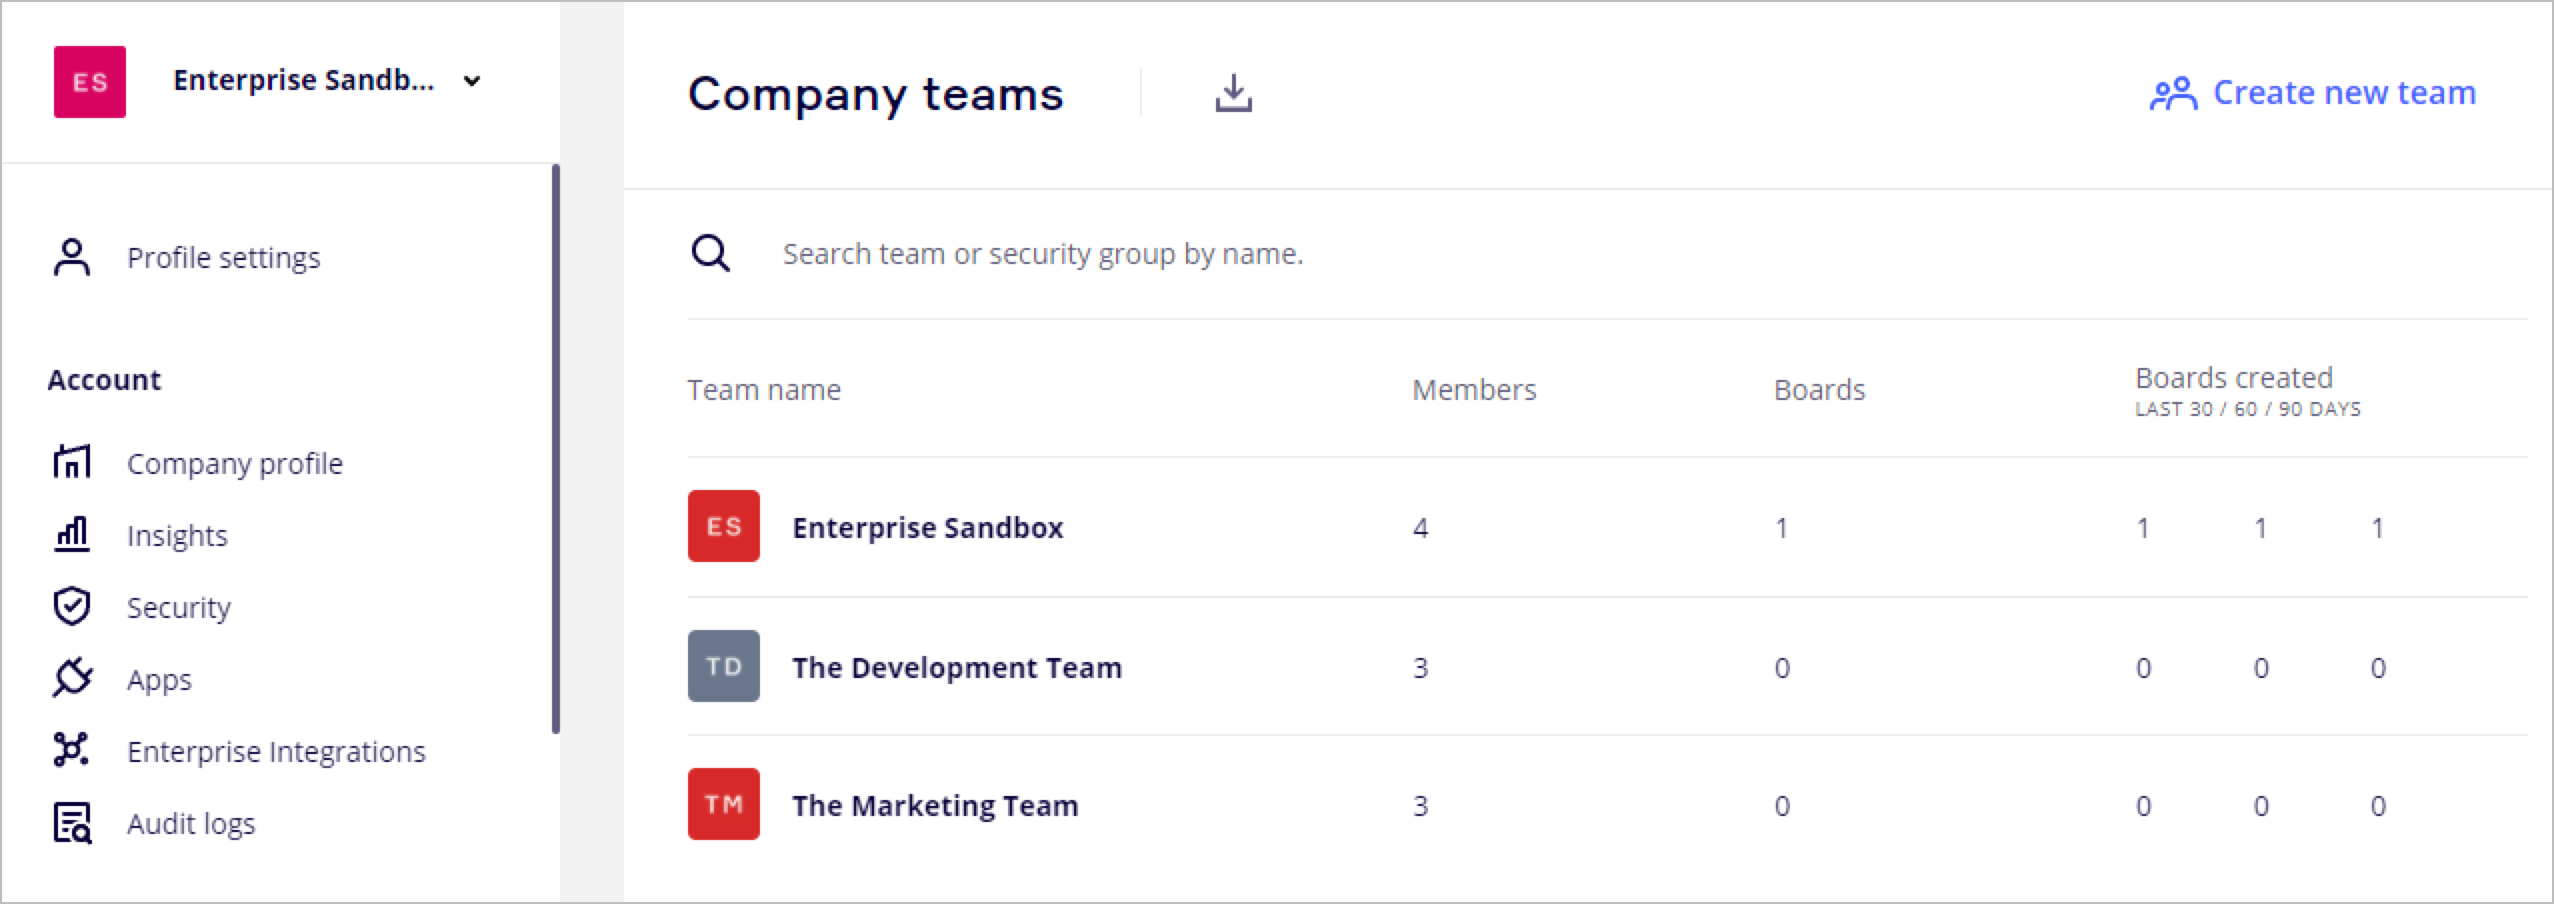
Figure 8. Company teams view showing the teams and team members your code produced.
Create starter boards for your current team
Now that you’ve invited employees to join their teams, it’s time to make it easy for them to create boards on Miro. Use the board endpoints to create a few boards and to add a friendly note for your team.
Your requests to these APIs must always include the OAuth token generated for your team when you installed the app.
Add the following code to index.mjs:
// 3. Creating starter boards for your current team
  console.log("Creating a todo board");

  const todoBoard = await api.createBoard(
  const todoBoard = await callMiroAPI({
    name: "Todo Tasks",
    policy: {
      permissionsPolicy: {
        copyAccess: "team_editors",
        sharingAccess: "team_members_with_editing_rights",
      },
      sharingPolicy: {
        access: "private",
        inviteToAccountAndBoardLinkAccess: "no_access",
        organizationAccess: "private",
        teamAccess: "edit",
      },
    },
    description: "Team Todo Tasks Board",
  });

  console.log("Creating a suggestions board");
  const suggestionBoard = await api.createBoard({
    name: "Suggestions Welcome",
    policy: {
      permissionsPolicy: {
        copyAccess: "anyone",
        sharingAccess: "team_members_with_editing_rights",
      },
      sharingPolicy: {
        access: "private",
        inviteToAccountAndBoardLinkAccess: "viewer",
        organizationAccess: "comment",
        teamAccess: "edit",
      },
    },
    description: "Company-wide Open Suggestions Board",
  });

  console.log("Creating a welcome note");
  await todoBoard.createStickyNoteItem({
    data: {
      content: "Welcome to the Todo board!",
      shape: "rectangle",
    },
    style: {
      fillColor: "light_blue",
      textAlign: "left",
      textAlignVertical: "top",
    },
  });

  console.log("Creating a suggestions CTA");
  await suggestionBoard.createStickyNoteItem({
    data: {
      content: "Submit your suggestions!",
      shape: "rectangle",
    },
    style: {
      fillColor: "light_yellow",
      textAlign: "center",
      textAlignVertical: "top",
    },
  });
To view the new boards with the welcome stiucky notes, run this code with the following command:
node index.mjs

Figure 9. A list of boards being created, as printed to the terminal.
After running this code, your Miro dashboard features two new boards named Todo and Suggestions.

Figure 10. List of boards belonging to the team.
The new boards include sticky notes with a welcome message or a call to action.
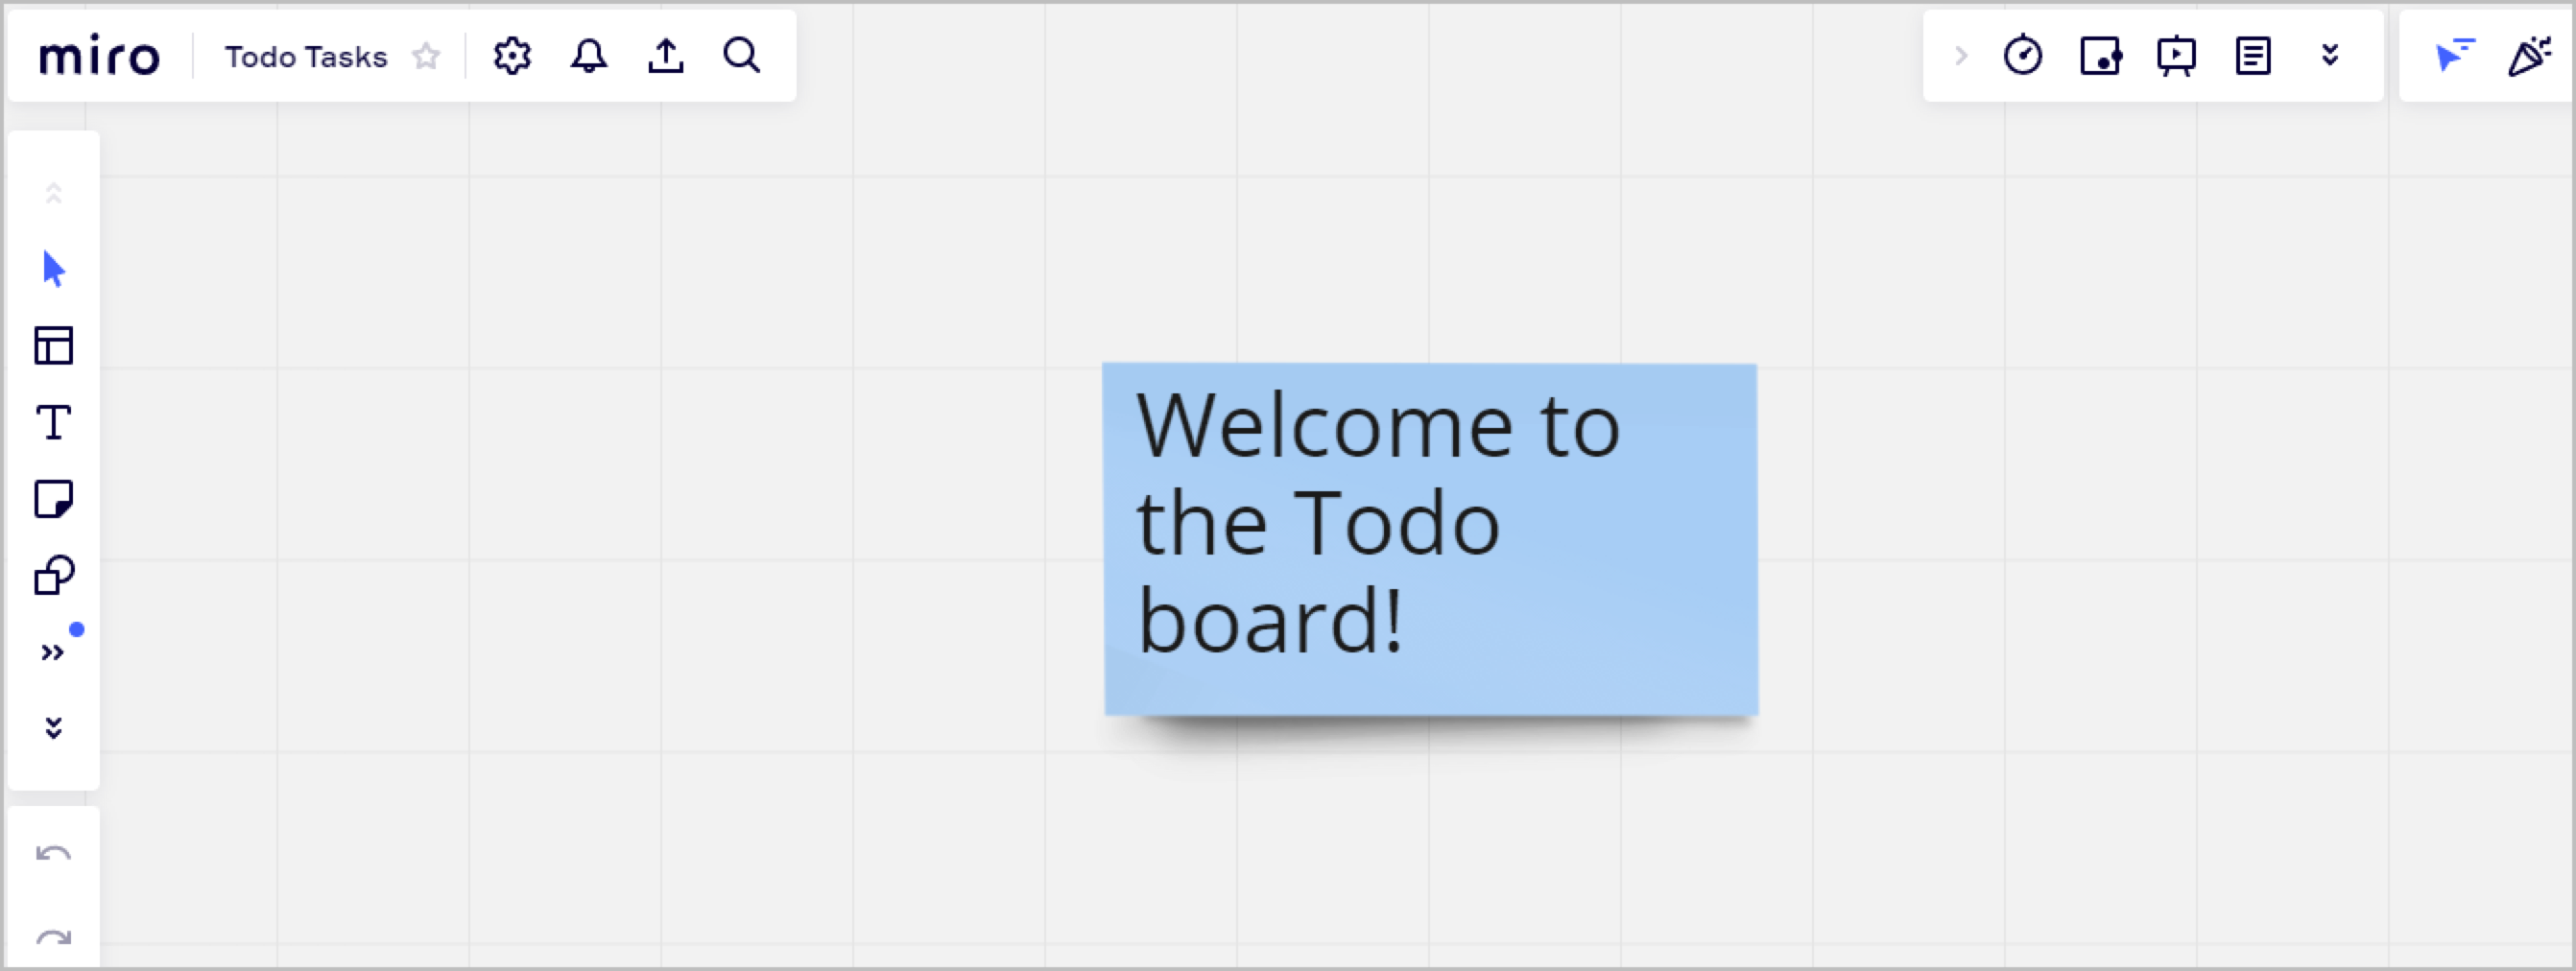
Figure 11. Welcome sticky note that reads: “Welcome to the Todo board!”
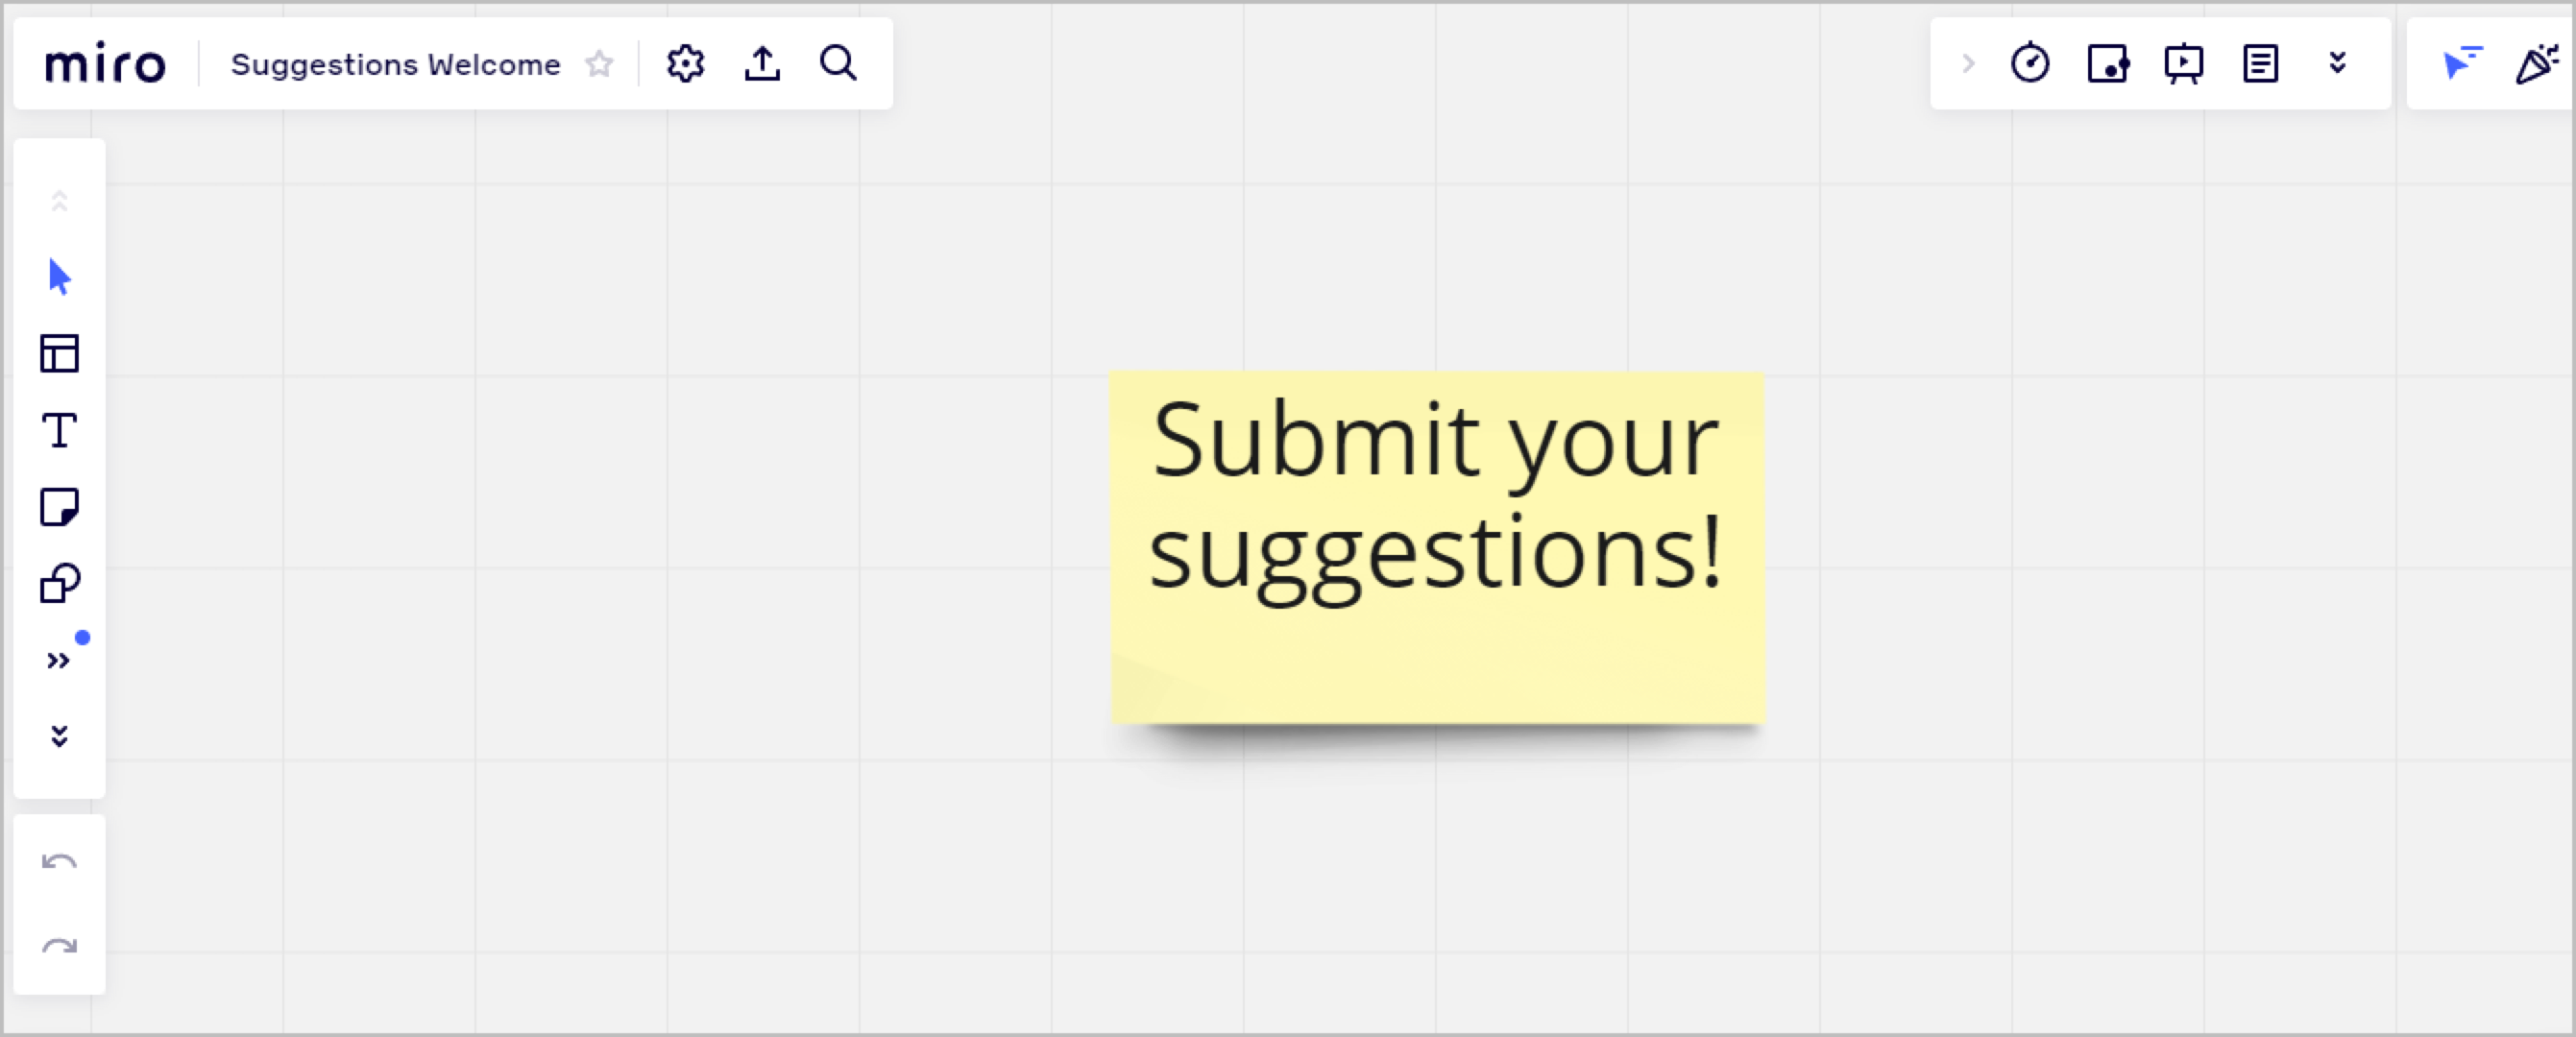
Figure 12. Welcome sticky note that reads: “Submit your suggestions!”
Promote a new team leader
As team evolve and change, you can update team member role, responsibilities, and seniority to reflect the teams they belong to.
In this example, the product development team gets a new team admin, and the previous team admin is removed from the team.
The team in the example has three members and an admin.
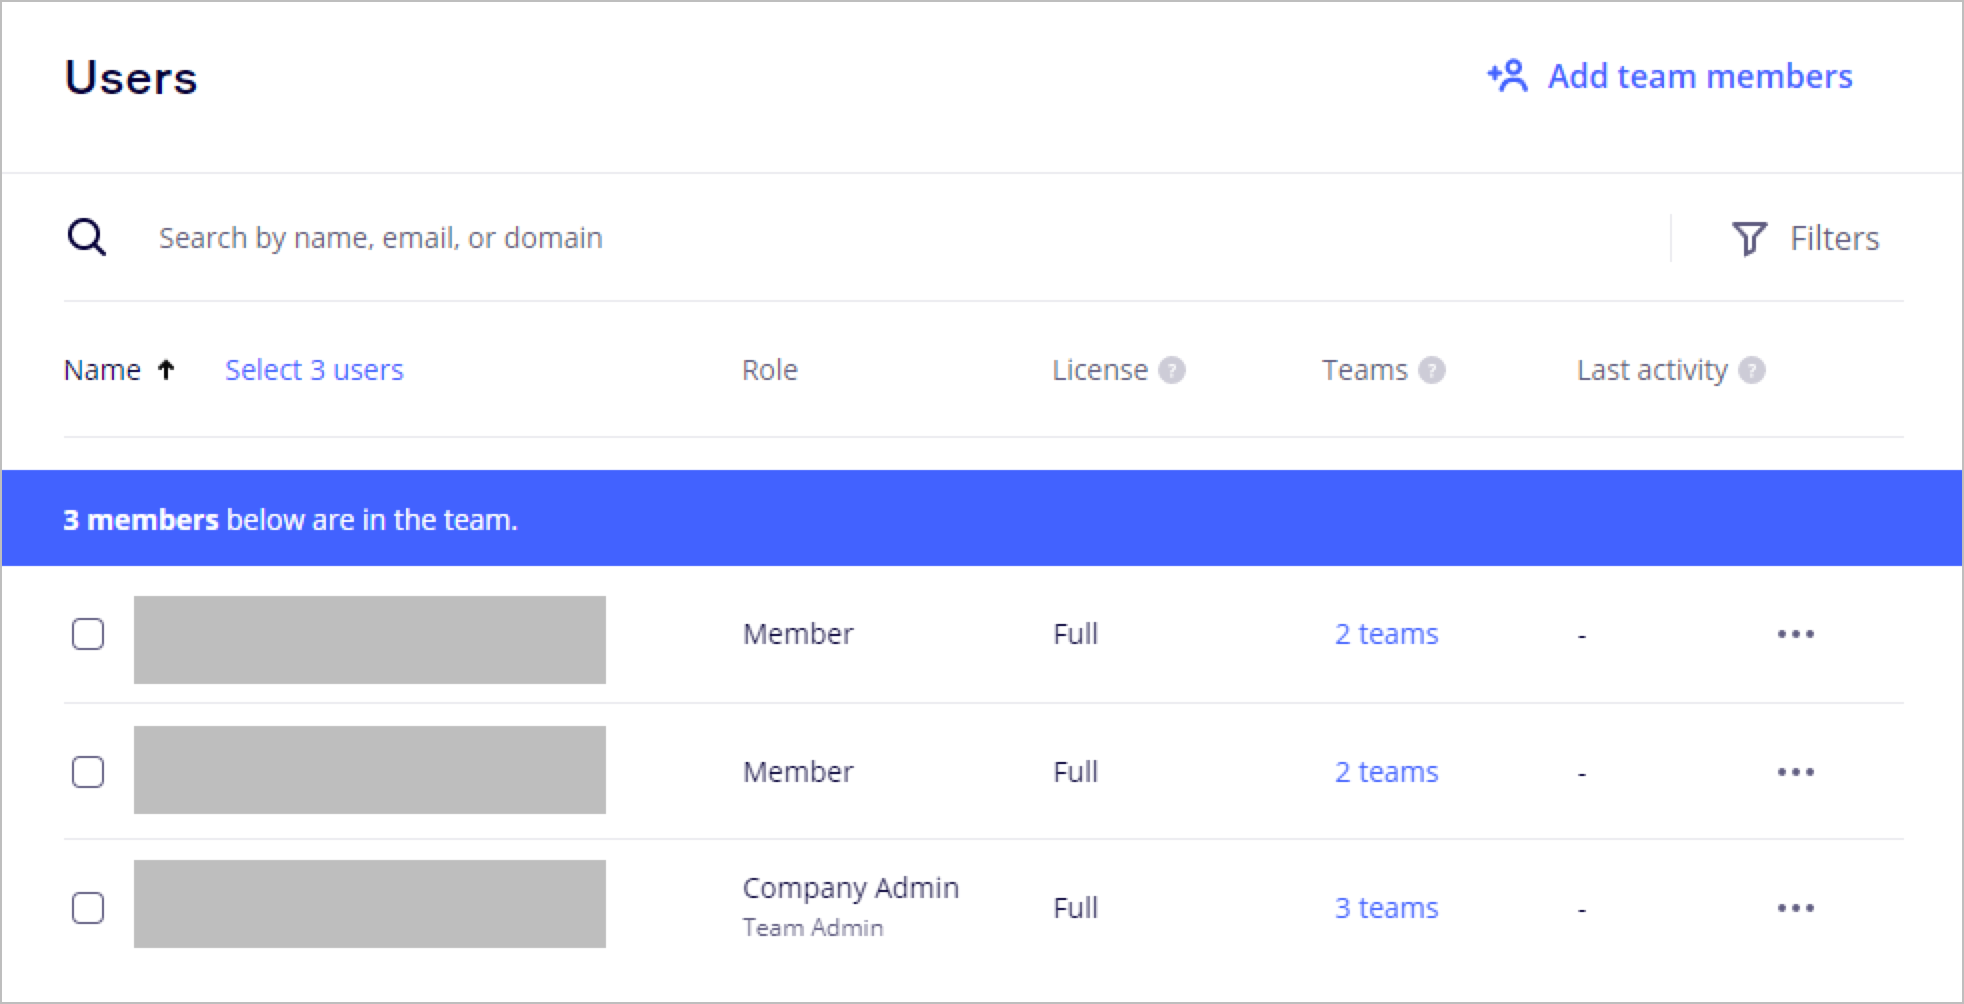
Figure 13. The Users view in the team settings offers a UI to manage team members.
To promote a team member to admin and to delete the previous team admin, add the following code to index.mjs:
// 4. Promote a new team admin
console.log( "Getting the list of teams" );
const org = await api.getOrganization(tokenInfo.organization.id)
for await (const team of org.getAllTeams()) {
  if (team.name !== "The Development Team") {
    continue;
  }
  const allMembers = []
  for await (const member of team.getAllTeamMembers()) {
    allMembers.push(member)
  }
  await allMembers[1].update({
    "role": "admin"
  })
  await team.deleteTeamMember(allMembers[0].memberId)
  break;
}
To view the new team admin, run this code with the following command:
node index.mjs
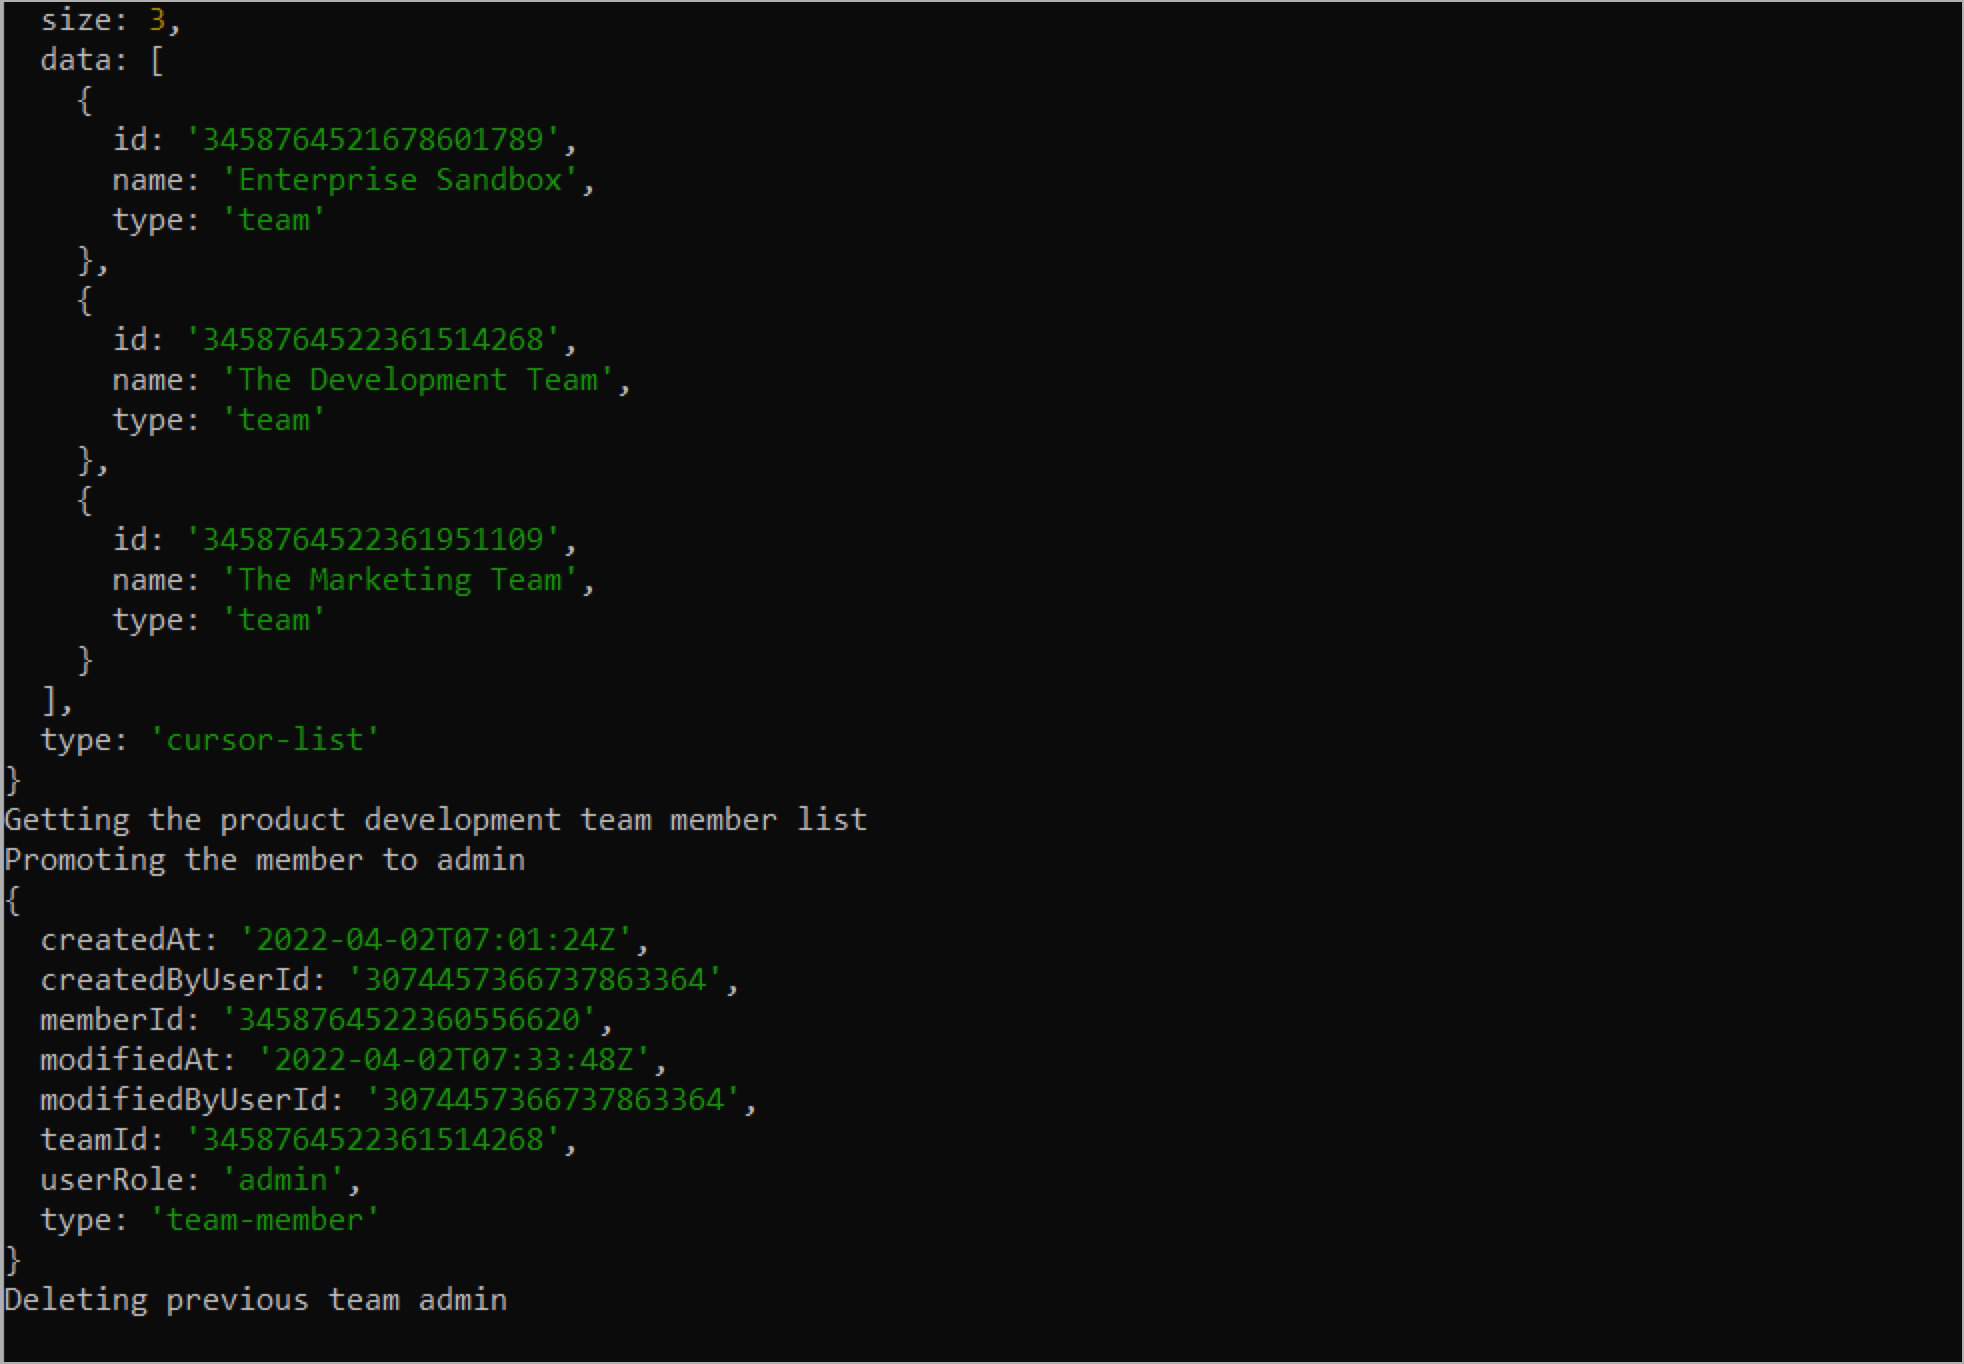
Figure 14. The output from running the code, as printed to the terminal.
After updating the the team details in this way, the Users view in the team settings of the product development team looks like this:
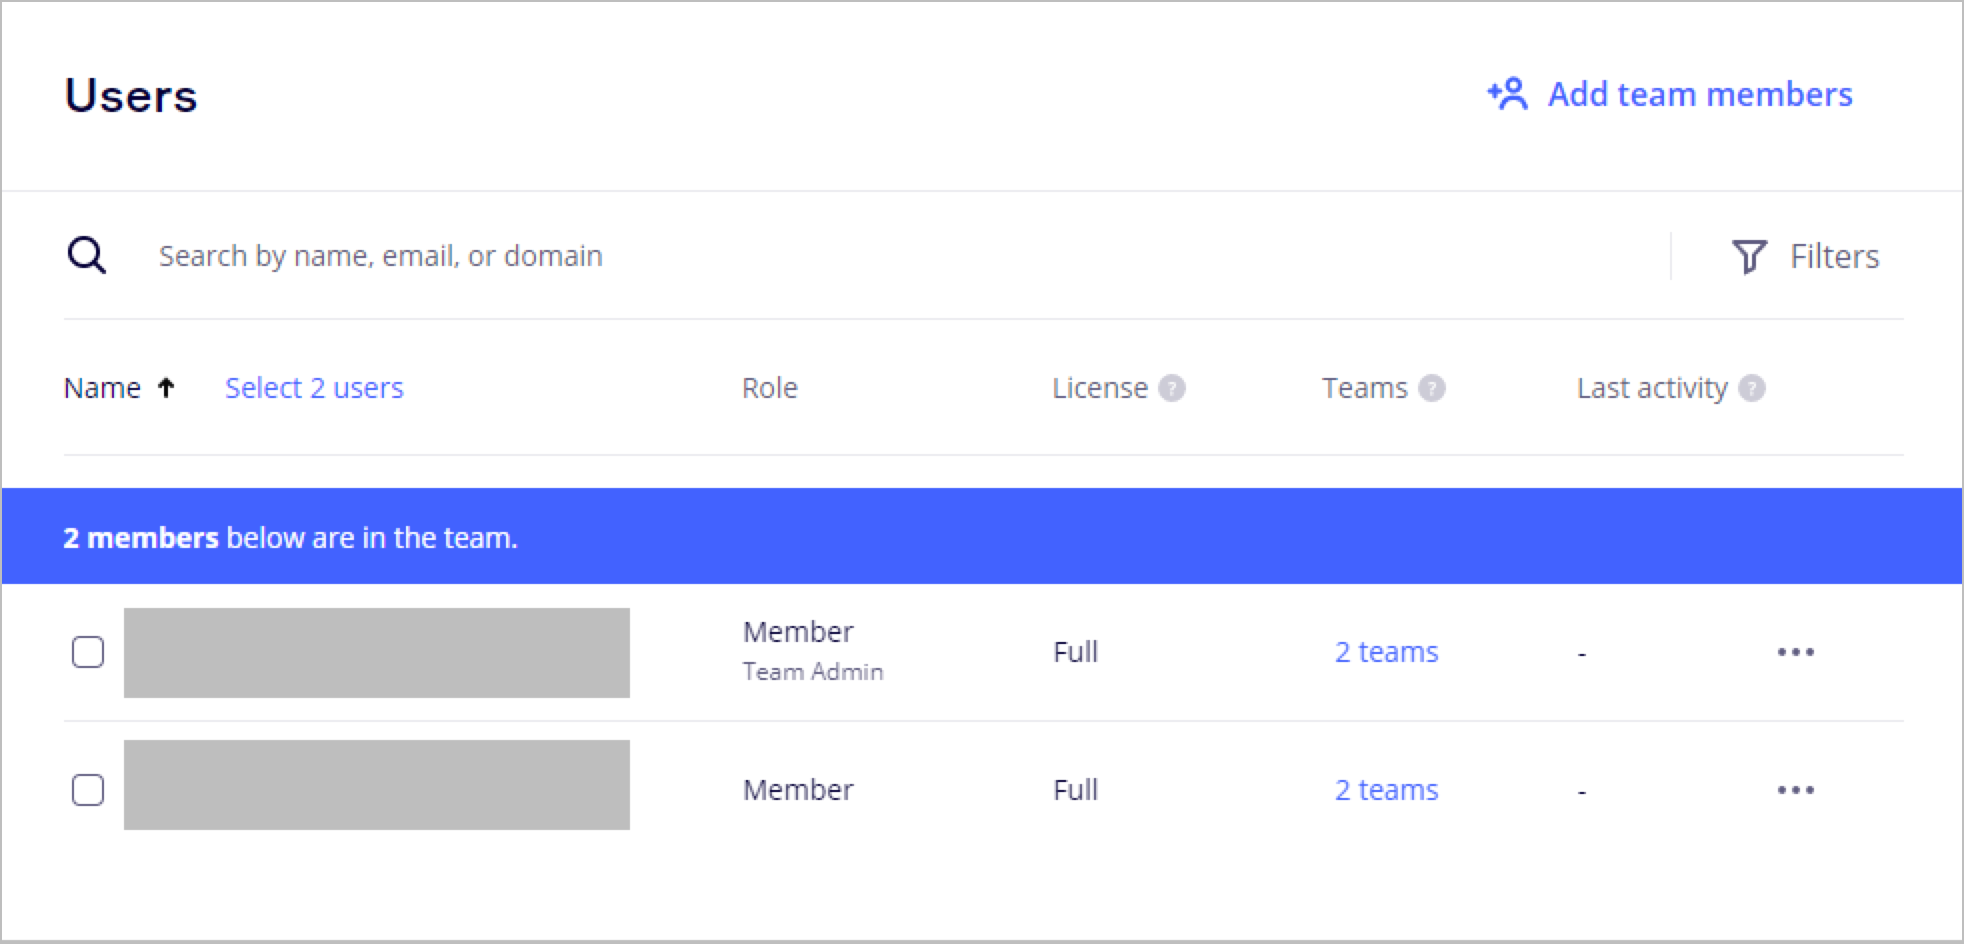
Figure 15. The Users view in the team settings of the product development team reflects the changes that you applied programmatically.
Clean up old teams
Once a project is complete, you can reorganize and dissolve ad-hoc project teams, as well as delete any boards and other resources that are no longer necessary.
Currently, the example organization in figure 16 has three teams, including the development team and the marketing team.
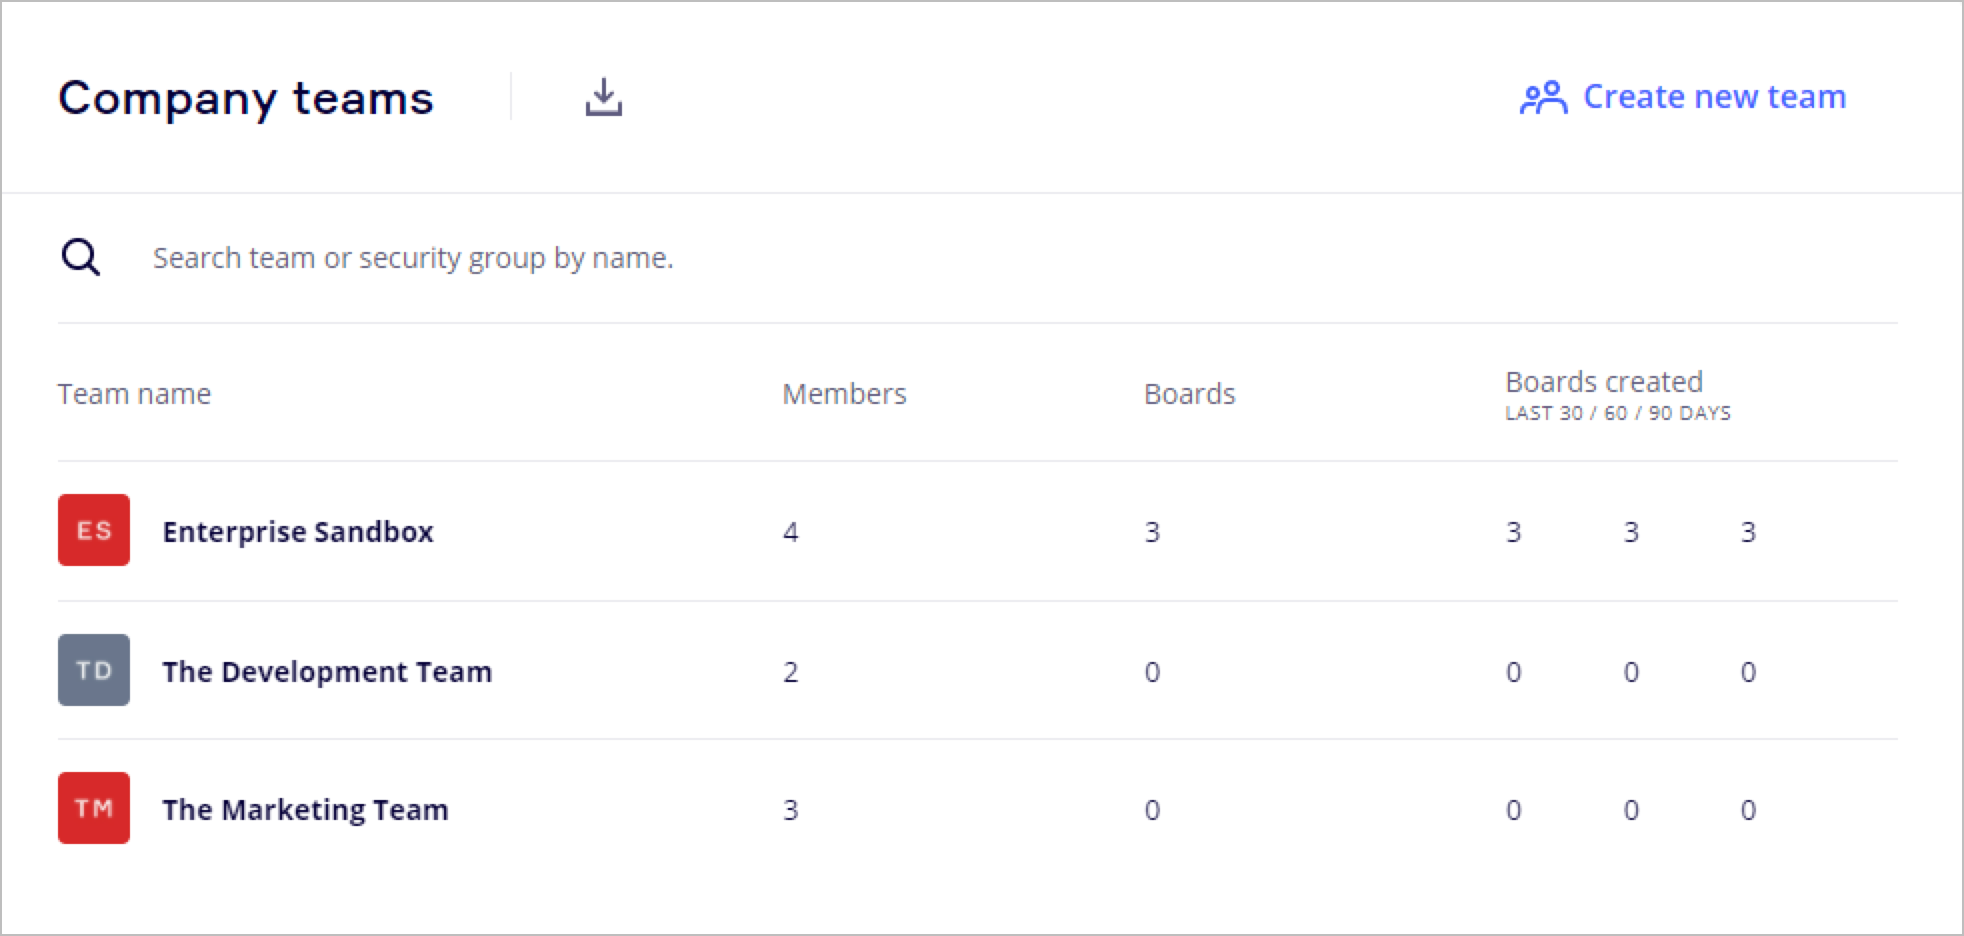
Figure 16. The Company teams view shows the teams belonging to the current organization.
In the final example in this tutorial, you’ll clean up retired team resources and delete multiple teams using the Teams API.
// 5. Cleaning up old teams
  const teamsToDelete = ["The Development Team", "The Marketing Team"];

  for await (const team of org.getAllTeams()) {
      if (teamsToDelete.includes(team.name)) {
        await team.deleteTeam()
      }
  }

Figure 17. The console output notifies that the teams have been deleted.
After removing the teams, the Company teams view in the company settings looks like this:
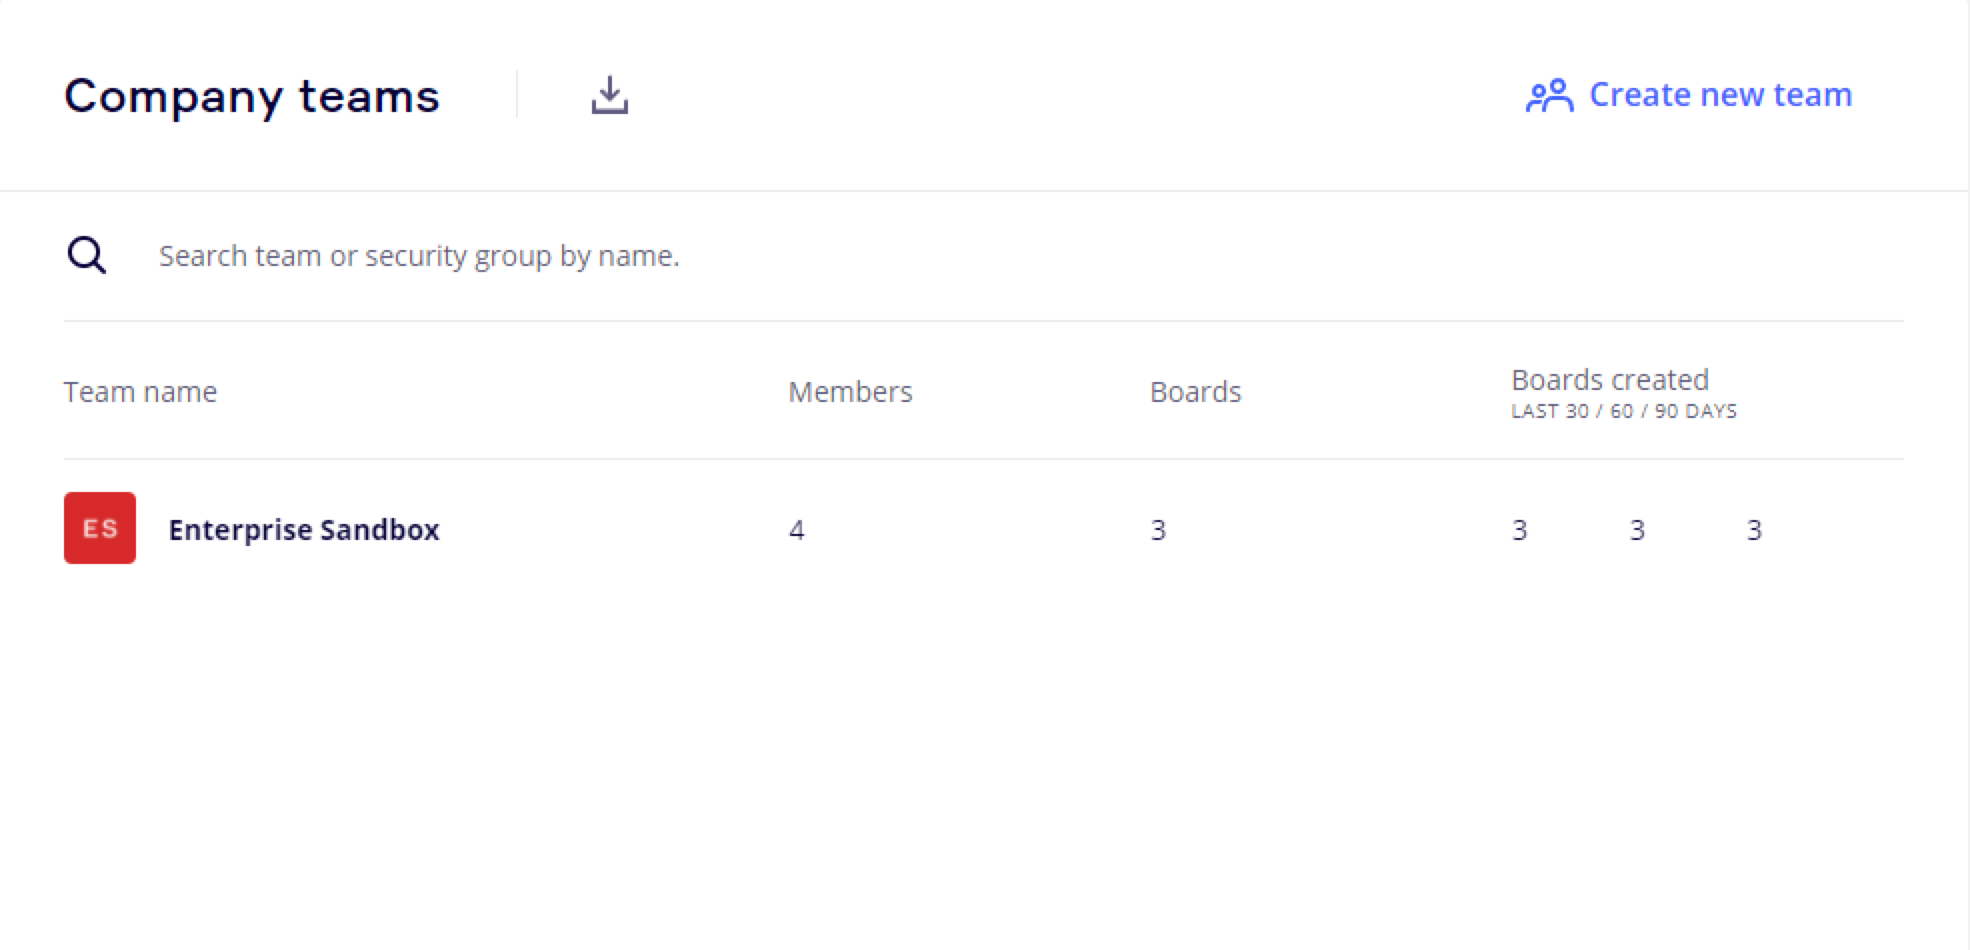
Figure 18. The Company teams view in the company settings reflects the changes that you applied programmatically.
Let's wrap up
In this tutorial, you learned how to use Miro’s Teams API to create and manage boards and teams using code. For larger teams and organizations, this API can help make Miro more efficient and reduce errors with manually-managed boards and teams.
See also
Updated over 1 year ago
To discover and to get acquainted with more Web SDK features, check the other tutorials.