Use the browser developer tools with the Miro Web SDK
Use the developer console to explore the Miro Web SDK, to experiment, and to debug your app.
The Miro Web SDK is loaded when a Miro board loads in a web browser.
Start exploring its possibilities right away from the browser developer tools.
Developer tools in this how-to refer to Chrome DevTools.
Developer tools for other browsers work in a very similar way.
Goal
Use the developer tools in your browser to explore and to try out some methods available in the Miro Web SDK.
Prerequisites
Before you begin, make sure that:
- You have a Miro account.
Open a Miro board
After signing in to your Miro account:
- Go to your board overview.
- Open an existing board, or create a new one.
Open the developer tools
On the browser tab with the open Miro board:
- Open the developer tools.
- Go to the developer console.

Figure 1. The Console tab in the browser developer tools.
Check if Miro Web SDK is available
Let's make sure that the Miro Web SDK 2.0 is loaded and ready for use.
In the developer console enter miro, and then press Enter ↩.
miro.v1is the previous version of the Web SDK. It's the current version to use for production.miro.boardenables access to the Miro Web SDK 2.0.
This is the version that this how-to covers, and we encourage using this version of the Web SDK for development.
In the developer console enter miro.board, and then press Enter ↩.
The response confirming that the Miro Web SDK 2.0 is available is highlighted:

Figure 2. Type miro.board, and then press Enter ↩. This is the output confirming that the Miro Web SDK 2.0 is loaded and ready for use.
Now you can start using the Miro Web SDK 2.0.
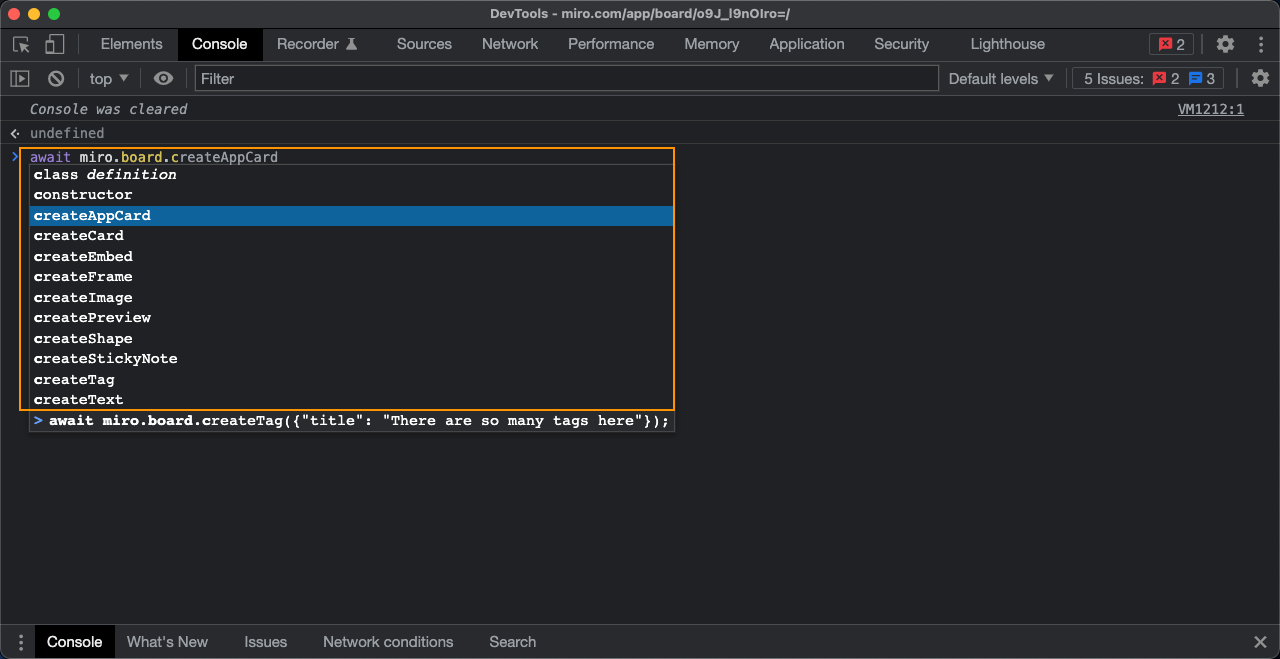
Leverage autocompletion
In the developer console, the Miro Web SDK features autocompletion for supported methods and properties.
Besides saving time, autocompletion helps you explore the Web SDK feature set.
In the developer console start typing miro.board., and then feel free to go down the rabbit hole:

Figure 3. Miro Web SDK autocompletion in the developer console.
Create
Start using the Miro Web SDK right away from the developer console.
For example, create a shape item.
In the developer console enter the following code, and then press Enter ↩:
const shape = await miro.board.createShape({
  content: '<p>This is a very yellow star shape.</p>',
  shape: 'star',
  style: {
    fillColor: '#FEFF45',
  },
  x: 3000,
  y: 4500,
  width: 280,
  height: 280,
});
Now, check what you just created by logging it to the console.
In the developer console enter the following code, and then press Enter ↩:
console.log(shape);
The response returns the created shape item.
This is also a practical way to inspect a board item's data structure on the fly, so that you know what to pass when you want to create a board item:
{
    "type": "shape",
    "content": "<p>This is a very yellow star shape.</p>",
    "shape": "star",
    "style": {
        "fillColor": "#feff45"
    },
    "x": 3000,
    "y": 4500,
    "width": 280,
    "height": 280,
    "id": "3458764514801557891",
    "createdAt": "2021-12-08T17:07:24.104Z",
    "createdBy": "3074457356556531234",
    "modifiedAt": "2021-12-08T17:08:34.375Z",
    "modifiedBy": "3074457356556531234",
    "rotation": 0
}
Where is the star? It may have been created outside the current viewport.
To view it on the board, let's zoom to it:
await miro.board.viewport.zoomTo(shape);
You just:
- Created a board item.
- Printed it to the console to view its data structure.
- Zoomed to it to find it, and to view it on the board.
Video 1. Create a shape, print it to the console, and zoom to it on the board.
Read
After creating a board item, you can retrieve it.
With the Miro Web SDK you can retrieve a board item in the following ways:
- Select it on the board by clicking it.
- Specify the type of board item that you want to retrieve.
This option returns all board items matching the item types that you pass with the method. - Specify the ID of the board item that you want to retrieve.
Get selected item
- On the board, go to the item that you want to retrieve.
- Click it to select it.
- In the developer console enter the following code, and then press
Enter ↩:
await miro.board.getSelection();
The item that you selected on the board is printed to the console.
Video 2. Select an item on the board, and retrieve it in the developer console.
Get item by type
- In the developer console enter the following code, and then press
Enter ↩:
await miro.board.get({type: ['shape', 'card']});
All board items matching the specified types are printed to the console.
Get item by ID
- In the developer console enter the following code, and then press
Enter ↩:
await miro.board.get({id: shape.id});
The board item matching the specified ID is printed to the console.
Update
You want to be able to change and update the properties of an existing board item.
In the Miro Web SDK, updating a board item is a 2-step process:
- Edit the values of the properties that you want to change.
- Use the
syncmethod to reflect the changes on the board, and to make them visible on the board.
Let's wreak havoc and change the shape from a star to a cloud.
In the developer console enter the following code, and then press Enter ↩:
shape.content = "This is a cloud now.",
shape.shape = "cloud",
shape.style.fillColor = "#13E3EB",
shape.rotation = 45
The shape properties are updated.
To verify it, print the shape item to the console.
In the developer console enter the following code, and then press Enter ↩:
console.log(shape);
The response returns the shape item with updated values for the changed properties.
{
    "type": "shape",
    "content": "This is a cloud now.",
    "shape": "cloud",
    "style": {
        "fillColor": "#13E3EB"
    },
    "x": 3000,
    "y": 4500,
    "width": 280,
    "height": 280,
    "id": "3458764514861530408",
    "createdAt": "2021-12-09T12:51:03.022Z",
    "createdBy": "3074457356556531234",
    "modifiedAt": "2021-12-09T12:51:03.022Z",
    "modifiedBy": "3074457356556531234",
    "rotation": 45
}
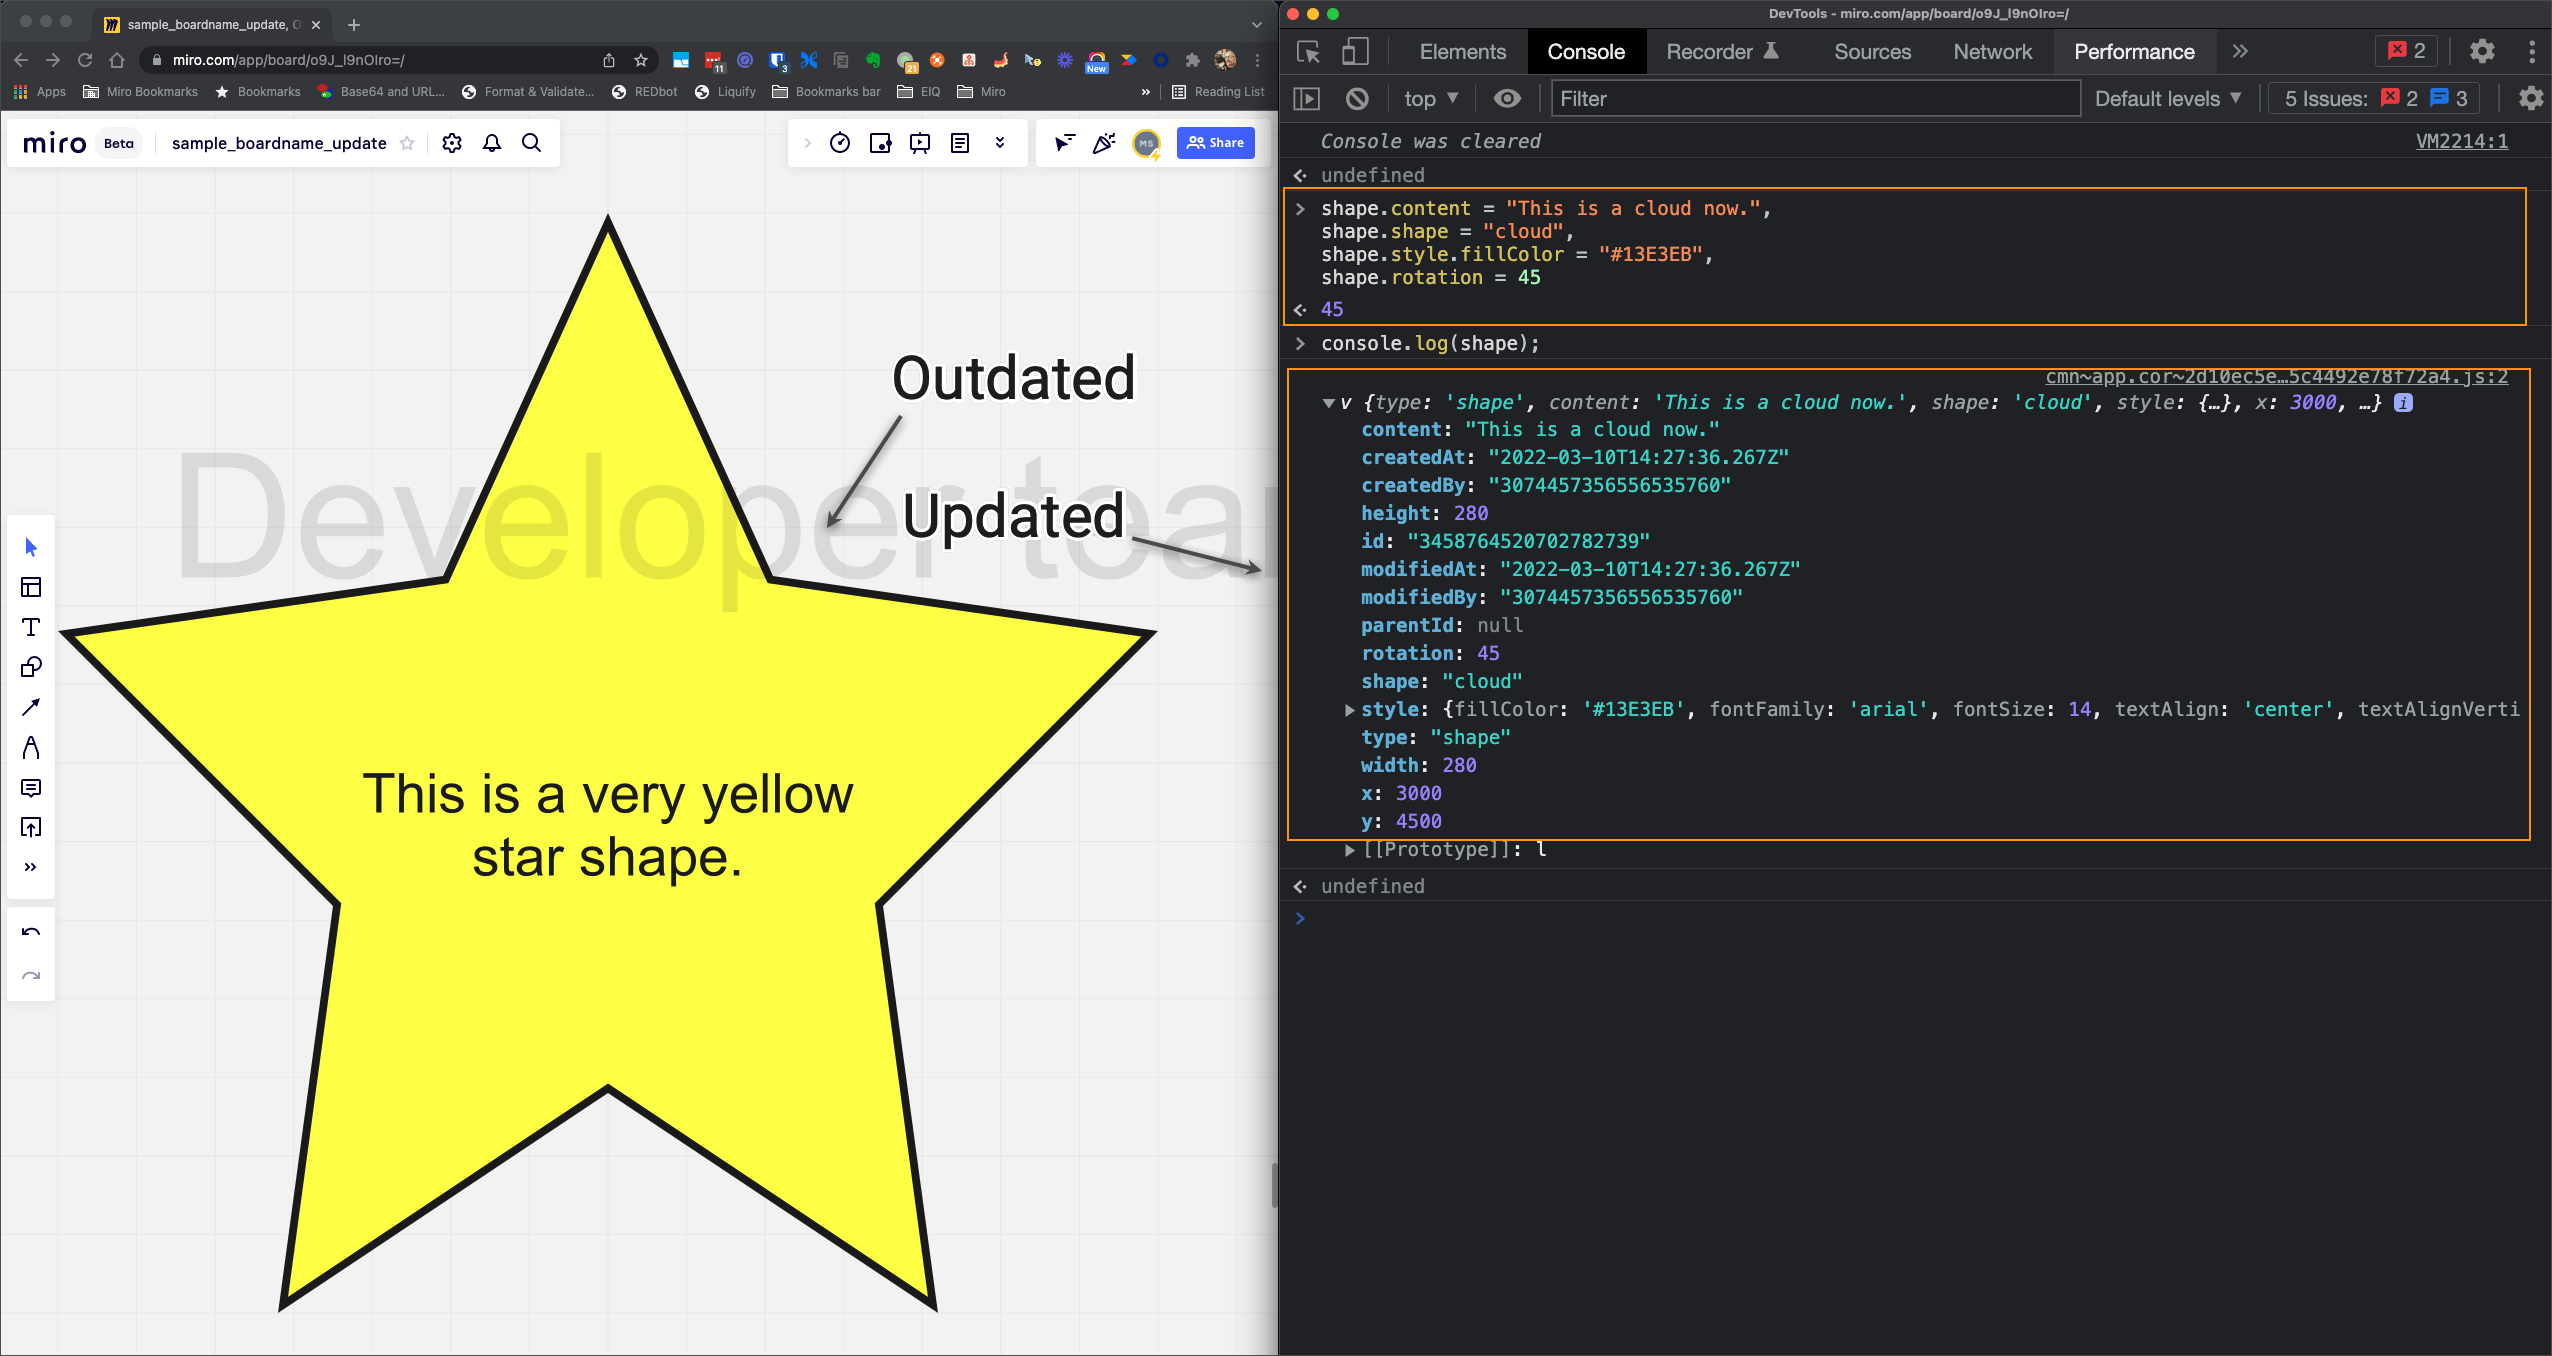
However, the changes aren't visible on the board, yet.

Figure 4. Without running sync, the updated properties are available only in the console, not on the board.
To reflect them on the board, use sync.
In the developer console enter the following code, and then press Enter ↩:
await shape.sync();
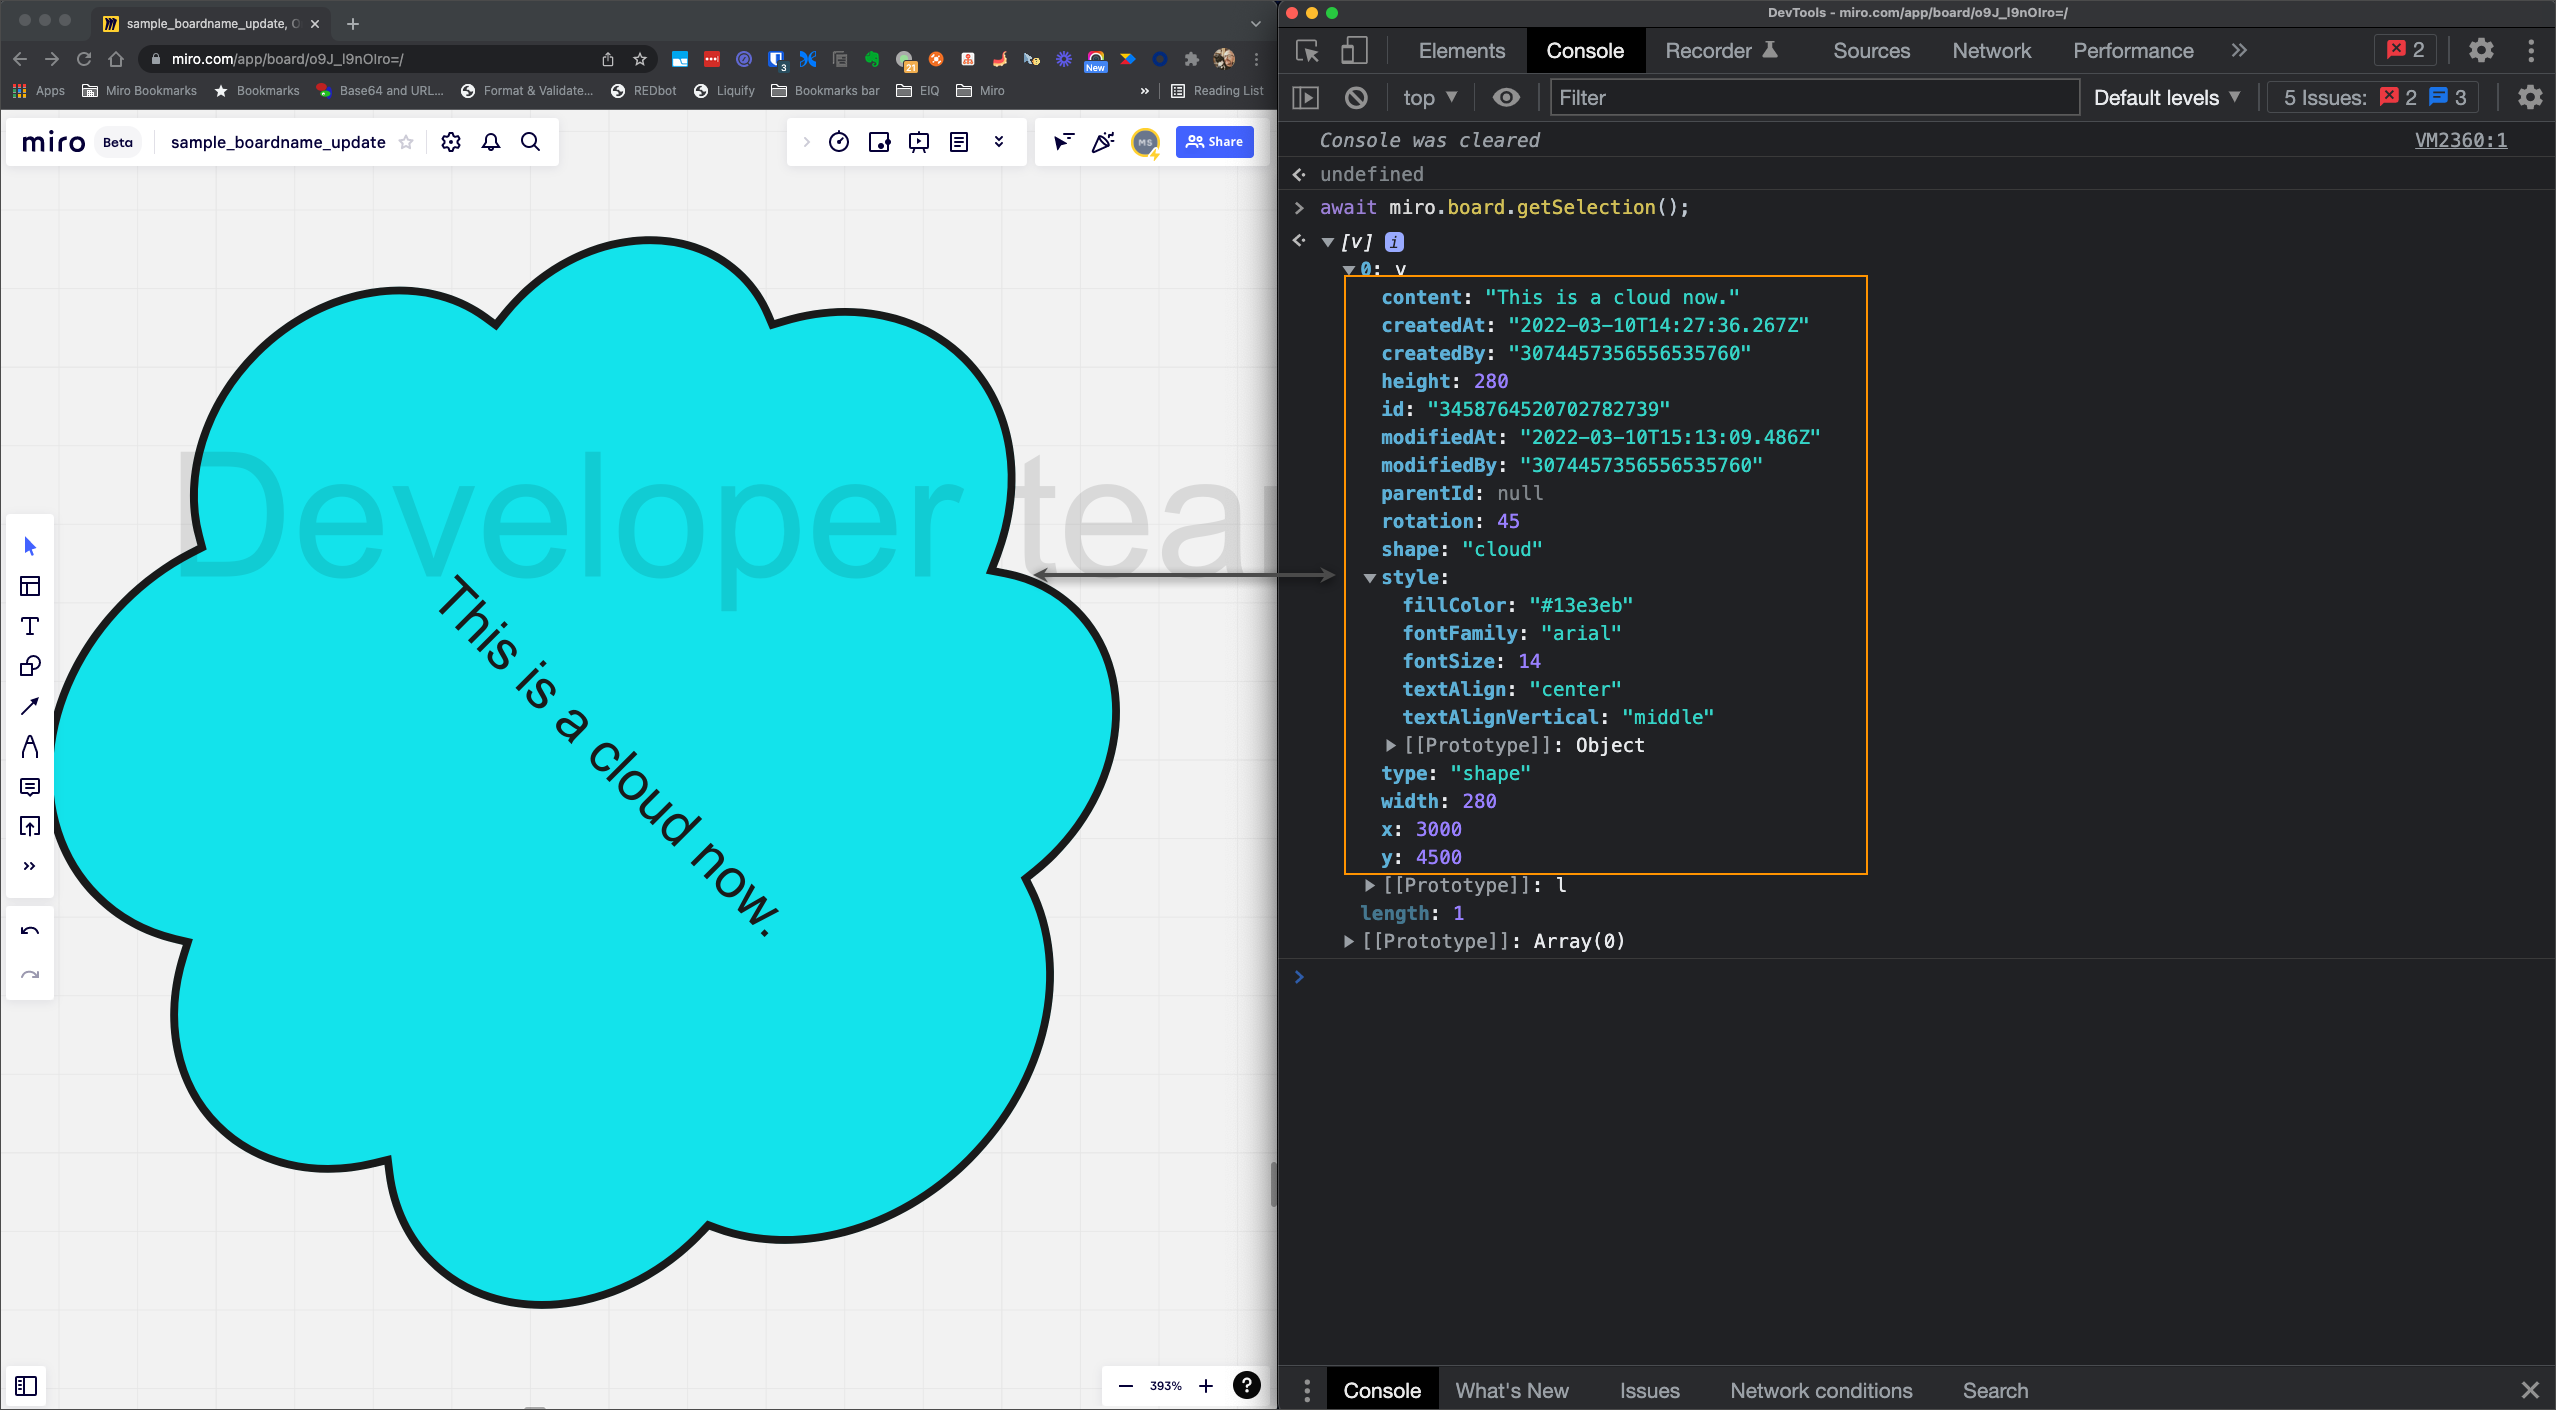
The changed shape item is updated on the board, too.

Figure 5. After running sync, the updated properties are visible also on the board.
Debug
Debugging is when the developer console becomes your best friend.
The Miro Web SDK throws errors that try to:
- Let you know what is wrong.
- Help you get back on track with information about how to fix it.
Error messages help you understand what isn't working as expected, and they provide insight into possible solutions to move forward.
For example, try to change the shape item you created earlier by updating item properties in ways that are either not valid, or not supported.
Try to change the shape from star to an invalid value:
// Change the shape
// In the developer console, enter:
shape.shape = "hippopotamus",

// Sync the change
// In the developer console, enter:
await shape.sync();

// Error message
// Unfortunately, 'hippopotamus' isn't a valid shape.
// However, the error message includes a list of all the valid shapes that you can assign
Uncaught Error: "shape" is invalid value "hippopotamus", expected one of ["rectangle","circle","triangle","wedge_round_rectangle_callout","round_rectangle","rhombus","parallelogram","star","right_arrow","left_arrow","pentagon","hexagon","octagon","trapezoid","flow_chart_predefined_process","left_right_arrow","cloud","left_brace","right_brace","cross","can"]
Try to write to the width property, which is read-only:
// Change the width
// In the developer console, enter:
shape.width = 500

// Sync the change
// In the developer console, enter:
await shape.sync();

// Error message
// Currently, 'width' is read-only.
// Try and change a writeable property, instead
Uncaught Error: Cannot change this property, because it's read-only: "width"
Delete
To delete a board item, pass it as an argument of the remove method.
After tinkering with our star-turned-cloud shape, time has come to delete it from the board.
In the developer console enter the following code, and then press Enter ↩:
await miro.board.remove(shape);
And it's gone.
See also
Updated about 2 years ago
After getting acquainted with the Web SDK in the console, practice updating with the syncmethod.