Troubleshoot OAuth2.0
Common issues and solutions for errors encountered during implementation of the OAuth2.0 authorization flow and subsequent requests to a REST API.
OAuth2.0 is a well-defined, highly adopted standard for authorization when working with REST APIs — whether in Miro or elsewhere.
This guide highlights some of the most common issues or errors that you might encounter when working with OAuth2.0, and solutions for each issue type. (Note that this guide focuses on the authorization code flow, as this is the flow leveraged by Miro’s Developer Platform.)
Issue: Redirect URI Mismatch / Invalid Redirect URI
(Error type: 4XX)
Example error response from Miro REST API:
{
    "status": 401,
    "code": "oauthError",
    "message": "Redirect URI mismatch.",
    "type": "error"
}
OAuth2.0’s authorization code flow includes a redirect_uri parameter that is referenced in both your OAuth configuration and [typically] requests to the /oauth endpoint itself.
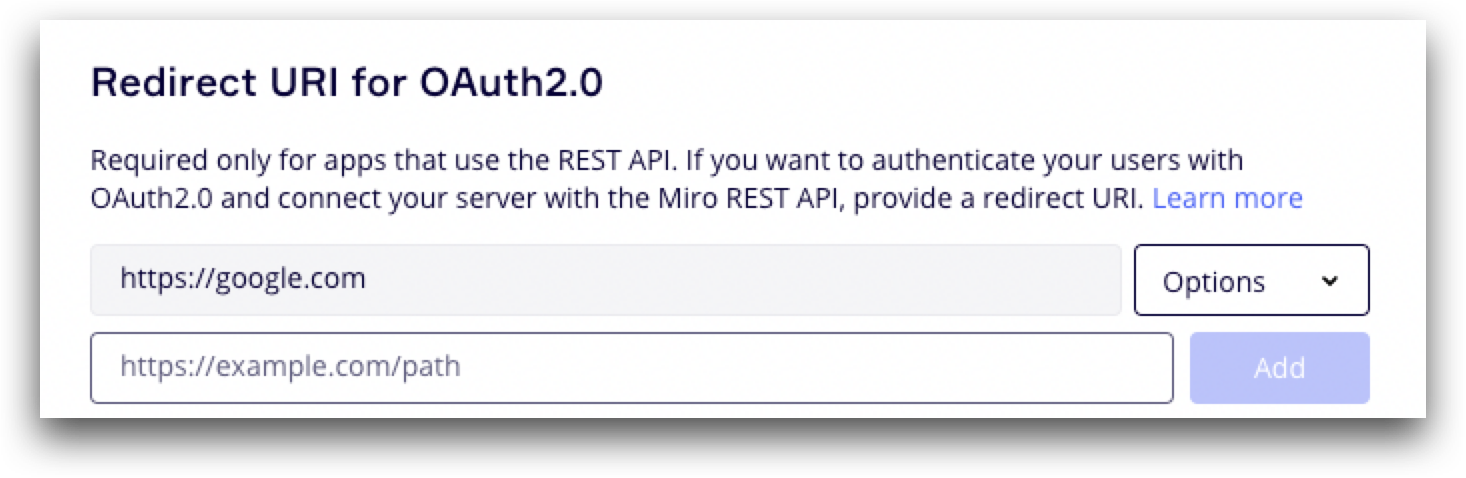
It is required that the Redirect URL that you provide in your OAuth configuration (typically a developer app/settings page hosted by the service you’re implementing OAuth for) matches exactly with the redirect_uri you pass in your request to the /oauth endpoint.
For example, in your OAuth configuration:
In your API request URL:
POST https://api.miro.com/v1/oauth/token?grant_type=authorization_code&client_id={{yourClientId}}&client_secret={{yourClientSecret}}&code={{authorizationCode}}&redirect_uri={{yourRedirectUri}}If these two URIs do not match exactly, you will encounter a 4XX error letting you know that the redirect URI is invalid in your request, or doesn’t match what is specified in your configuration.
Solution
Make sure to double-check how your URI is referenced in both places, and account for even small differences between URLs like www., a trailing slash /, and so on in one place and not the other.
Issue: Invalid or expired token when making an API request
(Error type: 4XX)
If an invalid or expired token is used to authorize a request to a REST API, the API provider will typically return a 4XX error. The error notifies that the access_token it was expecting wasn't valid (or wasn't found).
Example error response from Miro REST API:
{
    "status": 401,
    "code": "tokenNotProvided",
    "message": "No authorization data was found on the request",
    "type": "error"
}
A 4XX error like this could happen for any of the following reasons:
- No
access_tokenwas passed in theAuthorizationheader - An invalid
access_tokenwas used (typo, invalid string, etc.) - The
access_tokenwas expired (see below)
Expired tokens and refresh tokens
If you’ve selected the option to expire your access_token when configuring your OAuth settings, keep in mind that access_tokens will expire after one hour (3599 seconds).
Once expired (or before), you must refresh a user’s access_token. The purpose of the refresh_token is to request a new access_token. Although the refresh_token doesn’t expire immediately, it becomes invalid after it is used to request a new access_token.
You will receive a new pair of refresh_token and access_tokens each time you make a request to refresh your access_token. You will have to update both of these values with new ones each time you refresh an access_token.
Example response from Miro:
POST https://api.miro.com/v1/oauth/token?grant_type=authorization_code&client_id={{yourClientId}}&client_secret={{yourClientSecret}}&code={{authorizationCode}}&redirect_uri={{yourRedirectUri}}
{
    "user_id": "userId",
    "scope": "boards:write boards:read",
    "expires_in": 3599,
    "token_type": "bearer",
    "team_id": "teamId",
    "access_token": "eyJtaXJvLm9yaWdpbiI6ImV1MDEif*****************",
    "refresh_token": "eyJtaXJvLm9yaWdpbiI6ImV1MDEifQ_86d*************"
}
Solution
Typically, these are the most common reasons for such an error:
- If a new
access_tokenis generated, both the previousaccess_tokenandrefresh_tokenwill become invalid.- You will need to ensure you’re updating each of these tokens every time you request a new
access_token.
- You will need to ensure you’re updating each of these tokens every time you request a new
- If a new
access_tokenwith the option to “expire token” is generated, but it’s been more than 60 minutes- If it’s been over 60 minutes since an expiring
access_tokenwas generated, you will need to reauthorize your app to request a newaccess_token
- If it’s been over 60 minutes since an expiring
- If a user uninstalls your app or access is revoked (In Miro, this is possible via the Revoke Token endpoint), the refresh token will become invalid.
- You will need to reauthorize your app to request a new
access_token
- You will need to reauthorize your app to request a new
Issue: Invalid authorization code
(Error type: 4XX)
If it’s been more than a few minutes since an end user authorized your app to generate the code included upon redirect, that code may no longer be valid.
The authorization code is intended to be used immediately upon successful retrieval from the redirected URL.
Example response from Miro OAuth endpoint:
{
    "status": 401,
    "code": "oauthError",
    "message": "Invalid authorization code: eyJtaXJvLm9yaWdpbiI6ImV1MDEifQ_8SRL0p",
    "type": "error"
}
Solution
Re-request the initial end user authorization so that a new, valid code can be retrieved.
Issue: Missing required scopes
(Error type: 4XX)
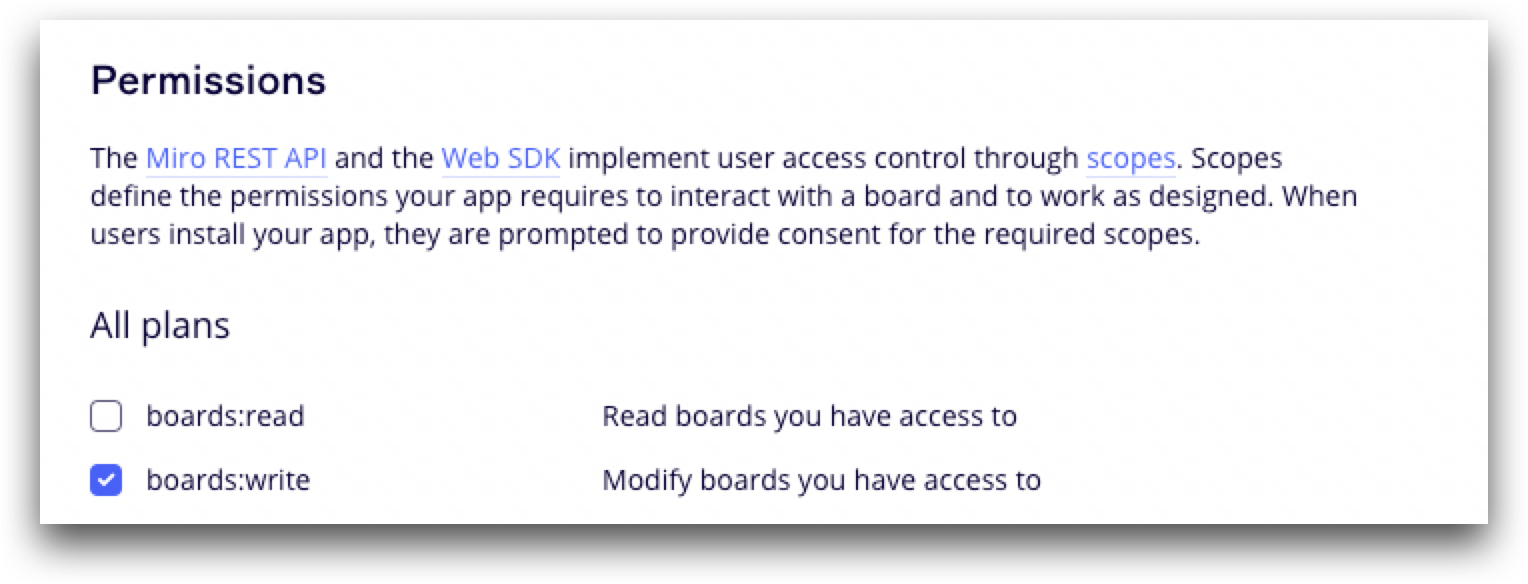
When you configure your OAuth settings (in Miro, done in the UI from your developer app), you will designate specific, defined scopes that your access_token will have access to. An access_token that is used to make a request to an API endpoint that is not included in the scopes specified will return an insufficient permissions error.
Example error response from Miro:
{
    "status": 403,
    "code": "insufficientPermissions",
    "message": "Required scopes: boards:read",
    "type": "error"
}
In the example above, you would receive this sort of error response, if for example, you attempted to call Miro’s GET Boards API endpoint, but your access token didn’t contain this scope before it was generated:
Solution
In your OAuth configuration settings/developer app, add the required scope and reauthorize the app.
Updated 4 months ago
What's next
To discover and to get acquainted with more Web SDK features, check the other tutorials.