Quickstart
Make your first REST API call in less than 3 minutes.
This tutorial shows you how to get a simple app running in Miro. This app uses our REST APIs.
If you've never built a Miro app before, you're in the right place. Welcome, and let's get started!
By the end of this guide, you'll have a board that has a sticky note with the text Hello, World!.
Prerequisites
Before you begin, ensure that you have the following prerequisites:
- Your Miro user account has a Developer team.
Step 1: create your app in Miro
-
Sign in to Miro, and then click your user account avatar.
-
From the drop-down menu, select Settings.
-
In the app settings view, click the Your apps tab.
-
In the Your apps view, click + Create new app.
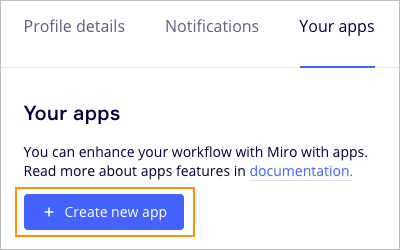
Figure 1. To start creating a new app from your app settings, click + Create new app. -
On the Create new app modal:
- In the App name input field, enter the name of your app.
For example: Hello world. - Select the Expire user authorization token checkbox to enable the expiring access token and refresh token feature for REST API authorization.
After creating the app, it's no longer possible to change the user authorization token from expiring to non-expiring.
Using an expiring access token and refresh token enhances your application's security. An access token expires in 1 hour and a refresh token expires in 60 days. When a new access token is requested, you also get a new refresh token.
In this scenario, the old access token and refresh token are no longer valid.
If you enable this feature, when you exchange an authorization code to an access token, you will also get back a refresh token.
For more information, see the REST API authorization flow for expiring tokens. - Click Create app.
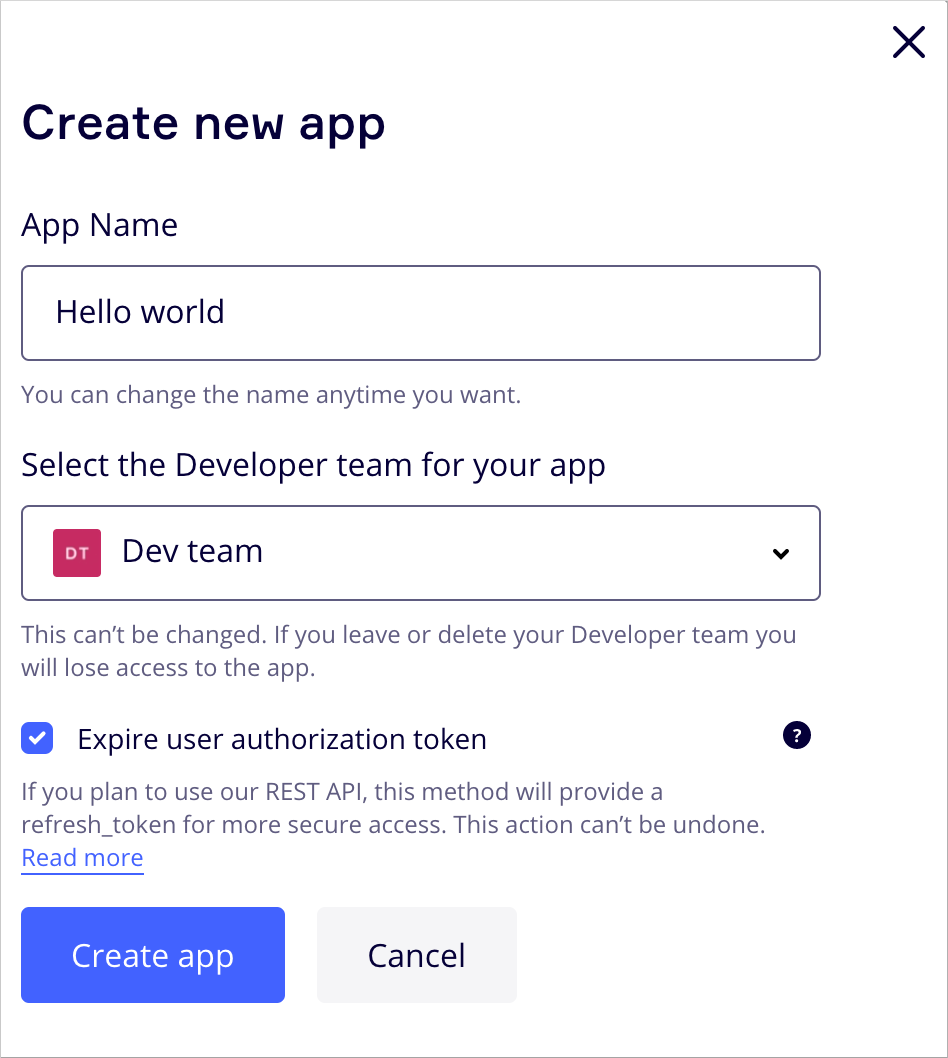
Figure 2. Create a new app.
- In the App name input field, enter the name of your app.
Step 2: configure your app in Miro
You can configure your app in one of the following ways:
- Edit the plain text app manifest in the online editor.
- Select the appropriate options in the app settings UI.
This step described how to configure your app using the app manifest editor.
- On the app settings page, click Edit in Manifest.
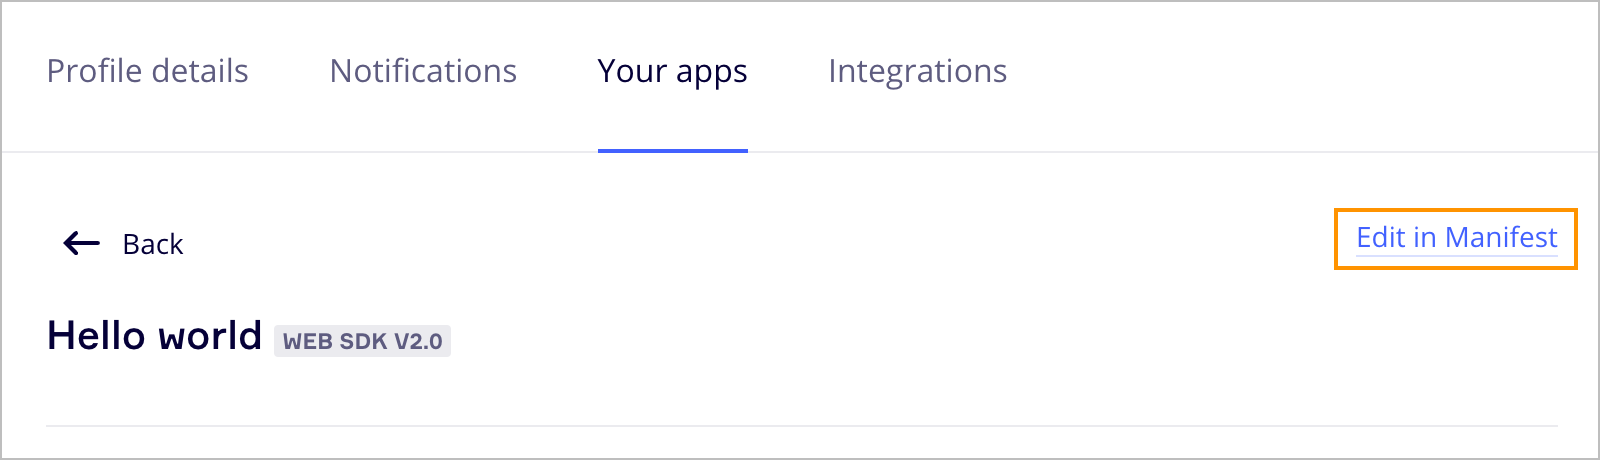
Figure 3. Click Edit in Manifest to open the app manifest editor. - In the app manifest editor, set at least the following properties:
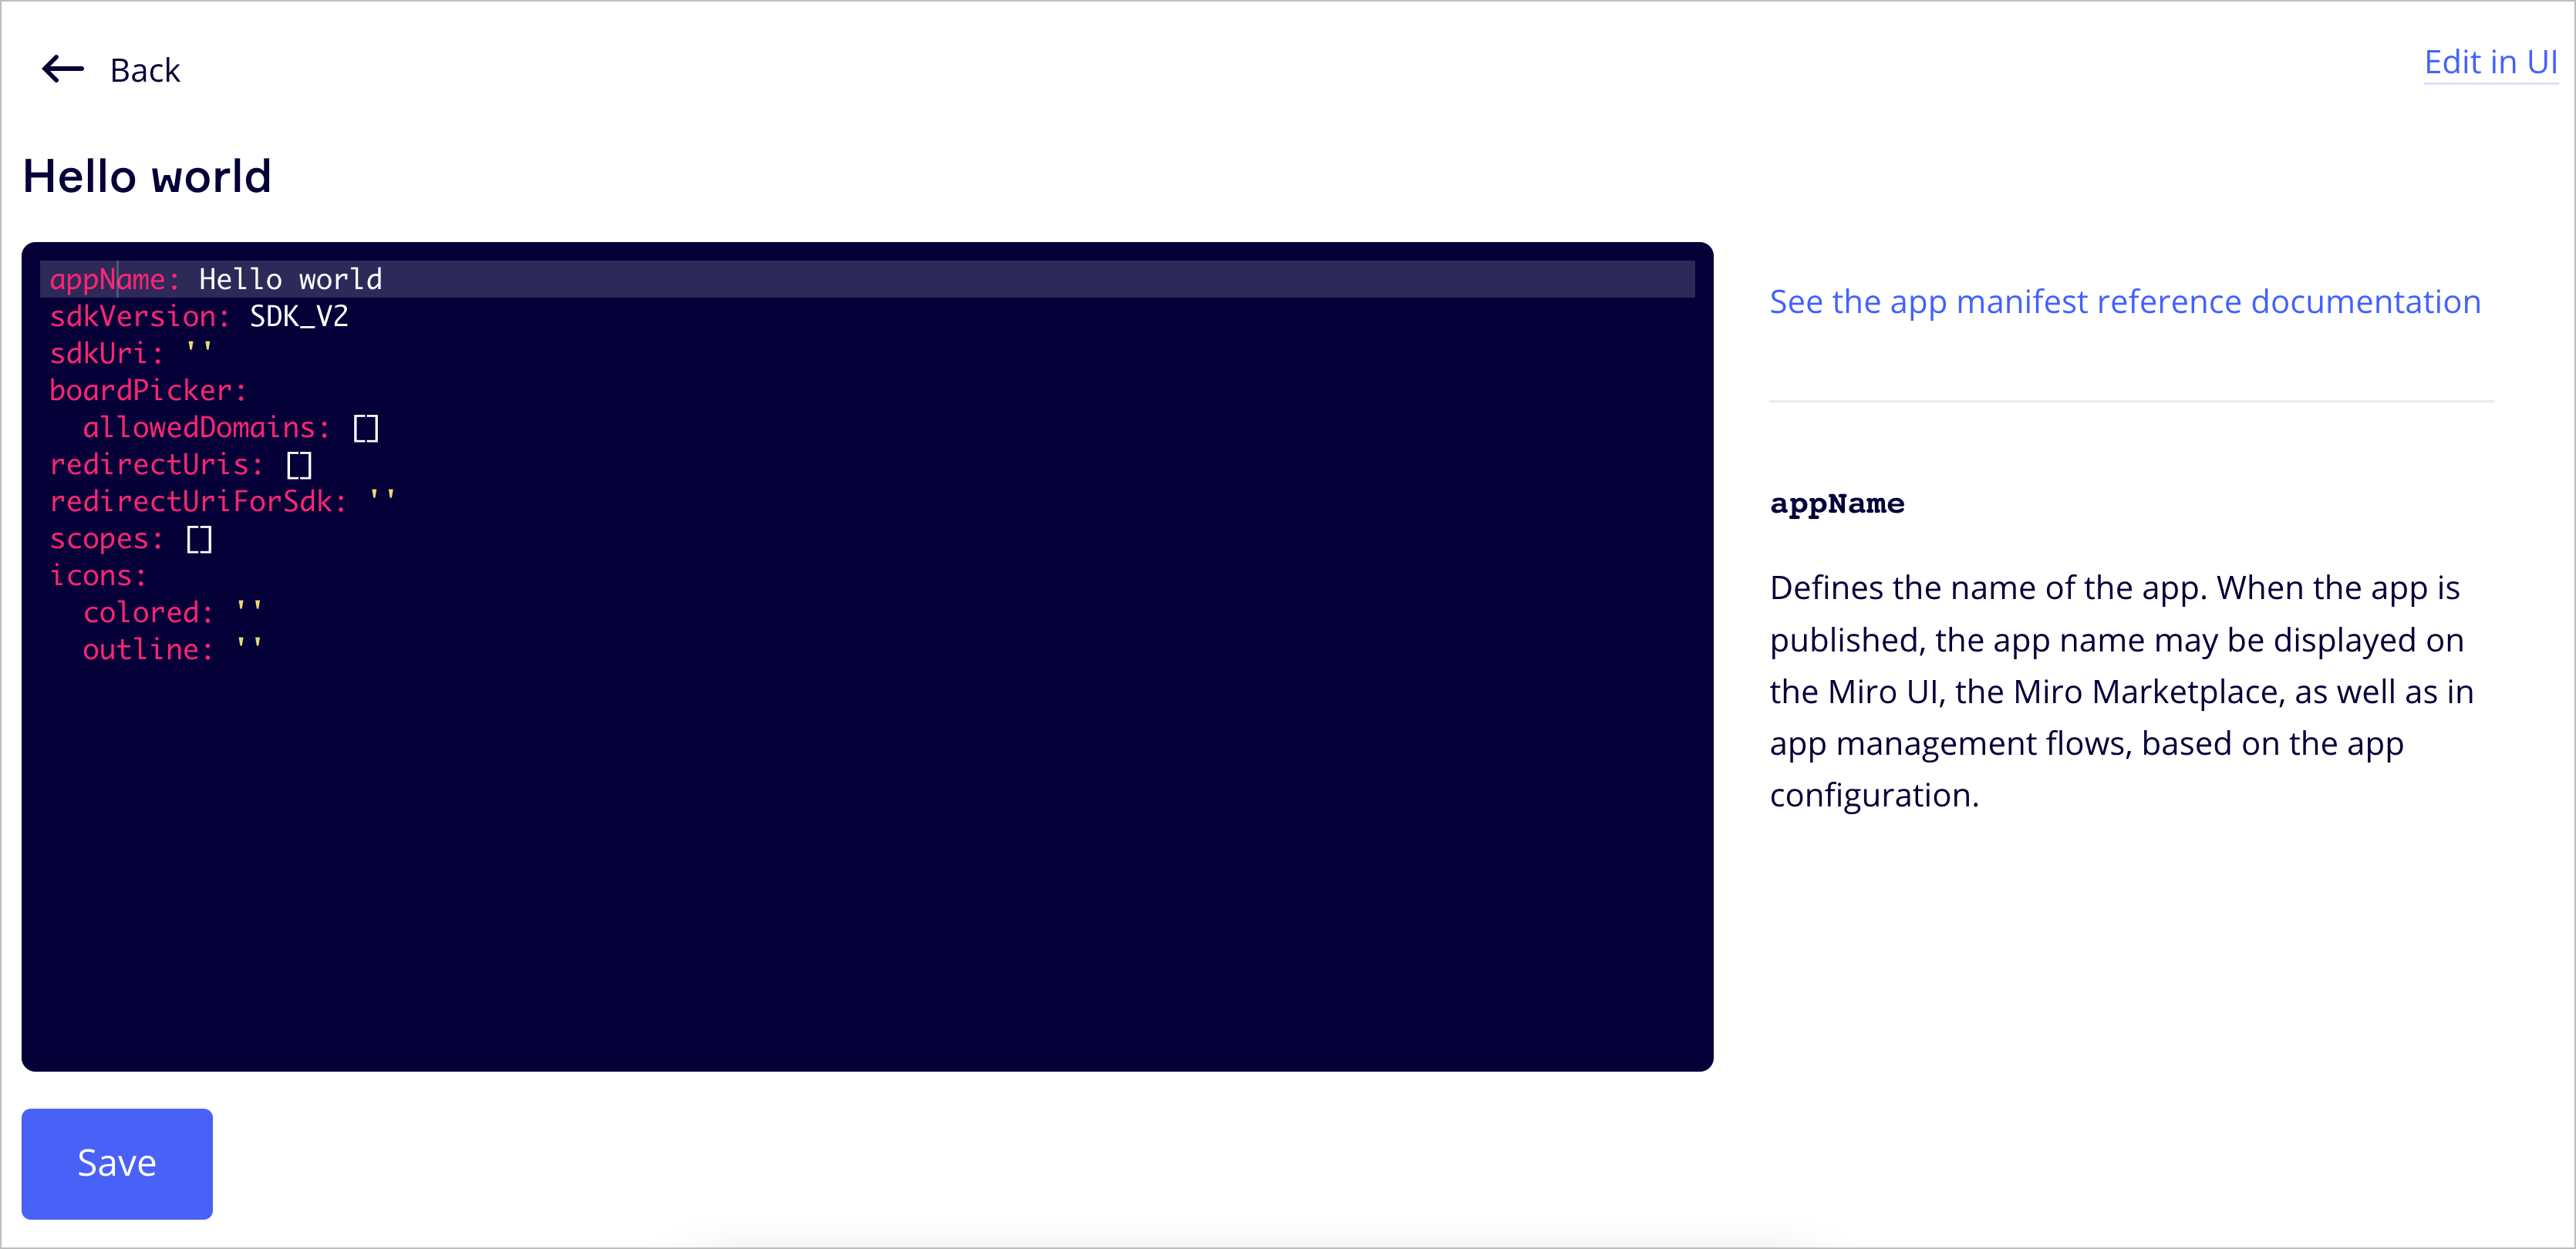
Figure 4. Configure your app by editing the app manifest.appName: the name of the app that you entered in the App name input field, on the Create new app modal.scopes: the Miro REST API and the Web SDK implement user access control through scopes.
Scopes define the permissions your app requires to interact with a board and to work as designed.
When users install your app, they are prompted to provide consent for the required scopes.
For example, to enable your app to read from and write to the board, specify the following permissions:board:readboard:write
- Once done, save your settings by clicking Save.
- To go back to the app settings UI and proceed with the app installation, in the top-right corner of the page click Edit in UI.
Step 3: install the app
In the app settings UI, do the following:
- At the bottom of the app settings page, click Install app and get OAuth token.
- On the Install app to get OAuth token dialog:
i. From the Select a team drop-down menu, select Dev team.
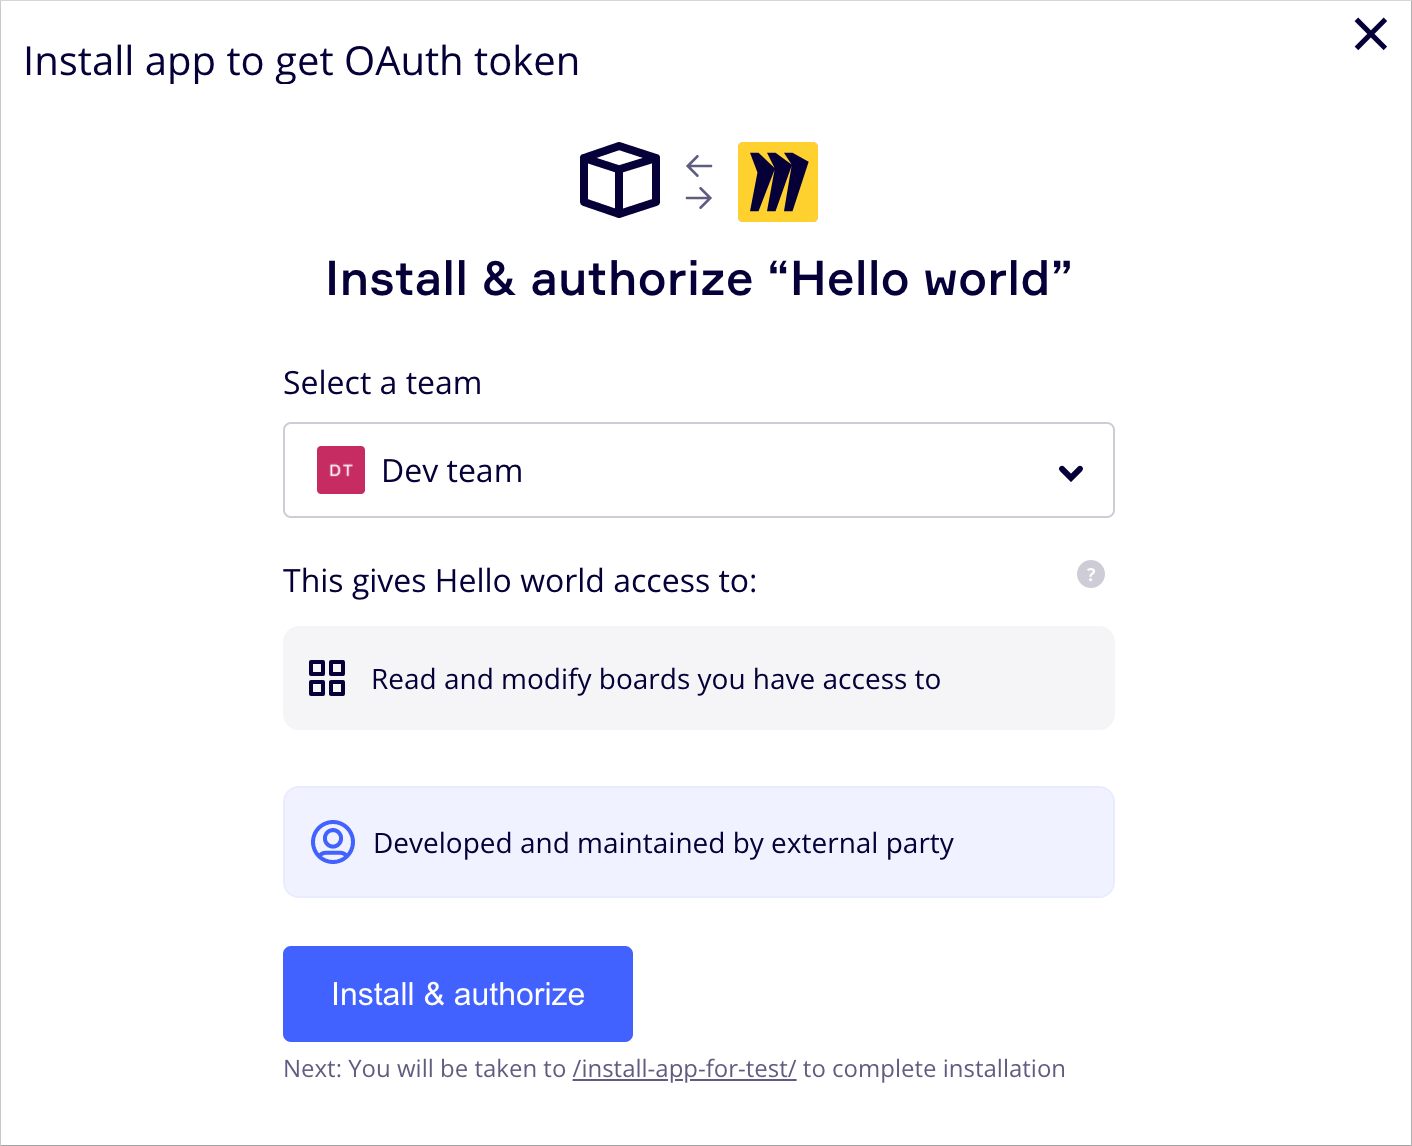
Figure 5. Select a team.
ii. Click Install & authorize. A message notifies you that the app is successfully installed, and you get your access token.
You need this access token in the next steps where you call the APIs to create a board and create a sticky note item on the board.
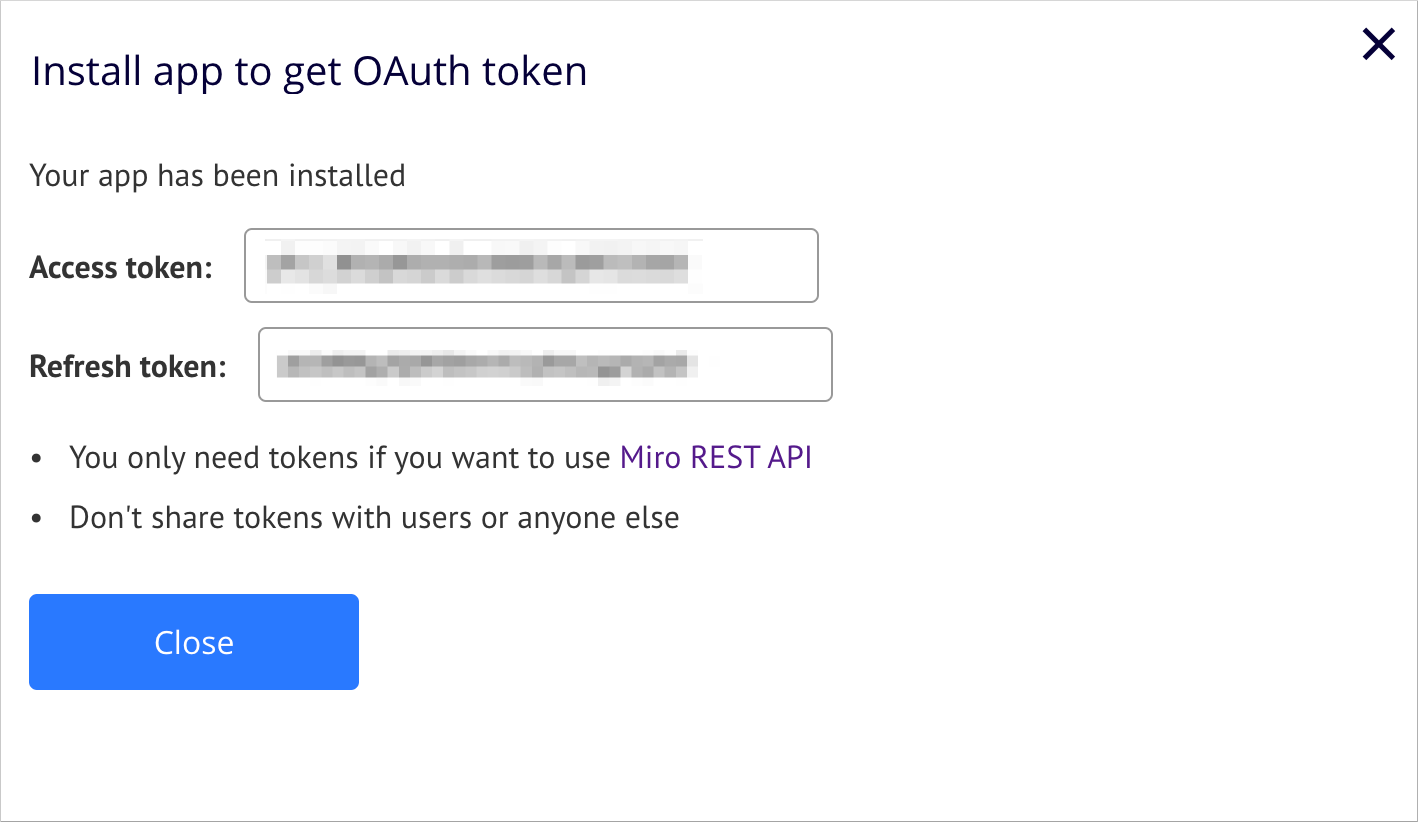
Figure 6. Access token.
iii . Click Close.
Service Account Use Case for REST API
If you plan to create an app and use it as a service account (i.e. no users for the app, just automate certain things on the board with the REST API) then you won't need to implement the full OAuth flow in your app. You'll need to decide if you want expiring tokens (recommended as a security best practice) or non-expiring (fine for test applications). If you're going with the non-expiring approach, then once you get your access token from following the steps above, you are done and ready to use the access token to call Miro's REST API endpoints.
If you've decided to go with the expiring token, then you'll need to implement some logic to get new access token using refresh token. We also have example code to show you how to implement the refresh token logic in our node-oauth app-example in GitHub.
Step 4: create a board
Now that you have an access token, navigate to the Create board reference documentation. To create a board, you need to construct an HTTP request. The documentation includes a sandbox to help you construct these requests by simply filling in the parameter fields.
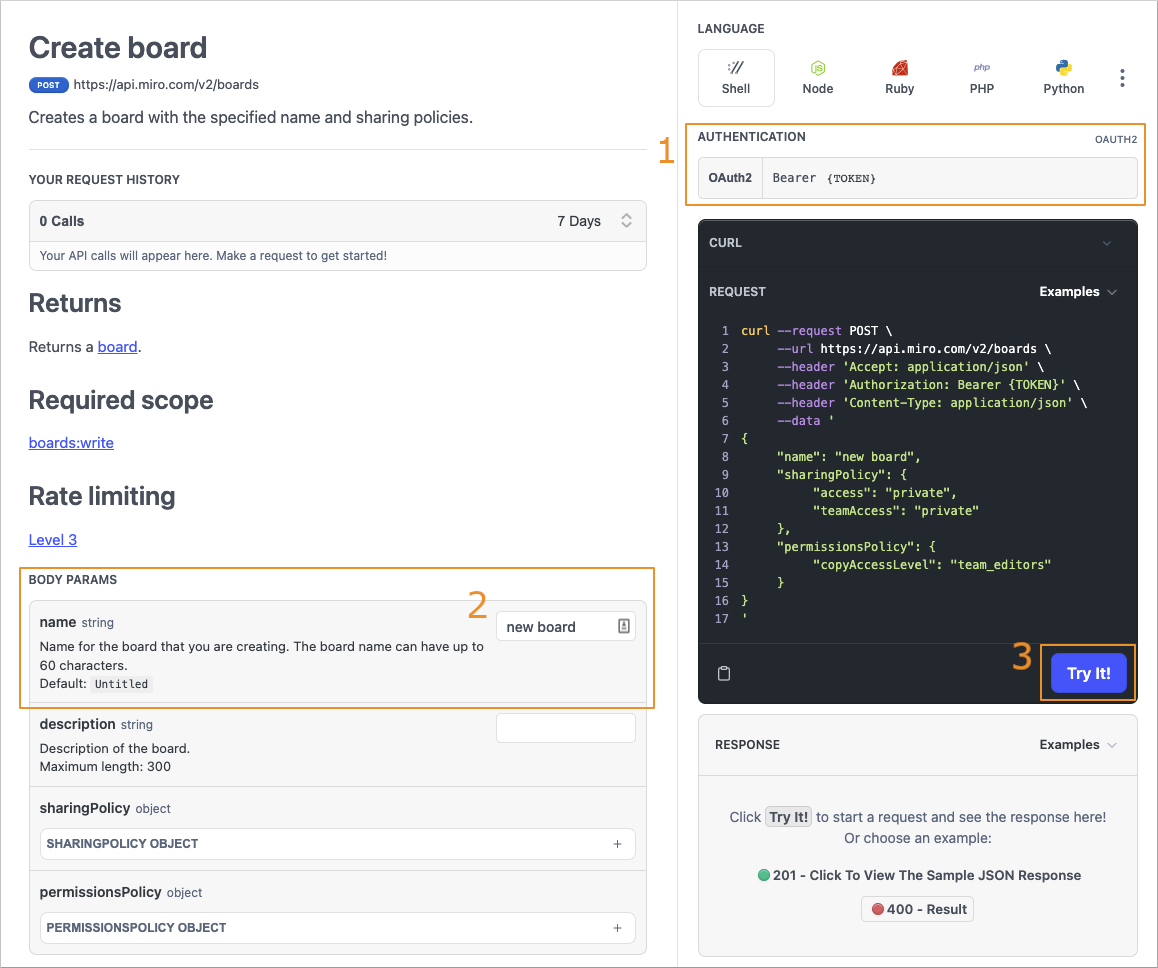
Figure 7. Make a REST API call in the interactive REST API playground to create a board.
To make the create board API call:
- Copy the access token you saved earlier into the Authentication field.
- Input a name for your new board in the
namefield. For example, you could use "new board". - Click Try It! to execute the API call.
- To see the result of the executed API call, open your Miro dashboard.
You should see a new board, with the title you used in your API call.
The Miro REST API reference documentation is intentionally designed to make it easy for you to explore and test each API endpoint. Simply use the access token you created, and you can execute API calls from the documentation, and even view a log of your recent API activity.
Updated 4 months ago