Tutorial: How to Generate Diagrams from Code w/ Miro MCP & VSCode + GitHub Copilot
Use Miro's MCP server within VSCode + GitHub Copilot to automatically generate technical diagrams from code.
Feedback form.
By integrating with GitHub Copilot Chat, this tool can analyze both public repositories and your local project files, outputting detailed diagrams onto your Miro board, such as:
- Flowchart
- Sequence
- Mindmap
- UML
- System Architecture
This process is invaluable for automating documentation, speeding up new engineer onboarding, and visualizing complex systems.
What We'll Cover
- Scenario 1: Generating a high-level architecture diagram from a public GitHub repository.
- Scenario 2: Generating a detailed component diagram from your local codebase open in VS Code.
Prerequisites
Before you begin, ensure you have the following set up:
- A Miro account.
- Visual Studio Code installed.
- The GitHub Copilot Chat extension installed and authenticated in VS Code.
- Miro MCP configured for VSCode + GitHub Copilot (this provides prompts to use to generate the best diagrams possible) installed and configured to connect to your Miro account. See instructions here.
- An active Miro board open in your browser (in the same org which you've authenticated Miro MCP) to receive the generated diagrams.
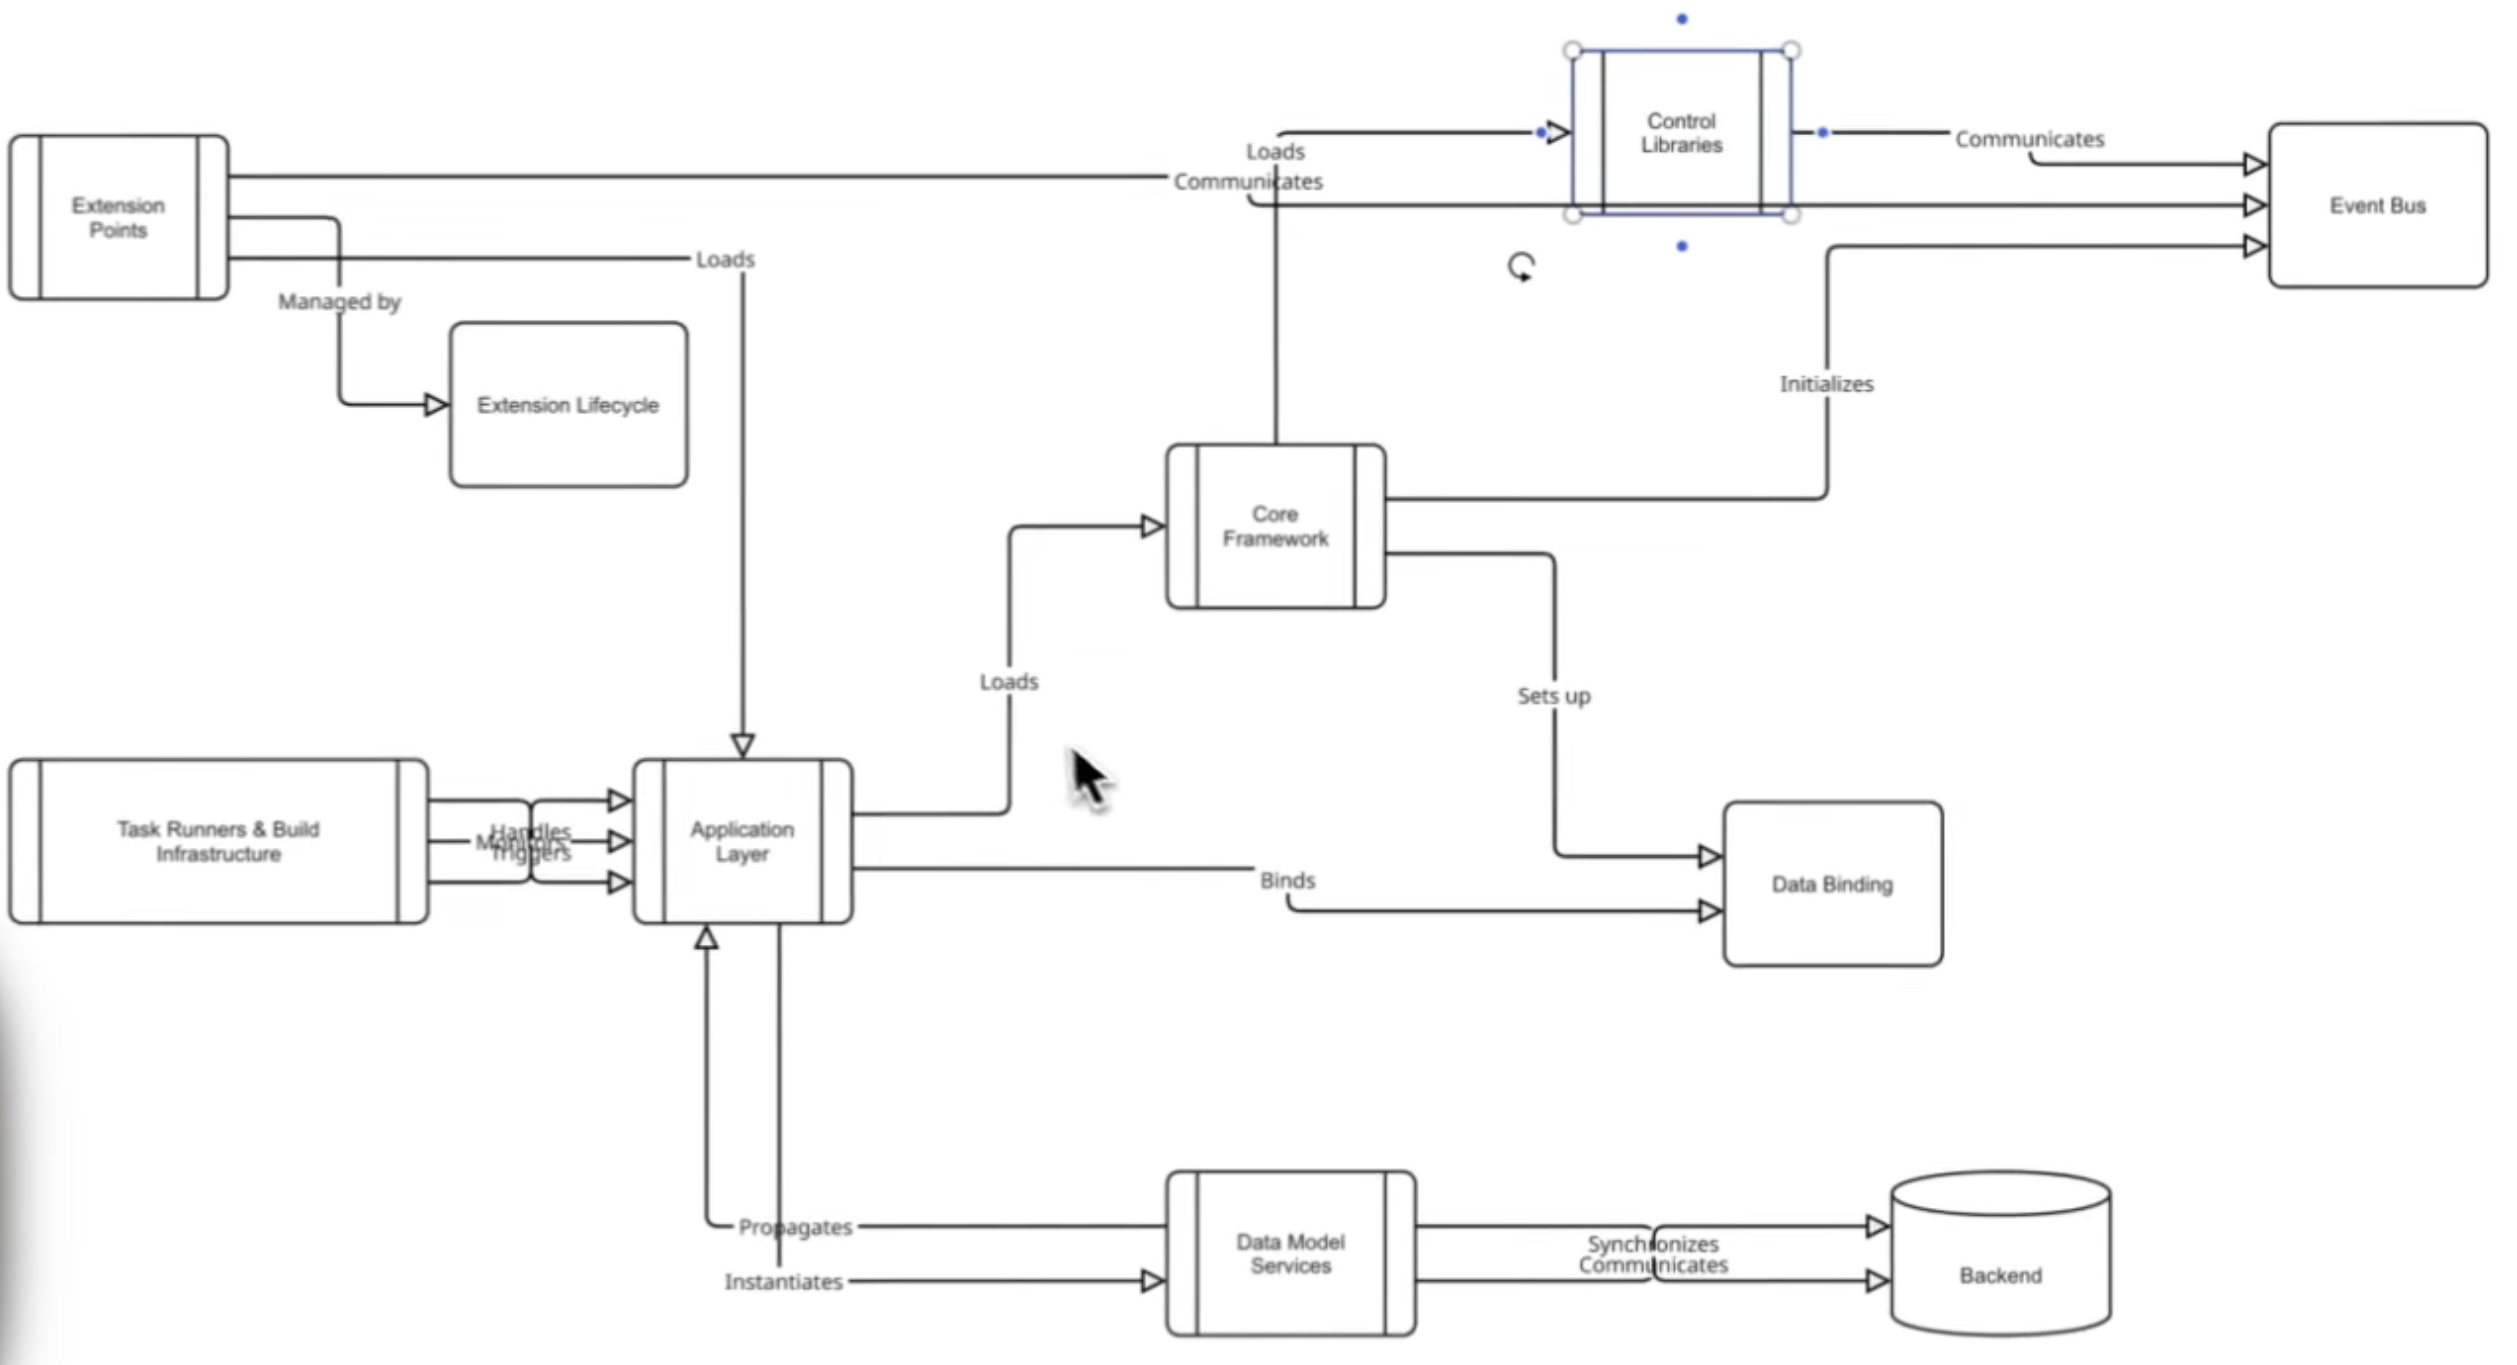
Scenario 1: Visualize a Public GitHub Repository
In this scenario, we will ask the MCP tool to analyze the public OpenUI5 GitHub repository and generate a technical architecture diagram.
1. Open VS Code & Copilot Chat
- Launch VS Code.
- Open the GitHub Copilot Chat view (from the activity bar or by command).
2. Prepare Your Prompt
- In the Copilot Chat box, type
/and then select/mcp.miro-mcp.code_explain_on_boardto use Miro MCP's custom prompt that is tailored for this specific use case - to analyze code and explain it via a diagram on your Miro board. See image below for what the prompt looks like after you type in/.

- In case you want to create and use your own prompt, you can see a sample prompt below, but we do recommend using our prompts.
Sample Prompt (from video):
Generate a detailed technical architectural diagram of the OpenUI5 application, based on its public GitHub repository (https://github.com/SAP/openui5), designed specifically for senior engineers.
Focus on the underlying technical structure, components, and interactions. Break down the architecture into its primary process-isolated services.
Clearly label the key technologies, frameworks, and communication protocols enabling interaction between these services. Illustrate the data flow and process boundaries to explain how the design achieves performance, stability, and extensibility.
The diagram should be precise and technically accurate, suitable for understanding the system's inner workings.
Add it to this Miro board:
[YOUR_MIRO_BOARD_LINK]
3. Execute and Review
- Send the prompt.
- GitHub Copilot will confirm that it is using the Miro MCP tool. It will fetch data from the public URL, analyze it, and then execute the diagram generation.
- Switch to your open Miro board.
- The new architecture diagram will appear on your board, ready to be applied to the canvas.
You can now move, edit, and style the diagram just like any other object on your Miro board.
Scenario 2: Visualize a Local Codebase
In this scenario, we will analyze an internal project (e.g., "security-header-automation") that is currently open in your VS Code workspace. The goal is to generate a UML-style class diagram.
1. Open Your Project and Copilot Chat
- Ensure your project folder is open in the VS Code file explorer.
- Open the GitHub Copilot Chat view.
2. Prepare Your Prompt
- This time, your prompt will instruct the tool to analyze the "current workspace" rather than a public URL.
- As before, invoke the Miro MCP prompt: in Copilot Chat box, type
/and then select/mcp.miro-mcp.code_explain_on_board. See image below for what the prompt looks like after you type in/. - We recommend to use the prompt above - but if you want to use your own prompt, you can also do that and ensure that you use the
draft_diagram_newtool to generate the diagram.

Sample Prompt (from video):
Analyze the entire codebase in my current workspace and generate a high-level component diagram. The diagram should be designed for a new engineer to quickly understand the core architecture. Please ensure you:
- Identify Key Components: Find the main services, modules, or architectural layers (e.g., "API Server," "Authentication Service," "Data Access Layer," "PostgreSQL Database").
- Map Relationships: Show the primary interactions and data flows between these components. Use labeled arrows to indicate the direction and purpose of the interaction (e.g., "Makes API call to," "Reads data from," "Publishes events to").
- Include External Systems: Explicitly show crucial external dependencies like databases, third-party APIs, or message queues.
- Maintain High-Level View: Abstract away minor implementation details. Focus on the overall structure, not individual functions or classes.
Make sure to use the generate diagram Miro tool from MCP which you have installed.
Add it to this Miro board:
[YOUR_MIRO_BOARD_LINK]
3. Execute and Review
- Send the prompt.
- Copilot will ask for permission to analyze the files in your local workspace. Click "Continue" to allow it.
- The tool will scan your codebase, identify the components, classes, and relationships, and then run the diagram generation.
- Switch to your Miro board.
- A new, detailed UML-style class diagram will appear.
- You can use Miro's "focus mode" to zoom in and see that the tool has correctly identified classes (e.g.,
APIServer,WebhookRoute,SlackService), properties (e.g.,port: int), and methods (e.g.,+startServer()), all based on your source code.
🏁 Conclusion
You have now successfully used the Miro MCP server and GitHub Copilot to automatically generate two different types of code diagrams. You have learned how to:
- Visualize a public repository by providing its URL.
- Visualize your local workspace by granting file access.
This workflow dramatically reduces the time spent on manual diagramming and helps keep your technical documentation evergreen.
Updated 4 months ago