Connecting Miro's MCP Server to MCP-compatible clients
Step by step guides on how to configure Miro's MCP Server with MCP-compatible clients.
Feedback form.
This guide shows examples of how to connect to Miro's MCP Server based on the MCP-compatible client you are planning to work with. The Miro OAuth flow will be the same, but each tool may have a slightly different UI.
The UI of each MCP-compatible client on this page may have changed recently, so please use this as a general guide. For the most accurate information, see the documentation of the MCP-compatible client of your choice.
If you are on Miro Enterprise Plan, you'll need to first enable Miro's MCP Server for your org before you can use it. See our Admin guide for more details.
Claude (Web & Desktop App)
Use this method to connect Miro to your standard Claude chat interface. This works across the Claude web app and the Claude Desktop application.
Setup Steps
-
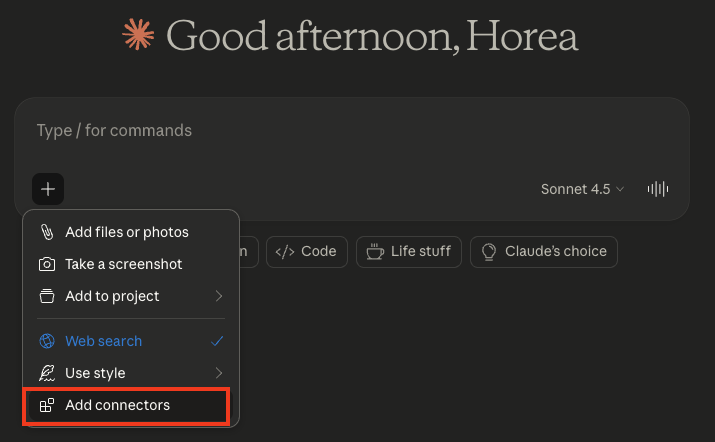
Open Connectors: In the Claude chat box, click the plus (+) icon and select Add connectors.
-
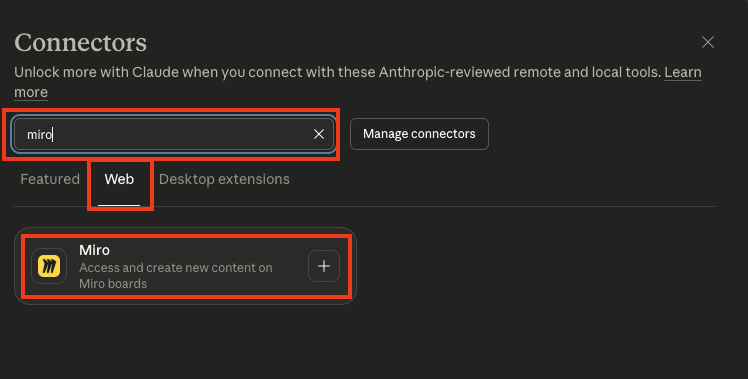
Find Miro: Select the Web tab and search for "Miro."
-
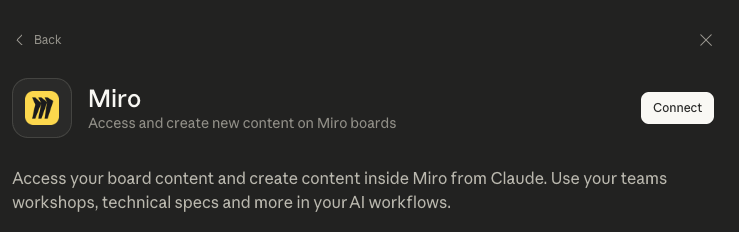
Connect: Click the plus (+) icon on the Miro card, then click Connect on the following screen.
-
Authorize: Follow the Miro OAuth flow to authorize the app for your specific Miro team.
-
Verify: You will see a "Connected to Miro" confirmation. You can now prompt Claude to access or create content on your boards by including a board URL in your message.

-
💡 Try this prompt: "Summarize the content on this board": [your-board-URL] OR "create me a sequence diagram of the data flow for Claude Web and Desktop app, and add it to this board [your-board-URL]
Claude Code
For most up to date info on how to manage MCP Servers with Claude Code, go to Claude Code MCP Docs.
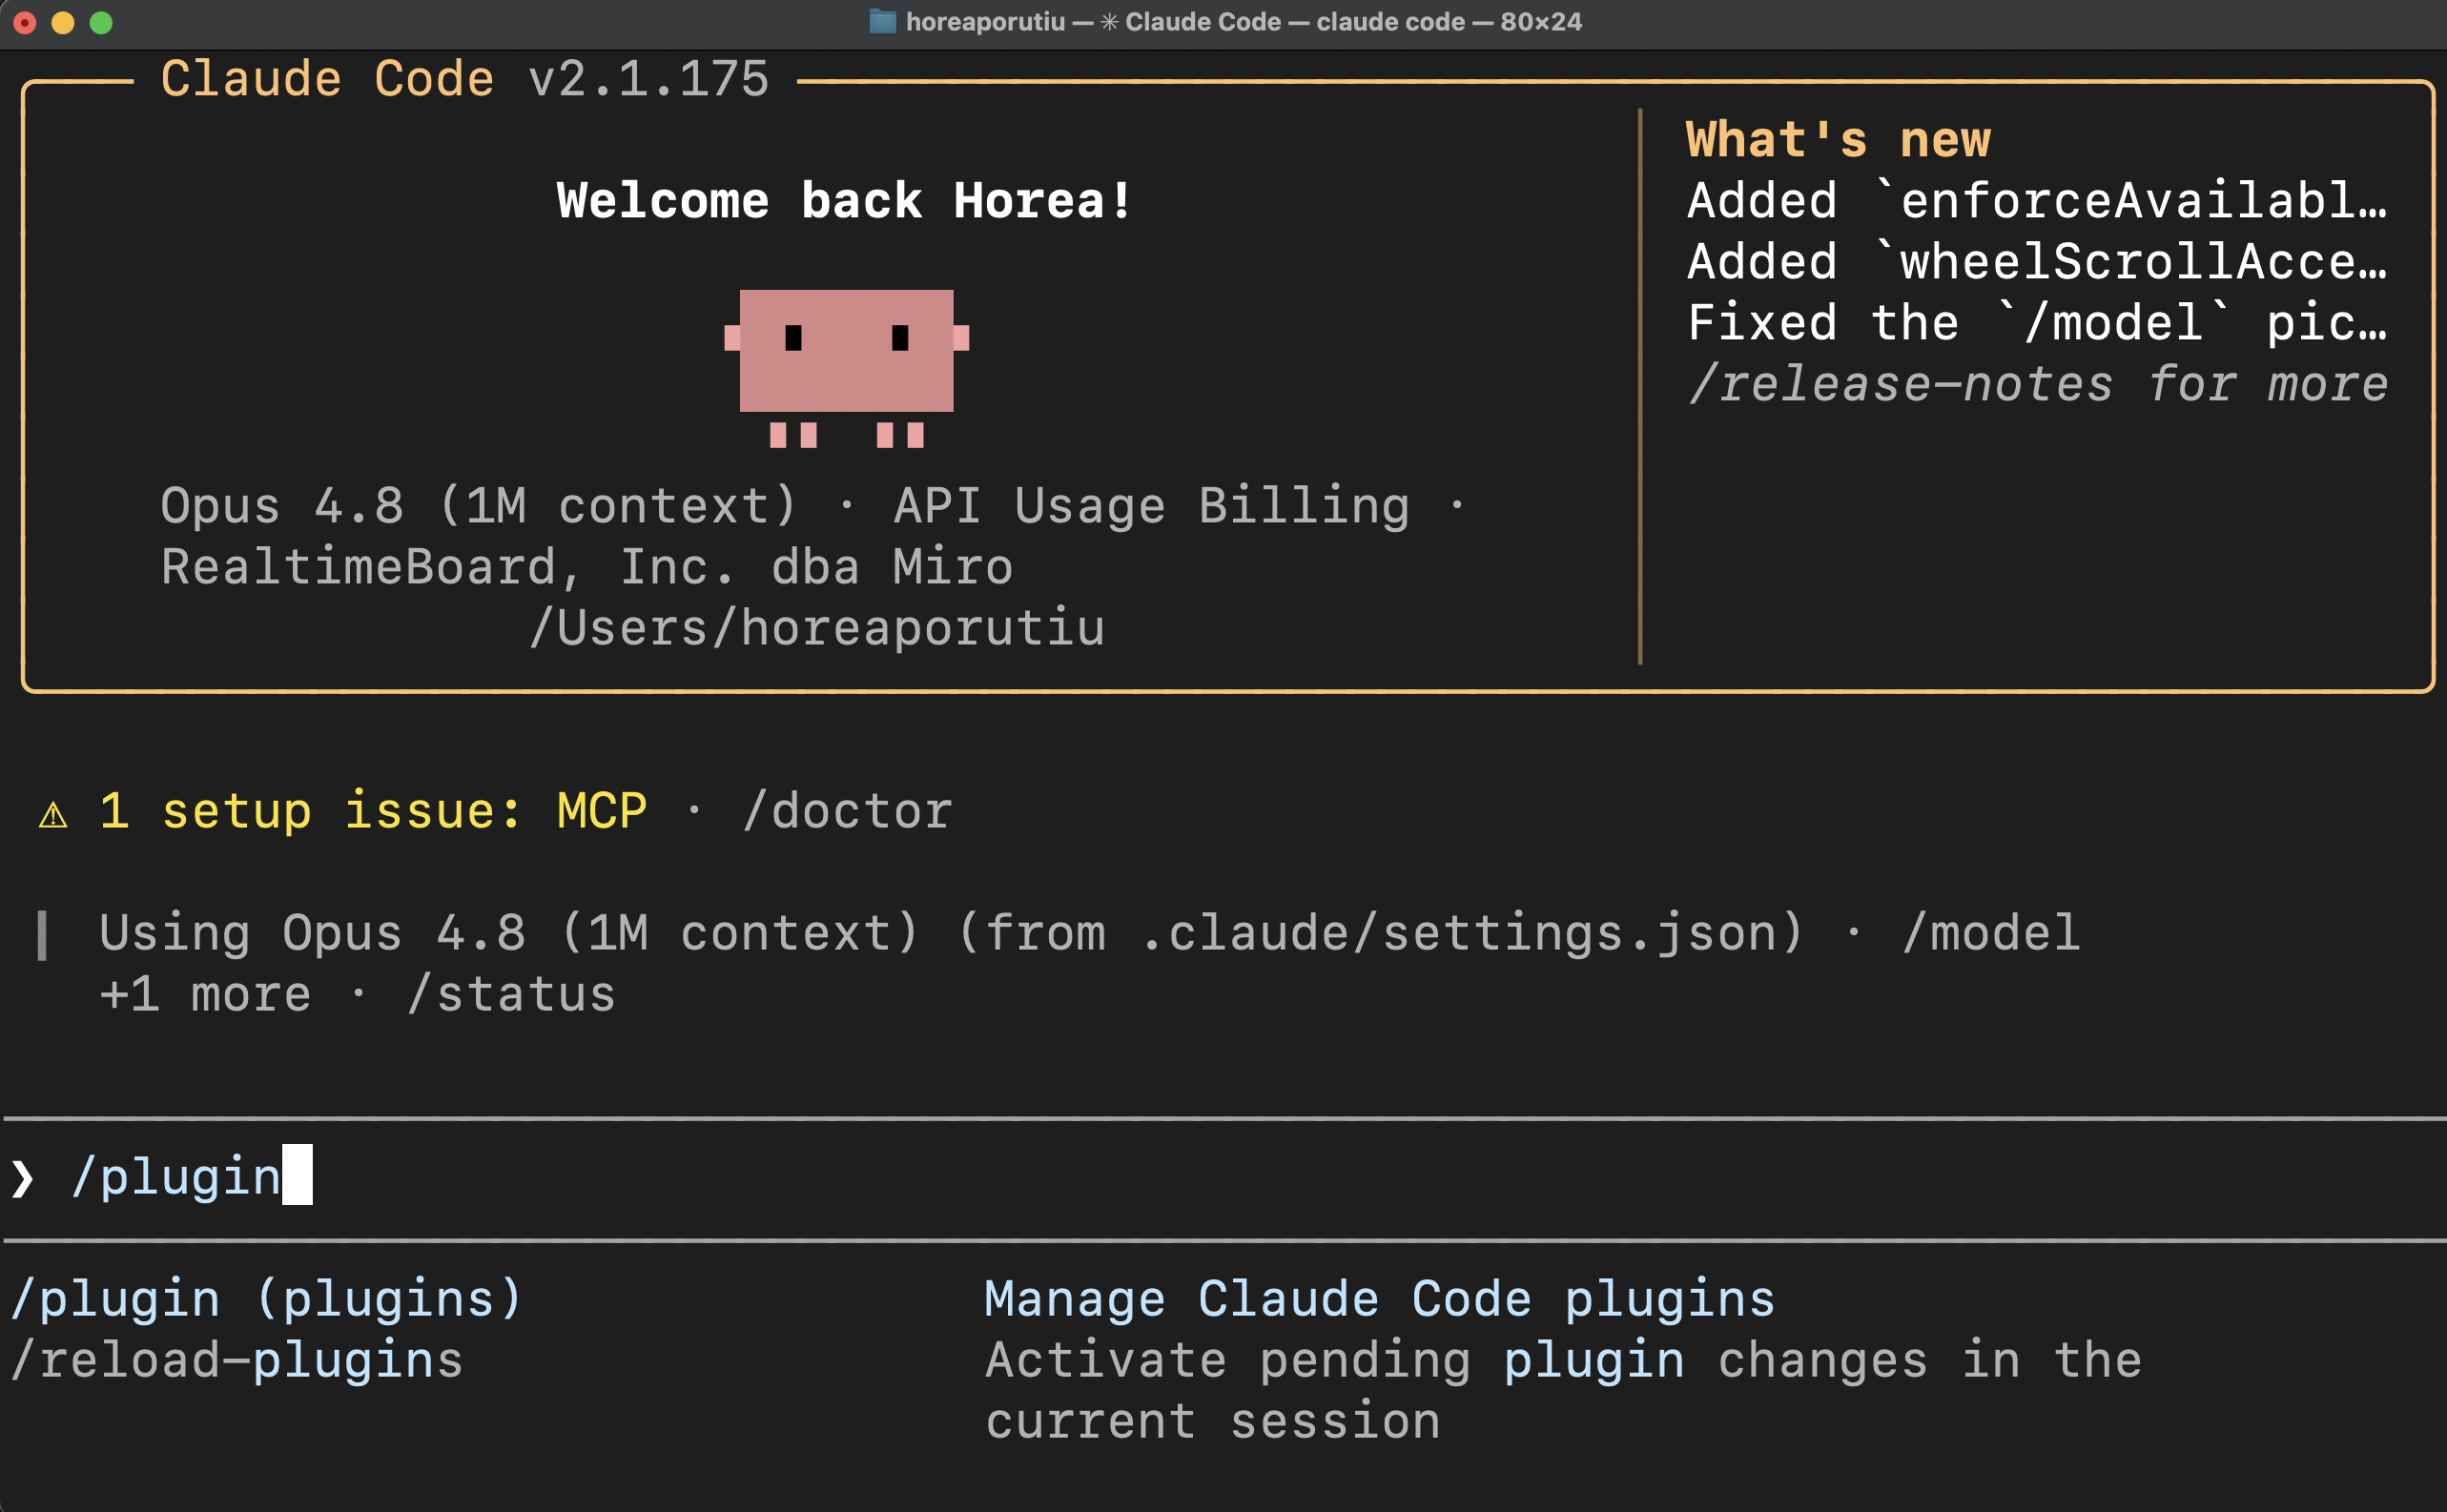
- Login to Claude Code and type in
plugins
- From the plugin menu, search for
Miro
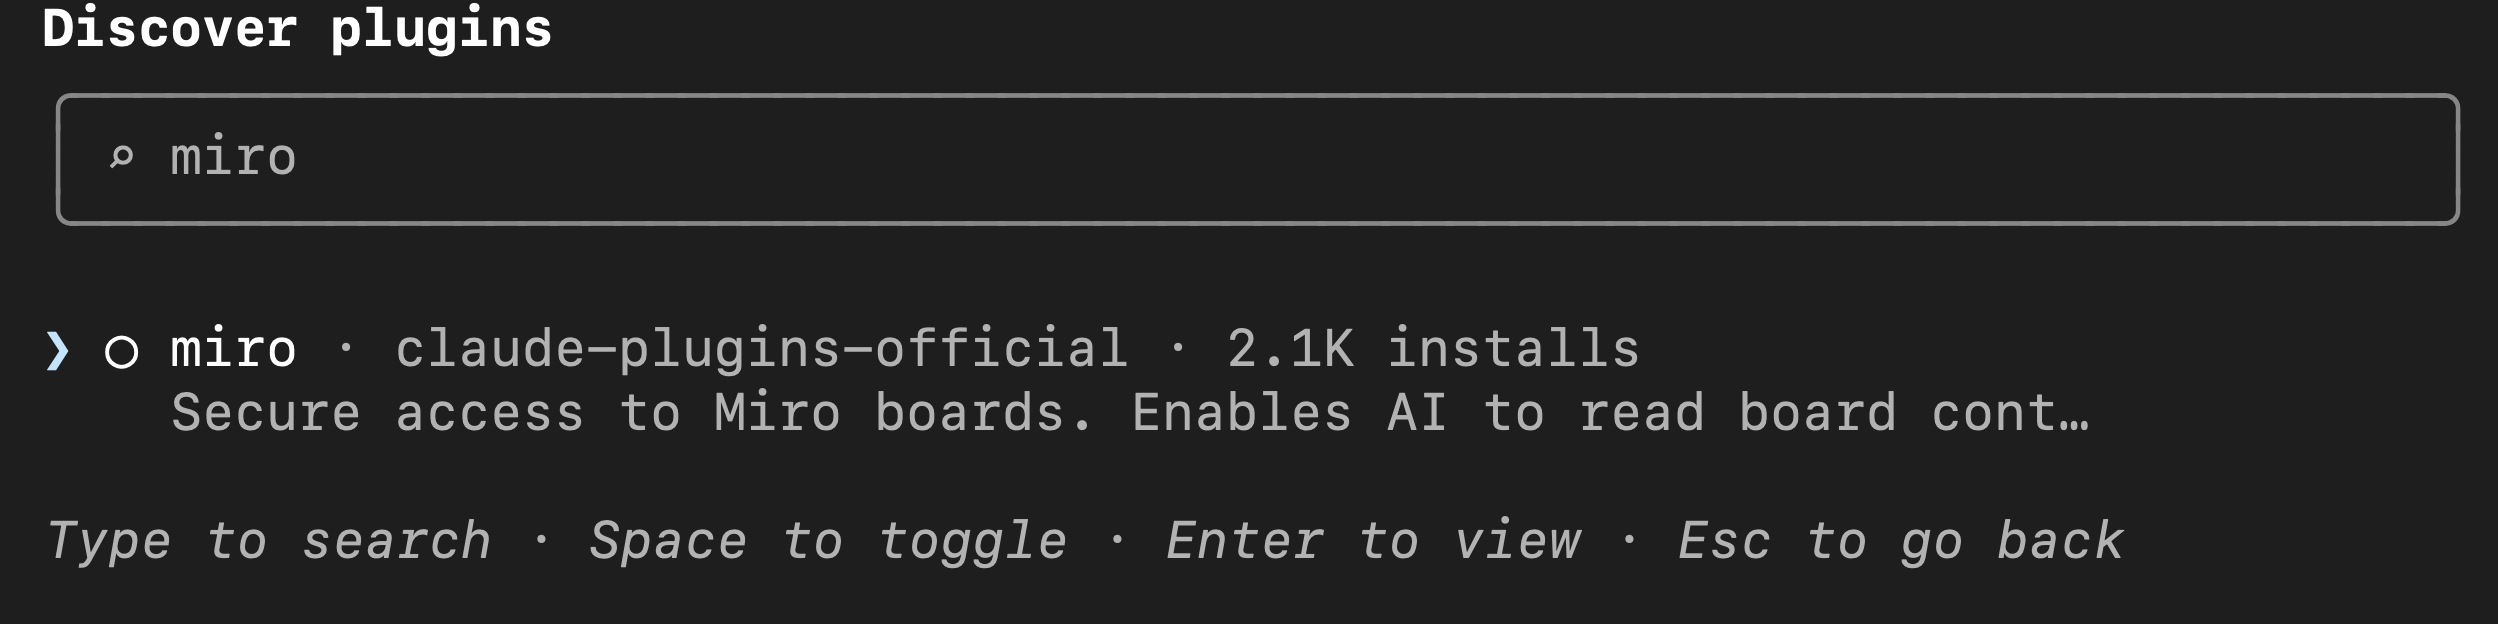
- Install the plugin
- Type in
/mcpand you should see the Miro MCP. Auth into it, and you should be able to use it!
- Login to Claude Code with
claudecommand. - Next, use
claude mcp add --transport http miro https://mcp.miro.comto add the Miro MCP into Claude Code. - Use
/mcp authand then auth into Miro by following the Miro OAuth flow. - Once you've authed, you are ready to use Miro's MCP Server. From there, type in a prompt such as `create me a new Miro board that visualizes my codebase from this directory [add in path to your code] as an architecture diagram
ChatGPT
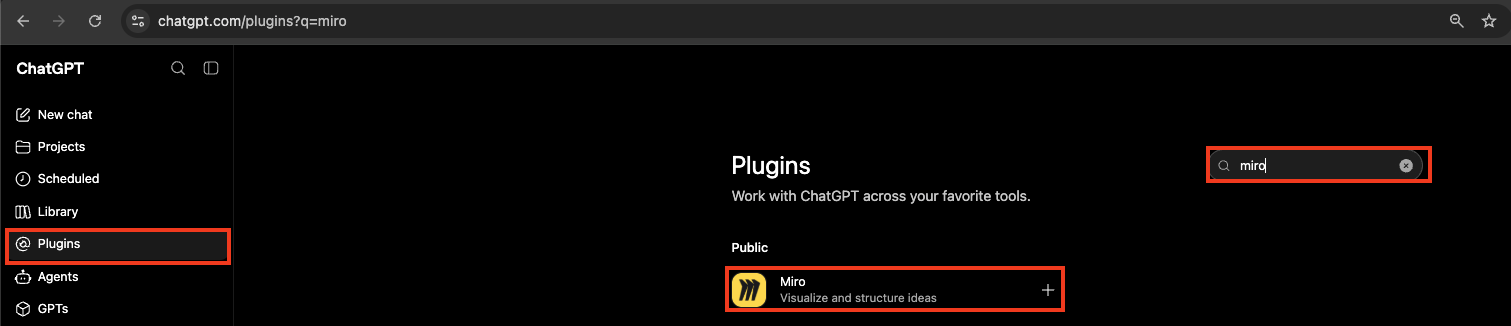
- Login to ChatGPT and Click on "Plugins" from the left sidebar
- Search for "Miro" and then "Add" the plugin. Auth into the Miro team you'd like to use Codex with.
Cursor
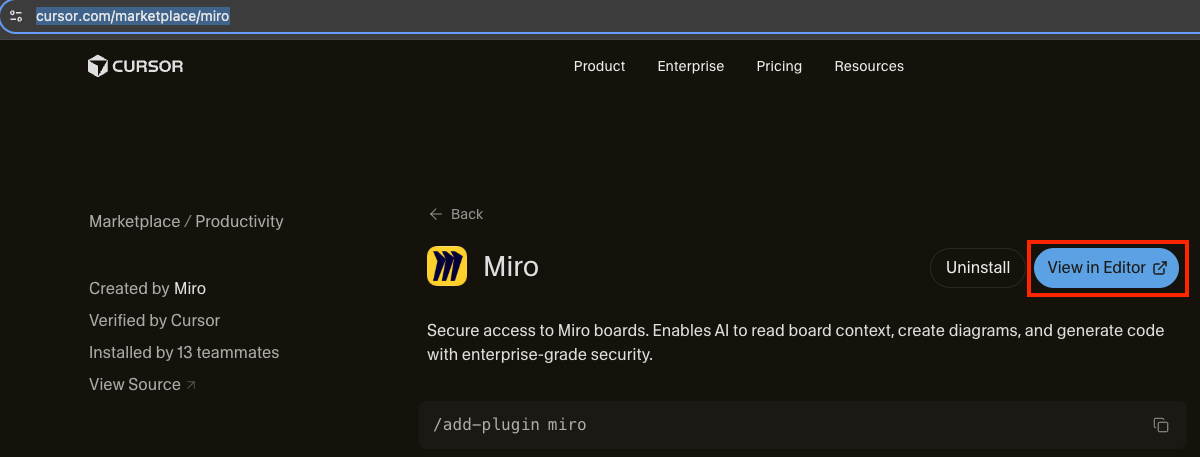
For Cursor, the best way to install the MCP Server is to go to Cursor's Marketplace and find the Miro Plugin.
From there, click on "View in Editor".
Then, find the Miro Plugin and click on it.
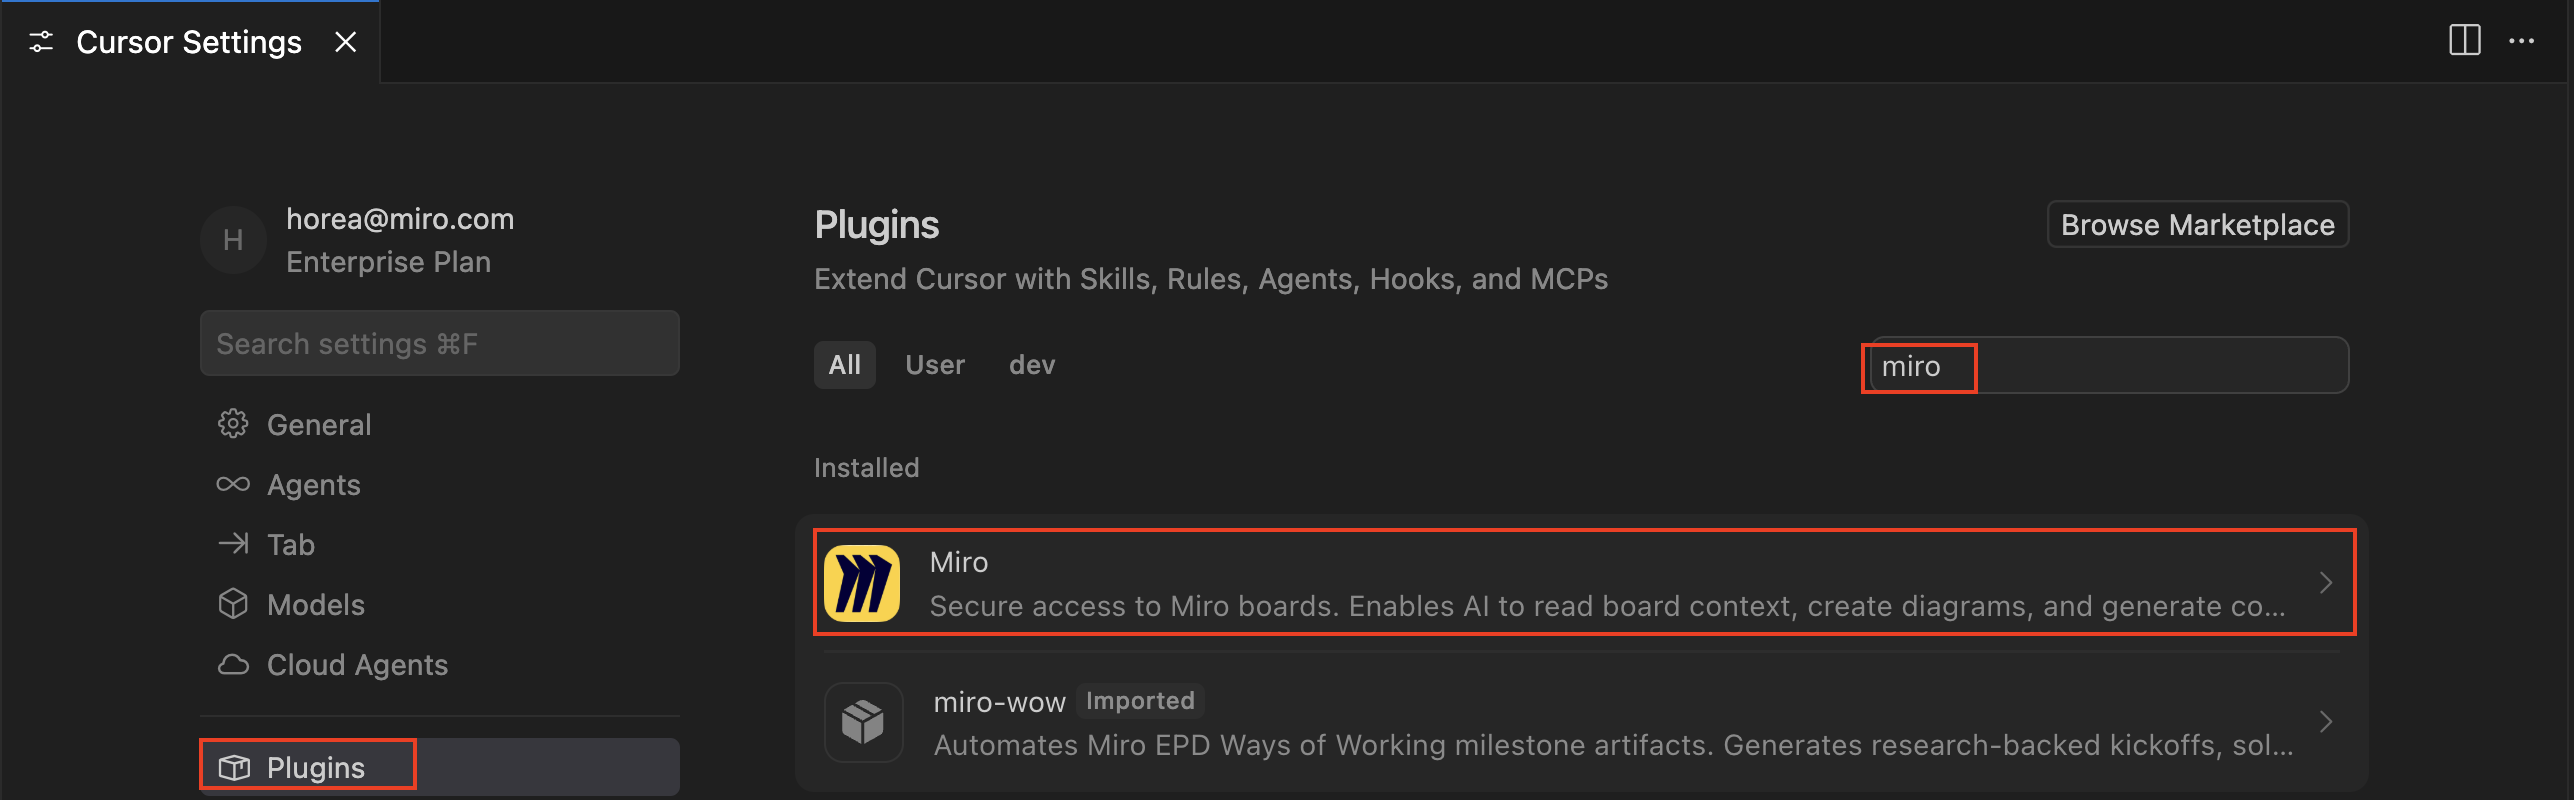
Lastly, click on "Add to Cursor" and from there, if you should see that the Plugin is installed as shown below.
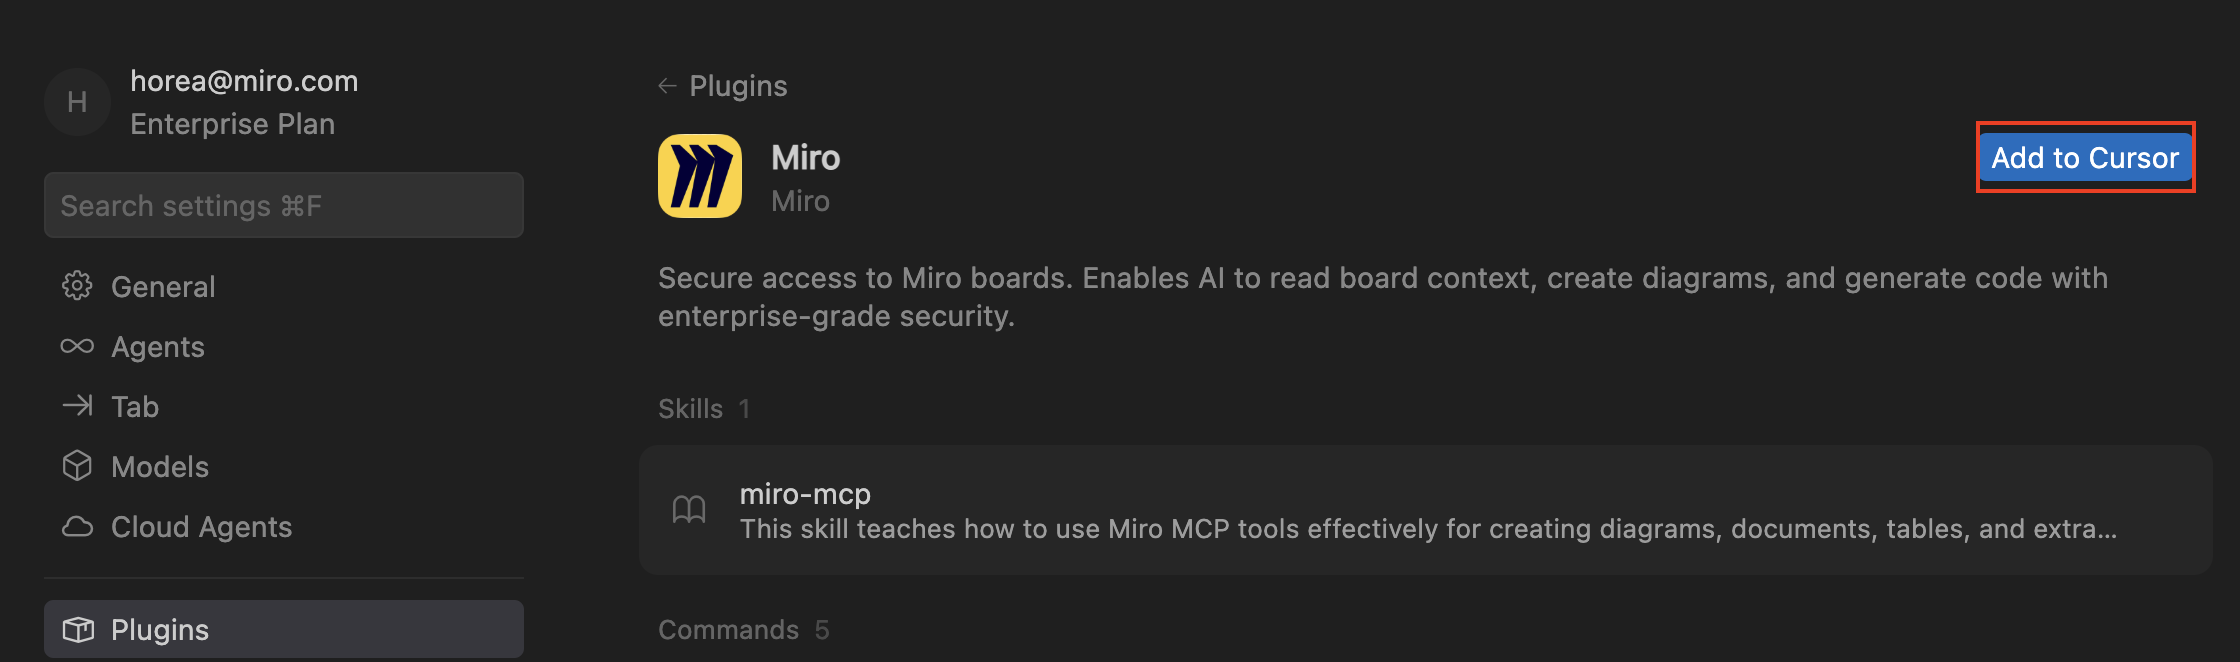
That's it! Now you can prompt cursor to read your Miro boards and generate docs, diagrams, tables, and more to come soon!
Alternatively, if you want to install the MCP Server manually, you can go to Cursor settings -> Cursor Settings -> MCP -> Add a Custom MCP Server and add in the following JSON:
{
  "mcpServers": {
    "miro-mcp": {
      "url": "https://mcp.miro.com/",
      "disabled": false,
      "autoApprove": []
    }
  }
}
Click on the authenticate button. This should open a new window for the Miro OAuth flow (see below). See OAuth details in previous guide.
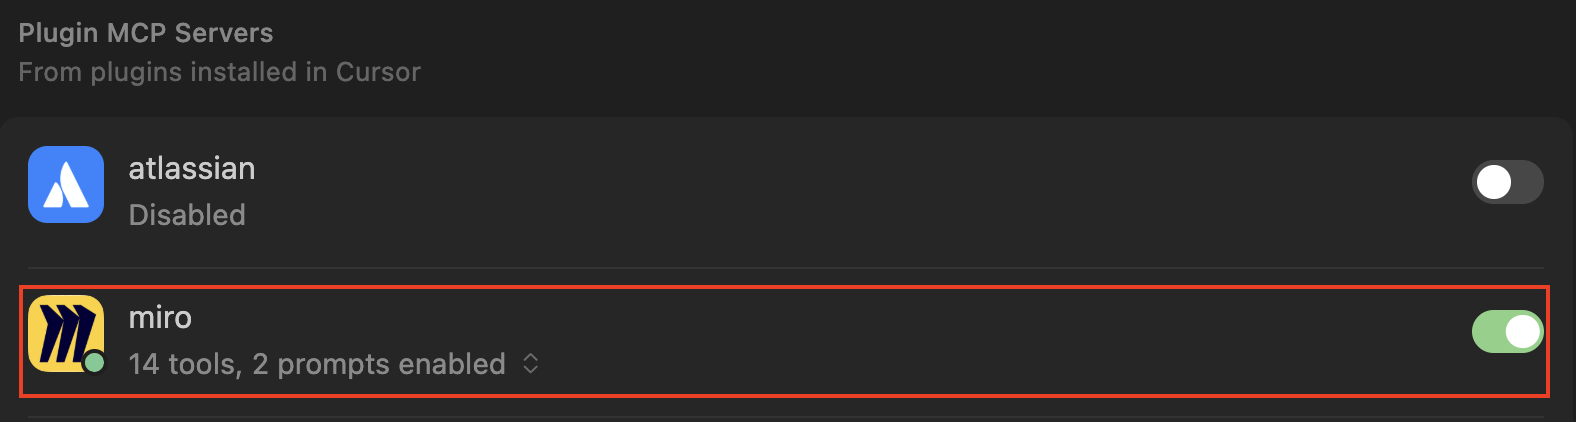
You should see that the MCP Server is enabled and should see that tools and prompts are available, as shown below.
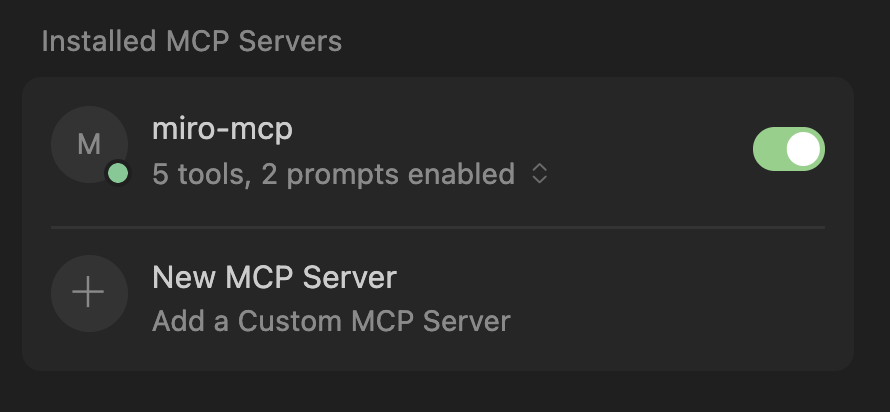
You should see tools and prompts are now enabled via Miro's MCP Server!
That's it! You're ready to start generating diagrams and next level apps with Miro MCP!
VSCode and GitHub Copilot
Use this method to connect Miro to VSCode + GitHub Copilot.
Setup Steps
-
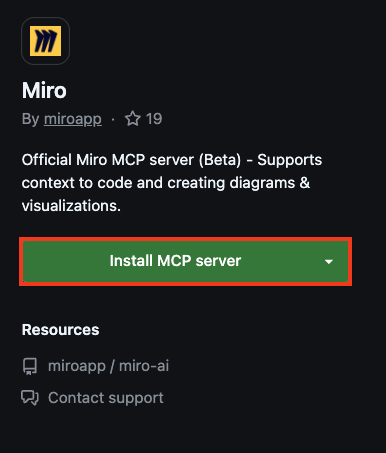
Find Miro's MCP Server on GitHub's MCP Registry.
-
Click on "Install MCP server".
-
Open the Miro OAuth flow, install the app on the team of your choice.
-
That's it! You can now start using Copilot agent to visualize on Miro, create code from context on Miro boards, or summarize boards.
-
💡 Try this prompt: "Summarize the content on this board": [your-board-URL] OR "create me a sequence diagram of the data flow for VSCode app and it's extensions and add it to this board [your-board-URL]
-
To use Miro's MCP Server's built in prompts you can type in
/and you should see the prompts which Miro's MCP Server provides. To see Miro's MCP Server tools, click on the tools icon and you should see Miro's tools.
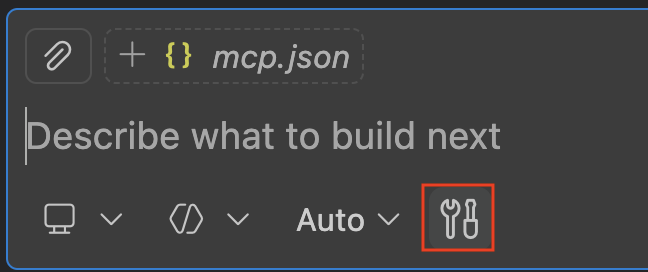
To see Miro's MCP Server tools, click on the tools icon and you should see Miro's tools.
-
See tools that you have available.
 documentation for latest tools.](https://files.readme.io/2e57040e0e74e27f24517473df7fcfb92ba81cd2f5563102e3bf91e3720383c3-Screenshot_2026-02-11_at_14.55.08.png)
See tools that you have available. Always check tools documentation for latest tools.
-
To ensure the Copilot Agent uses exactly the tools you want, you can explicitly tell the agent to complete task X with tool Y.
💡Try this prompt: "use the create_diagram tool to create me a diagram of my codebase at ~/dev/codebase _and add it to this Miro board [add in your Miro board URL]"
Codex
-
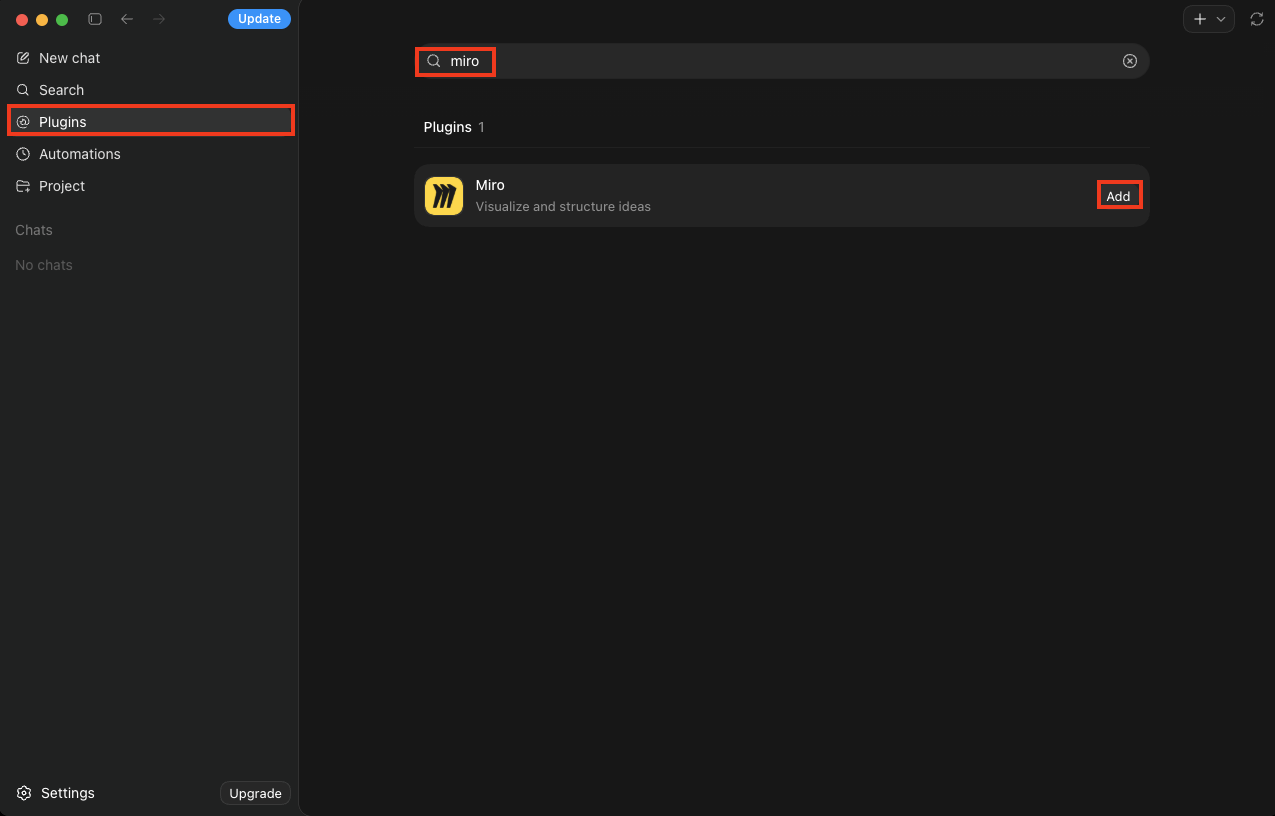
Login to Codex and Click on "Plugins" from the left sidebar
-
Search for "Miro" and then "Add" the plugin. Auth into the Miro team you'd like to use Codex with.
GitHub Agents
-
Go to https://github.com/apps/miro and click on
install. -
Choose the org you want to install the app into.
-
Select the repo's you'd like to use the Miro MCP Server functionality with. Then click on
install and authorize. -
Auth into the Miro team you'd like to use the MCP Server with.
-
Go to the repo you'd like to use the agent with, and click on the
Agentstab. Choose theMiro agent.
Select the Miro Agent from the Agents tab.
-
Try it out! You can ask the agent to:
"Visualize this PR [paste in PR link] on a new Miro board".
Lovable
- Log into lovable.dev.
- Click on your profile in the top right.
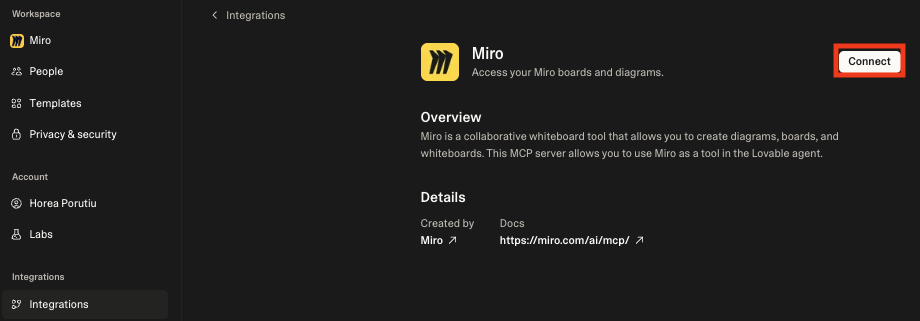
- Click on Settings -> Integrations. Scroll down to Your MCP Servers and find Miro. Click
Set up.

- Click on
Connectand then follow the Miro OAuth flow to install Miro's MCP Server on the team of your choice. You'll only be able to use MCP on boards from the team you authorize.
🎉 That's it! You've now connected Miro's MCP Server to Lovable!
❤️ Now you can start using your content inside Miro to build prototypes in Lovable, just make sure to include the board you want to reference in your prompt!
✨You can prompt it something like "build me a landing page based on the content of this board: <https://miro.com/app/board/
Replit
To use MCP with the Miro board in the video, use this template to bring that same Miro board into your account.And the REPL from video above.
- Click on button below to install Miro's MCP Server in Replit.
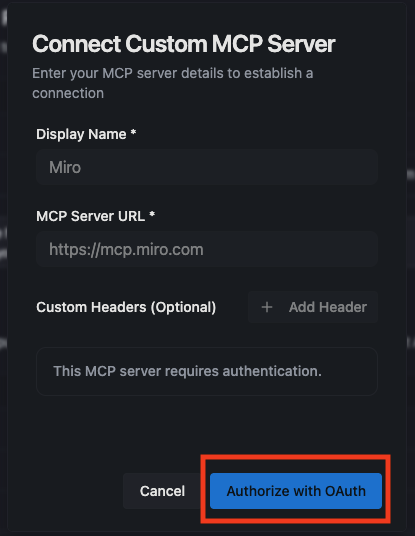
- Click on Test & Save.

- Click on Authorize with OAuth. This will start the OAuth flow to authenticate into your Miro account. Select the Miro Team where you want to use MCP. See Miro OAuth flow for MCP for more details.
- Now you can start using your content inside Miro to build prototypes in Replit, just make sure to include the board ID you want to reference in your prompt!
Gemini CLI
Watch the video below:
We recommend installing via the official extension
Once logged into Gemini CLI, simply type
gemini extensions install https://github.com/miroapp/miro-aiand then authenticate into the Miro team you want to use.
Windsurf
- Go to Windsurf settings -> Windsurf Settings -> Cascade -> Manage MCPs -> Configure and then add in the following JSON:
{
  "mcpServers": {
    "miro-mcp": {
      "url": "https://mcp.miro.com/",
      "disabled": false,
      "autoApprove": []
    }
  }
}- Go through the Miro OAuth flow and add the MCP app on the team of your choice.
- Start prompting Windsurf to use Miro MCP, we recommend
code_create_from_boardadd in a board URL like https://miro.com/app/board/uX1234567/ and hit enter.
Kiro IDE
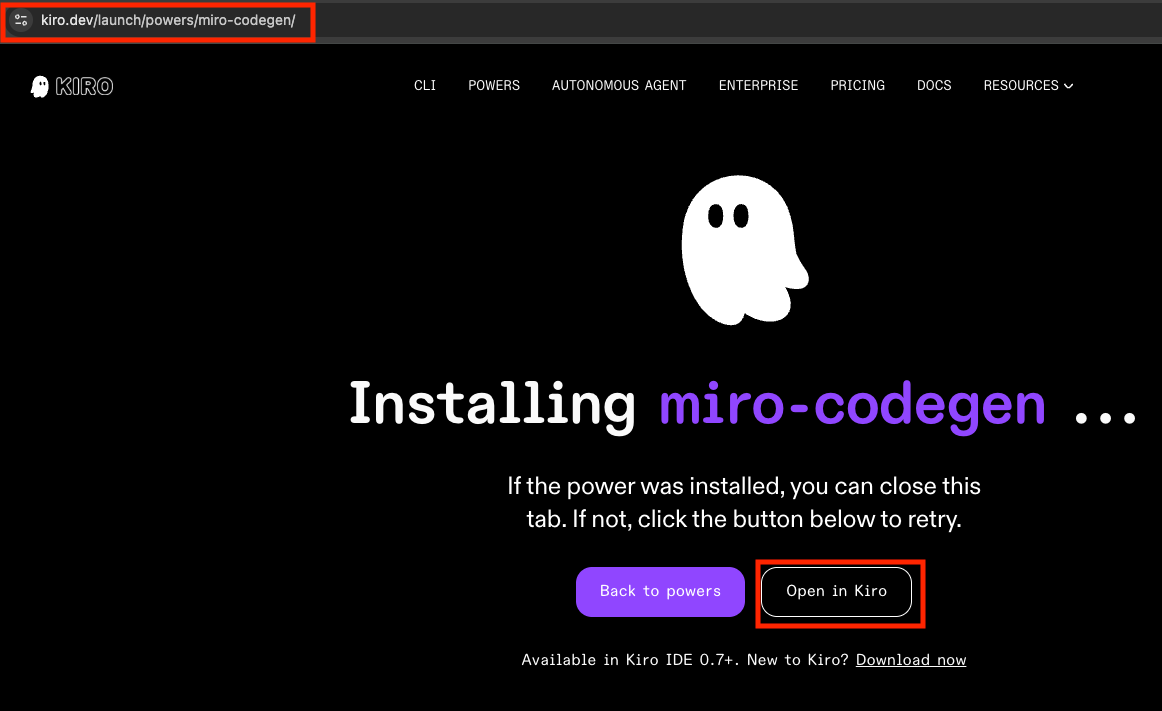
- Find the Miro Kiro Power, as shown below, and click on "Open in Kiro".
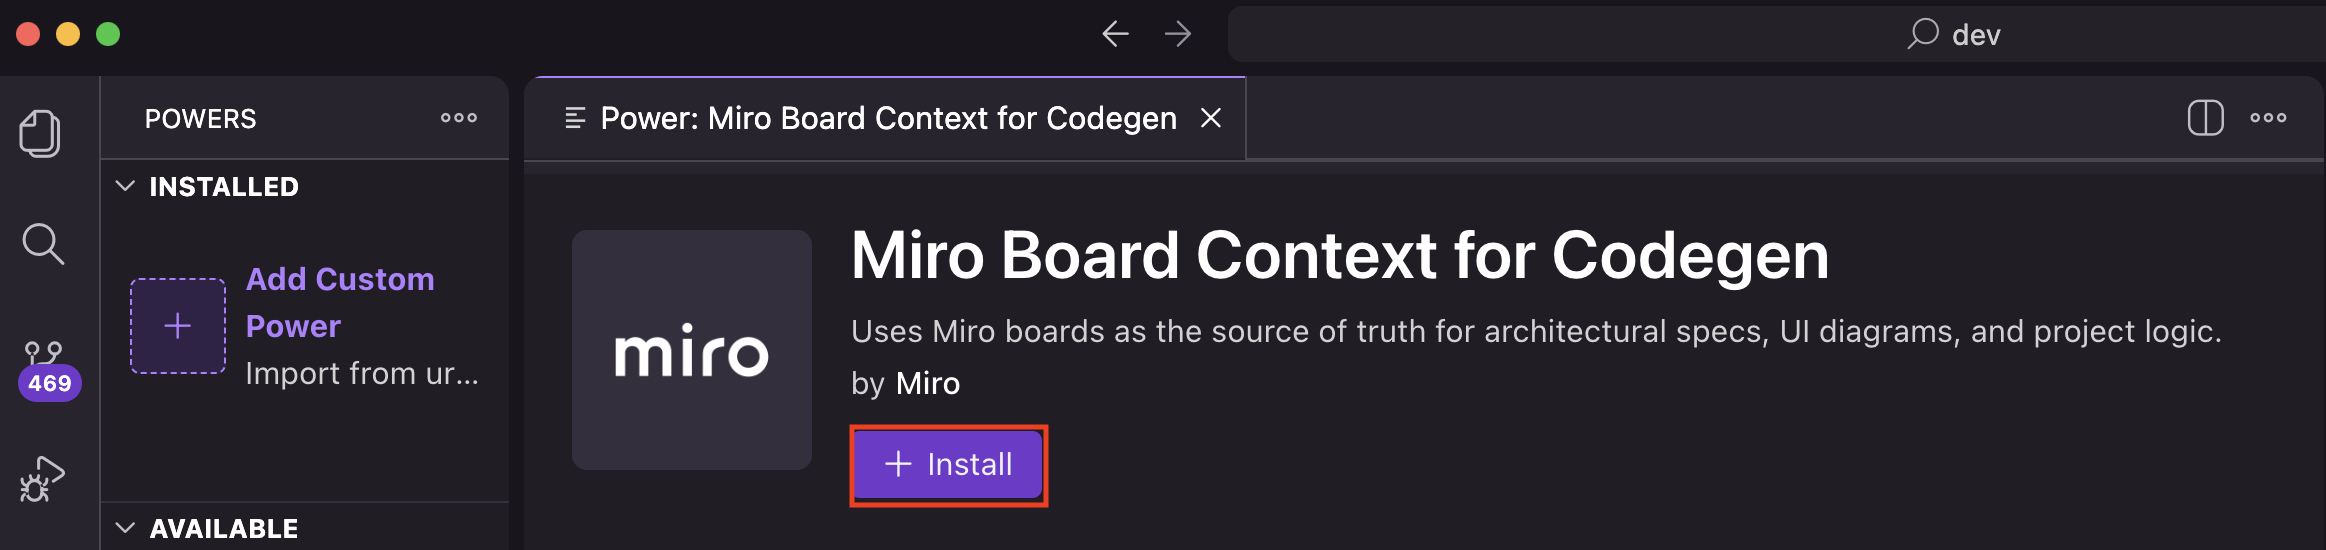
- Click on "Install".
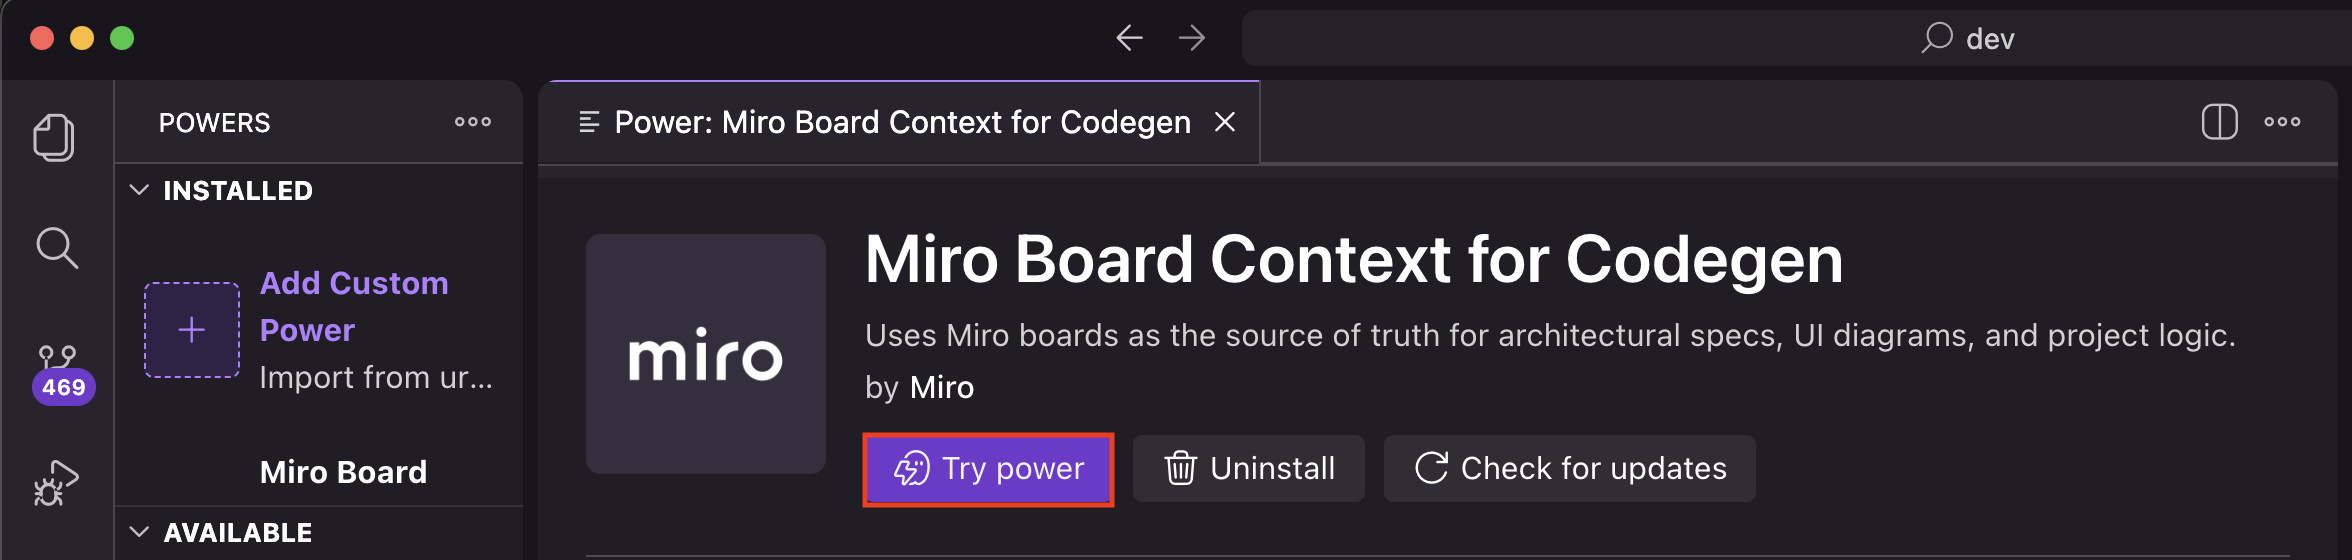
- Click on "Try Power".
- That's it! When you click on "Try Power" the agent should tell you the next steps. You can drop in a Miro board URL to analyze your board, or generate docs, tables, diagrams, and more coming soon!
If you don't want to install Miro MCP via the Kiro Power, you can still install it manually, although we recommend using the Power.
Go to Workspace settings and then search for "MCP" in the search bar.
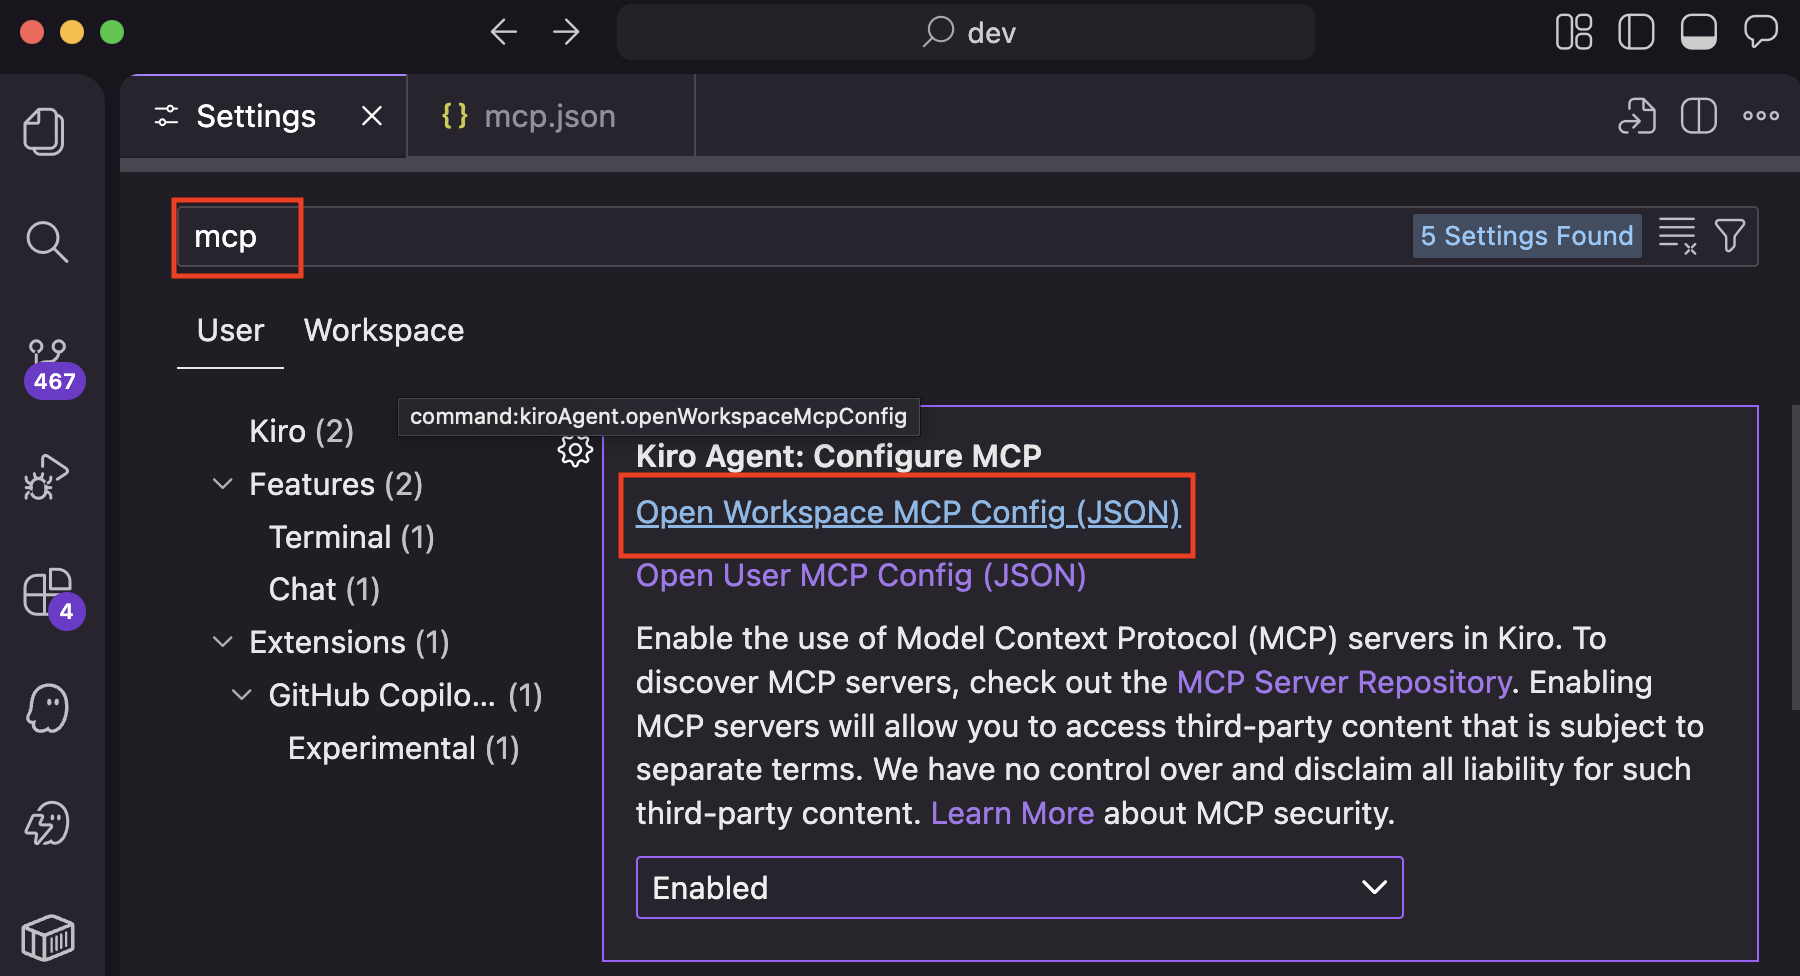
After searching for MCP settings, open either Workspace or User MCP Config
- Open Workspace Config for MCP, this should open an
mcp.jsonfile. - Add in the following JSON and save it:
{
  "mcpServers": {
    "miro-mcp": {
      "url": "https://mcp.miro.com/",
      "oauthScopes": [],
    }
  }
}
- You'll be asked to first allow the Kiro app, and then once you click allow you'll be asked to auth into Miro by following the Miro OAuth flow. Add the MCP app on the team of your choice that you wish to use MCP with.
- Try this prompt: "Summarize the content on this board": [your-board-URL] OR "create me a sequence diagram of the data flow for [enter app of your choice] and add it to this board [your-board-URL]
Kiro CLI
- After you install Kiro CLI, ensure your MCP Config file looks like this:
{
  "mcpServers": {
    "miro-mcp": {
      "url": "https://mcp.miro.com/",
      "oauthScopes": [],
    }
  }
}
- Go through the Miro OAuth flow and add the MCP app on the team of your choice.
- Start prompting Kiro CLI to use Miro MCP, we recommend
code_explain_on_boardadd in a board URL like https://miro.com/app/board/uX1234567/ and hit enter.
Amazon Q IDE Extension
Read more about Amazon Q IDE Extension here.
- After you install the extension, ensure your configuration looks like this (ensure Transport is http and the url is https://mcp.miro.com. Then hit save.
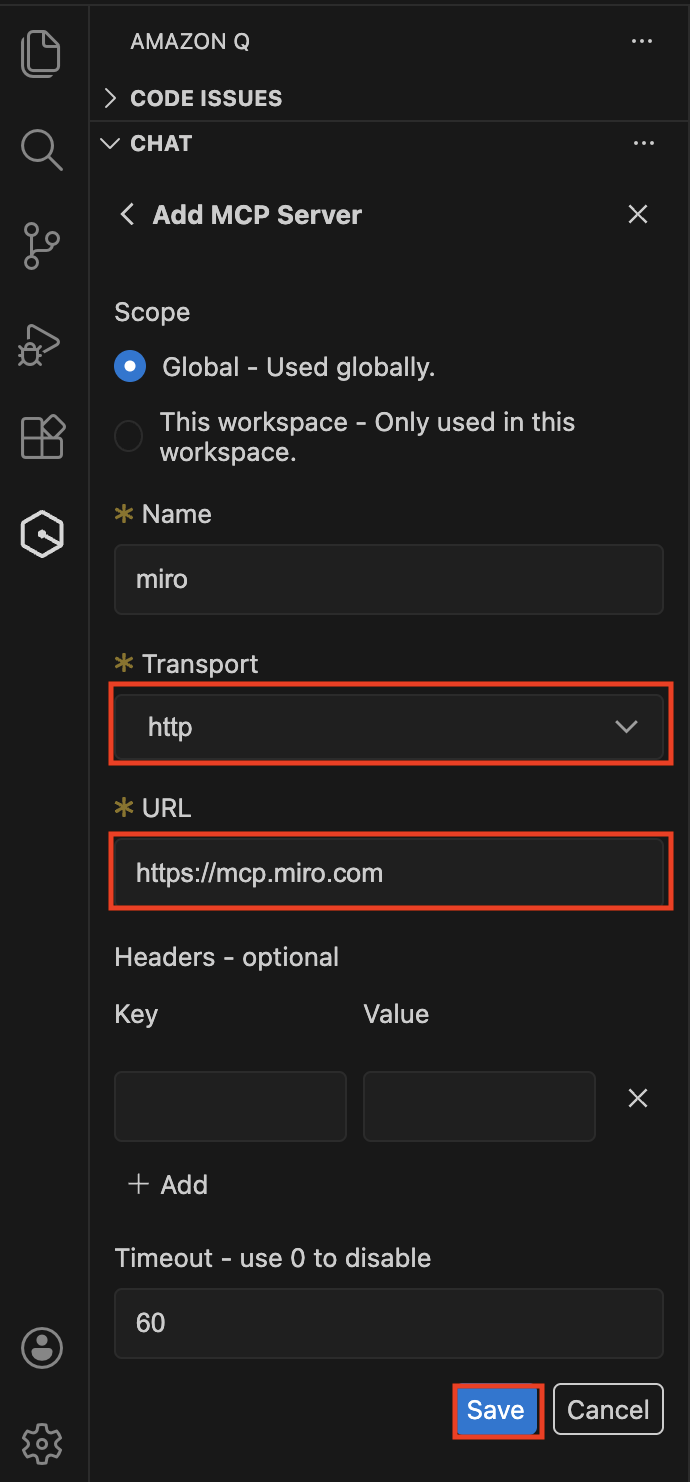
After that, you are ready to start prompting!
Updated 4 days ago